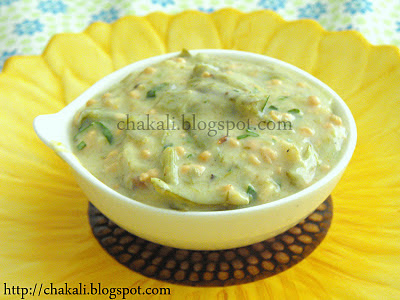
Dudhichi Bhaji in Marathi
Time: 15 minutes
Serves: 2 servings
Ingredients:
2 cups bottle gourd, small cubes (peeled and deseeded)
2 to 3 tbsp chana dal (soaked into water for 4 hours)
For tempering:- 1 tbsp oil, 2 pinches mustard seeds, 2 pinches hing, 1/4 tsp turmeric, 2 green chilies
1/4 tsp red chili powder, if required
2 tbsp fresh coconut, scraped
1/2 tsp goda masala
2 tsp jaggery or to taste
salt to taste
Method:
1) Heat oil into a pan. Prepare tadka by adding mustard seed, hing, turmeric powder and green chilies.
2) Add soaked chana dal. Cover and cook for couple of minute. Then introduce bottle gourd cubes and coconut. Mix well, cover and cook. Add little water, otherwise chana dal wont cook well.
3) Add salt and goda masala. Mix and add little red chili powder if required.
4) Once chana dal and bottle gourd cook well, add jaggery and mix. Cook for a minute or two.
Garnish with cilantro and serve with chapati.
Friday, 30 December 2011
दुधीची भाजी - Dudhichi Bhaji
Bottlegourd Sabzi in English
वेळ: १५ मिनिटे
वाढणी: २ जणांसाठी
साहित्य:
२ कप दुधीच्या लहान चौकोनी फोडी (दुधी सोलून आतील बिया काढून टाकाव्या)
२ ते ३ टेस्पून चणाडाळ (४ तास कोमट पाण्यात भिजवणे)
फोडणीसाठी: १ टेस्पून तेल, २ चिमटी मोहोरी, २ चिमटी हिंग, १/४ टिस्पून हळद, २ हिरव्या मिरच्या
१/४ टिस्पून लाल तिखट (गरज वाटल्यास)
२ टेस्पून ओलं खोबरं
१/२ टिस्पून गोडा मसाला
२ टिस्पून गूळ किंवा चवीनुसार
चवीनुसार मिठ
कृती:
१) कढईत तेल गरम करून त्यात मोहोरी, हिंग, हळद, मिरची घालून फोडणी करावी.
२) फोडणीत चणाडाळ घालून १ वाफ काढावी. नंतर दुधी आणि ओलं खोबरं घालून निट ढवळावे आणि वाफ काढावी. लागल्यास थोडे पाणी घालून चणाडाळ आणि दुधी शिजू द्यावा.
३) मिठ, गोडा मसाला घालून ढवळावे लागल्यास पाव चमचा लाल तिखट घालावे.
४) चणाडाळ व दुधी शिजला कि मग गूळ घालून मिक्स करावे व थोडावेळ वाफ काढावी.
कोथिंबीर घालून भाजी, पोळीबरोबर सर्व्ह करावी.
Thursday, 22 December 2011
Cucumber Soup
Cucumber Soup in Marathi
serves: 2 persons
Time: 20 minutes
Ingredients:
2 big cucumbers
1/2 tsp green chili paste
2 pinches black pepper powder
2 tsp olive oil
1/4 cup onion, finely chopped
2 garlic cloves, finely chopped
1 tsp lemon juice
Salt to taste
finely chopped cilantro for garnishing
Method:
1) Peel the cucumbers. Cut into thin round slices. Taste both cucumbers as sometimes cucumbers have slight bitterness.
2) Heat oil into a pan. Add chopped garlic. Saute for 20 seconds. Add chopped onion and saute until translucent.
3) Add cucumber slices and salt. Turn the heat to medium-low. Cover and cook for 10 minutes. After 10 minutes, cucumber will become mushy.
4) Add chili paste and transfer the cucumber to blender. Add a tsp of lemon juice and black pepper. Blend and make fine puree. Add very little water to adjust the consistency, only if needed.
You may serve this soup when its warm or refrigerate for 2 hours and serve chilled. Garnish with finely chopped cucumber and cilantro.
Tips:
1) To make this soup creamy, add an avocado while blending.
काकडीचे सूप - Cucumber Soup
Cucumber Soup in English
वेळ: १५-२० मिनिटे
वाढणी: २ जणांसाठी
साहित्य:
२ मोठ्या काकड्या
१/२ टीस्पून हिरवी मिरची पेस्ट
२ चिमटी मिरपूड
२ टीस्पून ऑलिव ऑईल
१/४ कप कांदा, बारीक चिरून
२ लसणीच्या पाकळ्या, बारीक चिरून
१ टीस्पून लिंबाचा रस
चवीपुरते मीठ
बारीक चिरलेली कोथिंबीर
कृती:
१) काकड्या सोलून घ्याव्यात. देठं काढून पातळ गोल चकत्या कराव्यात. दोन्ही काकड्यांची चव पहावी कारण कधीकधी काकडी कडवट असते.
२) पातेल्यात तेल गरम करावे. त्यात लसूण परतावी. नंतर कांदा परतावा.
३) कांदा नीट शिजला कि काकडीच्या चकत्या आणि थोडे मीठ घालावे. मिडीयम आणि लो च्या मध्ये आच ठेवावी. झाकण ठेवून १० मिनिटे काकडी शिजू द्यावी. १० मिनिटानी काकडी एकदम मऊ झालेली असेल.
४) हे मिश्रण मिक्सरमध्ये घालावे. मिरची पेस्ट, लिंबू रस आणि मिरपूड घालून एकदम बारीक करावे. कन्सिस्टन्सी अड्जस्ट करावी लागली तरच २-३ चमचे पाणी घालावे.
सूप कोमटसर सर्व्ह करावे किंवा २ तास फ्रीजमध्ये ठेवून कोल्ड सूप म्हणून सर्व्ह करावे. सर्व्ह करताना बारीक चिरलेली काकडी आणि कोथिंबीर यांनी सजवावे.
टीप:
१) हे सूप क्रिमी बनवण्यासाठी काकडी मिक्सरमध्ये बारीक करताना एक आवोकाडो घालावा.
Tuesday, 20 December 2011
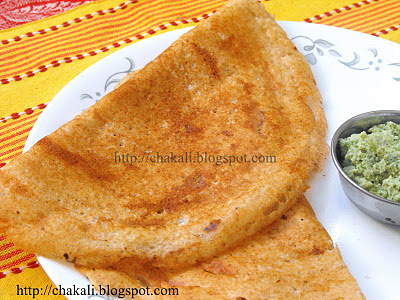
Healthy Oats dosa
Oats dosa in Marathi
20 medium dosas
Time: 2 to 3 minutes/ dosa
Ingredients:
1 cup rice
1 cup urad dal
3 cups rolled oats (quick cooking oats)
1/2 tsp fenugreek seeds
salt to taste
Oil to roast dosa
Method:
1) Soak Rice and urad dal separately in sufficient water for 5 to 6 hours. Soak fenugreek seeds along-with urad dal.
2) Soak oats just 10 minutes before grinding rice and urad dal. Soak them in 2 cups water.
3) Drain the water from rice. Grind it in a grinder. Add water little at a time to get fine paste.
4) Drain water from urad dal and grind it to fine paste. Add soaked oats to the mixer and grind it along with urad dal.
5) Mix ground rice, urad dal and oats together. Add little water to adjust the consistency. Add salt to taste. Cover and keep it to dark warm place. It should ferment within 8 to 10 hours. (See important tip regarding fermentation)
6) Once batter is fermented, take about 2 cups of batter into a separate bowl. If the batter is thick, add some water. The consistency for dosa batter should be little thin than idli batter. Likewise, take required amount of in a separate bowl and adjust the consistency by adding little water.
7) Heat a nonstick tawa. Spray some oil and carefully wipe it with a paper towel. Flame should be on medium high. Pour a medium ladelful batter at the center. swirl the spoon clockwise, in circular motion. Make a thin crepe. After 30 seconds, drizzle little oil around the edges and over the dosa. When the dosa is well done at one side, flip it to the other side. Press gently with flat spatula. After flipping, there is no need to roast longer.
Serve oats dosa with sambar and coconut chutney.
Tips:
1) Use a bigger container to ferment the batter. There should be atleast 10 inch space above the level of the batter to rise.
2) In cold season, batter does not ferment well or doesn't ferment at all. If you have oven at home, preheat it at 200 F for 3 to 4 minutes. Then switch off the oven. Put the covered container inside and close the door. If you are going to put the container in the oven, use steel or glass container.
3) The batter will stay fresh for 5 days in refrigerator.
ओट्स डोसा - Oats Dosa
Oats dosa in English
२० मध्यम डोसे
वेळ: २ ते ३ मिनिट्स/डोसा
साहित्य:
१ कप तांदूळ
१ कप उडीद डाळ
३ कप रोल्ड ओट्स (क्विक कुकिंग ओट्स)
१/२ टीस्पून मेथी दाणे
चवीपुरते मीठ
तेल डोसे बनवताना
कृती:
१) उडीद डाळ आणि तांदूळ ५ ते ६ तास पाण्यात वेगवेगळे भिजवावे. मेथी दाणे उडीद डाळीबरोबरच भिजवावे.
२) डाळ तांदूळ मिक्सरमध्ये वाटण्याच्या आधी १० मिनिटे ओट्स भिजवावे. साधारण २ कप पाण्यात १० मिनिटे भिजवावे.
३) तांदुळामधील पाणी काढून टाकावे. मिक्सरमध्ये बारीक वाटावे. गरजेपुरते पाणी घालून वाटावे. खूप जास्त पाणी घालू नये.
४) उडीद डाळीमधील पाणी काढून टाकावे. थोडे पाणी घालून एकदम बारीक वाटावी. वाटलेल्या डाळीत भिजवलेले ओट्स घालून परत एकदा वाटावे.
५) वाटलेला तांदूळ आणि वाटलेली डाळ एकत्र करून त्यात मीठ घालावे. थोडेथोडे पाणी घालून कन्सिस्टन्सी अड्जस्ट करावी. झाकून उबदार ठिकाणी ठेवावे. ८ ते १० तास मिश्रण आंबवावे.
६) मिश्रण आंबले कि त्यातील २ कप मिश्रण बाजूला काढावे. जर मिश्रण घट्ट असेल तर थोडे पाणी घालावे. इडलीच्या पिठापेक्षा डोशाचे पीठ थोडे पातळ असावेत म्हणजे डोसे पातळ व कुरकुरीत होतात. अशाप्रकारे लागेल तसे मिश्रण घेउन पातळ करावे आणि मग डोसे घालावे.
७) तवा तापवून त्यावर थोडे तेल घालावे आणि काळजीपूर्वक पेपर टॉवेलने पुसून टाकावे. आच मिडीयम हायवर असावी. मध्यम पळीभर मिश्रण घेउन तव्याच्या मध्यावर घालावे. क्लॉकवाईज गोल फिरवावे आणि डोसा बनवावा. ३० सेकंदानी थोडे तेल कडेने आणि डोशावर सोडावे. एक बाजू झाली कि कालथ्याने दुसरी बाजू पलटावी. दोन्ही बाजू भाजल्या कि सांबार किंवा चटणीबरोबर डोसा गरमच सर्व्ह करावा.
टीपा:
१) पीठ आंबवताना नेहमी मोठे भांडे घ्यावे. म्हणजे ज्यात मिश्रण घातल्यानंतर वरती एकदीड वीत जागा राहिली पाहिजे. मध्यमसर भांडे घेतले तर मिश्रण आंबून भांड्याबाहेर उतू जाते.
२) थंडीमध्ये पीठ आंबत नाही अशावेळी ओव्हन २०० F वर ३-४ मिनिटे गरम करावा ओव्हन स्वीच ऑफ करून पिठाचे भांडे झाकून ओव्हनमध्ये ठेवावे. आणि ओव्हन सारखा उघडू नये. पीठ ओव्हनमध्ये आंबवणार असाल तर स्टील किंवा काचेचे भांडे वापरावे.
३) डोशाचे पीठ डब्यात भरून फ्रीजमध्ये ठेवावे. ४-५ दिवस पीठ चांगले राहते आणि गरजेप्रमाणे झटपट डोसे करता येतात.
Labels:
Breakfast,
Dosa,
Oats,
Snacks,
South Indian
Thursday, 15 December 2011
बेसनाचे धिरडे - Besanache Dhirade
Besan Dhirde (chila) in English
वेळ: १५ मिनिटे
५ मध्यम धिरडी
साहित्य:
एक कप बेसन
२ टेस्पून रवा
१ टीस्पून मिरचीची पेस्ट,
२-३ टेस्पून कोथिंबीर, बारीक चिरून
१ + ३/४ कप पाणी
१ टीस्पून लसूण पेस्ट
१/४ टीस्पून हळद
१/४ टीस्पून हिंग
२ चिमटी जिरे
चवीपुरते मीठ
धिरडी बनवताना थोडे तेल
कृती:
१) खोलगट वाडग्यात बेसन आणि रवा मिक्स करावे. थोडे थोडे पाणी घालून मध्यमसर मिश्रण बनवावे. गुठळ्या राहू देवू नयेत. जर गुठळ्या राहिल्याच तर हे मिश्रण गाळून घ्यावे. गाळण्यात ज्या गुठळ्या असतील त्या फोडून भिजवलेल्या पिठात मिक्स करावे.
२) भिजवलेल्या पिठात मिरची पेस्ट, कोथिंबीर, लसूण पेस्ट, हळद, हिंग, जिरे आणि मीठ घालून मिक्स करावे.
३) नॉनस्टिक तवा गरम करून आच मिडीयम-हाय फ्लेमवर ठेवावी. थोडेसे तेल घालावे. लाकडी कालथ्याने ते सर्वत्र पसरवावे. डावभर मिश्रण तव्यावर घालून पातळसर धिरडे घालावे.
४) झाकण ठेवावे. १ मिनिटाने झाकण काढून धीराद्याच्या कडेने थोडे तेल सोडावे. परत झाकण ठेवून २ मिनिटे एक बाजू शिजू द्यावी. झाकण काढून दुसऱ्या बाजूला धिरडे पलटावे. झाकण ठेवून दुसरी बाजू शिजू द्यावी. लागल्यास थोडे तेल घालावे.
गरम धिरडे नारळाच्या चटणीबरोबर किंवा लसणीच्या तिखटाबरोबर खायला द्यावे.
Besan Dhirde
Besan Chila in Marathi
5 medium Dhirdehttp://www.blogger.com/img/blank.gif
Time: 15 minutes
Ingredients:
1 cup besan
2 tbsp rava
1 tsp green chili paste, coarse
2-3 tbsp cilantro, finely chopped
1 + 3/4 cups water
1 tsp garlic paste
1/4 tsp turmeric powder
1/8 tsp hing
2 pinches cumin seeds
salt to taste
some oil to cook the pancakeshttp://www.blogger.com/img/blank.gif
Method:
1) Take a mixing bowl. Add besan and rava. Add water little at a time and make a thin constancy batter.
2) Add in chili paste, cilantro, garlic paste, turmeric powder, hing, cumin seeds and salt to taste. mix well.
3) Heat a nonstick pan over medium-high heat. drizzle some oil. Add a ladelful batter and try to keep round shape.
4) Cover and cook over medium heat till one side gets done well. Drizzle some oil and flip the side. Cover and cook till another side is cooked nicely.
Serve hot with or Dry garlic chutney.
Tuesday, 13 December 2011
Paneer Jhalfrezi
Paneer Jalfrezi in Marathi
Time: 15 minutes
Makes: 2 to 3 servings
Ingredients:
200 grams Paneer, cut into fingers
1 cup Bell Peppers, julienne (I used tricolor peppers red, green and yellow)
1/2 cup onion, julienne
1 medium tomato, cut in medium cubes
1 tsp ginger, finely chopped
2 tsp garlic, finely chopped
1/8 tsp turmeric powder
2 pinches cumin seeds
1 tsp coriander seeds, lightly toasted and coarsely crushed
red chili flakes, to your taste (I used 1 tsp)
2 pinches garam masala
1/2 tsp vinegar
pinch of sugar
1 tbsp + 1 tbsp Oil
salt to taste
Method:
1) Heat oil into a notstick pan. Put the flame on medium. Add paneer and toss till the edges become little brown. Remove them from pan.
2) Add remaining 1 tbsp oil. Add cumin seeds. Saute ginger and garlic. Add turmeric and onions. Cook onion for a minute.Sprinkle some salt. Now add tomatoes and cook till they become mushy.
3) Add bell peppers and mix gently. Cook for a couple of minutes. We don't want peppers to become soft. So now add paneer, crushed coriander seeds, garam masala, sugar, vinegar and red chili flakes. Add little salt only if needed. Mix well and serve hot.
Jalfrezi can be served with Rice or have it as an appetizer.
पनीर जाल्फ्रेझी - Paneer Jalfrezi
Paneer Jalfrezi in English
वेळ: १५ मिनिटे
वाढणी: २ ते ३
साहित्य:
२०० ग्राम पनीर, उभे लांबडे तुकडे
१ कप भोपळी मिरची, पातळ काप (मी तीनरंगी भोपळी मिरच्या वापरल्या होत्या. लाल, हिरवी आणि पिवळी)
१/२ काप कांदा, उभे पातळ काप
१ मध्यम टोमॅटो, मध्यम चिरून
१ टीस्पून आलं, बारीक चिरून
२ टीस्पून लसूण, बारीक चिरून
१/८ टीस्पून हळद
२ चिमटी जिरे
१ टीस्पून धनेपूड, हलकेच भाजून भरडसर पूड करावी
रेड चिली फ्लेक्स, आवडीनुसार (मी १ टीस्पून वापरली होती)
२ चिमटी गरम मसाला
१/२ टीस्पून व्हिनेगर
चिमूटभर साखर
१ टेस्पून + १ टेस्पून तेल
चवीपुरते मीठ
कृती:
१) नॉनस्टिक पॅनमध्ये १ टेस्पून तेल गरम करावे. आच मध्यम ठेवावी. पनीर घालून कडा ब्राउन होईस्तोवर परतावे. नंतर पॅनमधून काढून प्लेटमध्ये काढून ठेवावे.
२) उरलेले १ टेस्पून तेल पॅनमध्ये घालावे. त्यात जिरे घालावे, चिरलेले आलं लसूण घालावे. हळद आणि कांदा घालावा. थोडे मीठ घालावे. कांदा मिनिटभर परतावा. टोमॅटो घालून ते मऊ होईस्तोवर परतावे.
३) आता भोपळी मिरच्या घालाव्यात आणि नीट मिक्स करावे. २ मिनिटे परतून पनीर घालावे. धनेपूड, गरम मसाला, साखर, व्हिनेगर, आणि रेड चिली फ्लेक्स घालून मिक्स करावे. लागल्यास थोडे मीठ घालावे. नीट मिक्स करून लगेच सर्व्ह करावे.
जाल्फ्रेझी भाताबरोबर सर्व्ह करावे. तसेच अपेटायझर म्हणूनही सर्व्ह करू शकतो.
Labels:
Paneer,
Party,
Suki Bhaji
Thursday, 8 December 2011
Dahi Butti
Dahi Butti in Marathi
Time: 10 to 15 minutes
Makes 2 to 3 servings
Ingredients:
3/4 cup Rice
3/4 to 1 cup yogurt
1/4 to 1/2 cup cold milk
1 tsp ghee, 3-4 curry leaves, 2 dry red chilies, 1/4 tsp urad dal, 2 pinches cumin seeds, 2 pinches hing, 1/4 tsp grated ginger
Salt to taste
Method:
1) Wash rice. Add 1.5 cups to 2 cups of water and pressure cook upto 2-3 whistles. Do not add salt while cooking. Let the pressure release on its own.
2) Get the rice out and transfer it into a medium bowl. Add milk and mix well. Adding cold milk will help the rice to cool down quickly. Do not add yogurt in hot mixture, it will separate.
3) Add yogurt and salt. Mix.
4) Heat ghee in a tadka pan. Once ghee is hot, add urad dal and wait till color turns pink. Then add cumin seeds, hing, curry leaves and red chilies. Turn off the heat. If chilies are not immersing in ghee then press them with a spoon. Add ginger and stir with a spoon. Pour this tempering into curd rice.
Mix well and serve.
Tips:
1) Leftover rice can be used to make dahi butti. This rice becomes slightly hard. We need soft textured rice for making dahi butti. Steam cook in pressure cooker for 5 minutes and then follow the above recipe.
2) You may add 1/2 tsp sugar to give a hint of sweetness.
3) Amount of yogurt may be vary slightly. Add quarter of a cup at a time
दही बुत्ती - Dahi Butti
Dahi Butti in English
वेळ: १५ मिनिटे
२ ते ३ जणांसाठी
साहित्य:
३/४ कप तांदूळ
३/४ ते १ कप दही
१/४ ते १/२ कप दुध
१ टीस्पून तूप, ३-४ कढीपत्ता पाने, २ सुक्या लाल मिरच्या, १/४ टीस्पून उडीद डाळ, २ चिमटी जिरे, २ चिमटी हिंग, १/४ टीस्पून आले
चवीपुरते मीठ
कृती:
१) तांदूळ धुवून त्यात दीड ते दोन कप पाणी घालून प्रेशर कुकरमध्ये भात शिजवून घ्यावा. मीठ घालू नये.
२) भात एका खोलगट वाडग्यात काढून घ्यावा. त्यात गार दुध घालावे. गार दुध घातल्याने भात लवकर थंड व्हायला मदत होते. मिश्रण गार झाले (अगदी किंचित कोमट असेल तरी चालेल) कि त्यात दही आणि मीठ घाला. गरम मिश्रणात दही घातल्यास उष्णतेमुळे दही फुटते.
३) कढल्यात तूप गरम करावे. त्यात आधी उडीद डाळ घालावी. गुलाबीसर झाली कि त्यात जिरे, हिंग, कढीपत्ता, मिरच्या घालून फोडणी करावी. मिरच्या जर तुपात भिजत नसतील तर चमच्याने थोडा दाब द्यावा. आता गॅस बंद करावा आणि फोडणीत आले घालावे. मिक्स करून हि फोडणी दही-भातावर घालावी.
मिक्स करून सर्व्ह करावे.
टीपा:
१) आदल्या दिवशीचा भात वापरला तरीही चालतो. फक्त या भाताला कुकरमध्ये एक वाफ काढावी, शिट्टी करू नये. फक्त ५ मिनिटे मध्यम आचेवर वाफ काढावी. आदल्या दिवशीच्या भाताची शिते थोडी तडतडीत होतात. अशा भाताची दही-बुत्ती चांगली लागत नाही.
२) या भातात थोडा गोडपणा देण्यासाठी १/२ टीस्पून साखर घालू शकतो.
३) दह्याचे प्रमाण आवडीप्रमाणे कमी-जास्त करू शकतो.
Tuesday, 6 December 2011
Sweet Potato chaat
Sweet Potato Chat in Marathi
Time: 15-20 minutes
Makes: 4 to 5 servings
Ingredients:
1/2 kg sweet potatoes
1/2 cup green chutney (cilantro + green chilies)
1/2 cup tamarind chutney (tamarind + jaggery)
1 tsp ghee
1 to 2 tsp cumin powder
3/4 cup yogurt (add a tsp of sugar)
1/2 cup potato sev or potato sticks
salt to taste (or black salt)
1 tsp red chili powder
finely chopped cilantro for garnishing
Method:
1) Peel the sweet potatoes. Cut them into 2 inch finger chips.Cut them into same size, so that all pieces will cook evenly.
2) Heat a nonstick pan. Add 1 tsp ghee. Add sweet potato pieces. Sprinkle some salt. Cover and cook over medium heat for 4-5 minutes. Don't cook until sweet potatoes become mushy. Cook them Al-dente. Also, try to cook them in two batches.
3) Arrange serving plates. Add around 1/2 a cup to 3/4 cup of sweet potatoes in each plate. Add 1 tbsp each of green and tamarind chutney. Sprinkle some salt and cumin powder. Drizzle some yogurt. Add some more chutney if you like. Sprinkle pinch of red chili powder. Add couple tbsp of potato sev or potato sticks. Garnish with cilantro and serve.
रताळ्याचे चाट - Sweet Potato Chat
Sweet Potato Chat in English
वेळ: १५-२० मिनिटे
वाढणी: ४ ते ५ प्लेट
साहित्य:
१/२ किलो रताळी
१/२ कप हिरवी चटणी
१/२ कप चिंचेची आंबट-गोड चटणी
१ टीस्पून तूप
१ ते २ टीस्पून जिरेपूड
३/४ कप दही, (चमचाभर साखर घालावी)
१/२ कप बटाटा शेव किंवा बटाटा सळी
चवीपुरते मीठ किंवा सैंधव
१ टीस्पून लाल तिखट
बारीक चिरलेली कोथिंबीर सजावटीसाठी
कृती:
१) रताळी सोलून घ्यावीत आणि त्याचे दीड-दोन इंचाचे फिंगर चिप्स सारखे तुकडे करावेत. तुकडे खूप पातळ किंवा खूप जाड नसावेत, तसेच सर्व तुकडे साधारण एकसारख्या आकाराचे आणि जाडीचे असावेत.
२) नॉनस्टिक पॅनमध्ये १ टीस्पून तूप गरम करावे. त्यात रताळ्याचे तुकडे घालावे. चिमूटभर मीठ पेरावे आणि झाकण ठेवून ४-५ मिनिटे मध्यम आचेवर शिजवावे. रताळी एकदम मऊ होईस्तोवर शिजवू नये. आतपर्यंत शिजली पाहिजेत आणि आकारात अख्खीही राहिली पाहिजेत. शक्यतो २ बॅचेस मध्ये रताळी शिजवावीत.
३) रताळी शिजली कि प्रत्येक सर्व्हिंग प्लेटमध्ये साधारण १/२ कप अशी वाढावीत. त्यावर एकेक चमचा हिरवी आणि गोड चटणी घालावी. वरती थोडे मीठ आणि जिरेपूड पेरावी. त्यावर दही घालावे. प्लेटच्या कडेने अजून थोडी हिरवी चटणी आणि गोड चटणी घालावी. वरून शोभेला लाल तिखट पेरावे. थोडी बटाटा शेव किंवा बटाटा सळी घालावी. कोथिंबीरीने सजवावे.
लगेच सर्व्ह करावे.
Thursday, 1 December 2011
How to roast an Eggplant
i) over stove top:- If you have gas burner, rub little oil to eggplant and roast it on the flame. Turn it occasionally. (Note- Eggplant releases water after roasting, so it may leave stains on the burner. But those stains can be removed by scrubbing)
ii) in the Oven:- Preheat the oven at 450 F. Apply some oil all over the eggplant. Poke the eggplant a few times with a fork. Wrap it with aluminum foil. Put it in a baking tray and bake for 45 to 50 minutes. (It does cook the eggplant, but does not give smokey flavor)
iii) Use the barbecue grill to roast eggplant.
iv) in Fireplace (Tip) - Funny to hear but I actually roasted the eggplant in fireplace :). Apply some oil all over the eggplant. Poke the eggplant a few times with a fork. Wrap it with aluminum foil. Open the exhaust before starting fire. Now stack 2-3 logs in fireplace. Put 1 or 2 coconut shells at the bottom. Sprinkle 2 spoons oil over the logs. Place the eggplant in between so that it gets roasted evenly. Light the fire with some newspapers. After fire kicks up perfectly, eggplant will get roasted within 10 to 15 minutes. Remove the eggplant very carefully by using tong. BE CAREFUL WHILE USING THIS METHOD and taking the roasted eggplant out.
Tip:
1) I did not use 'starter fire logs' which are available in super markets, as I wasn't sure of what things and chemicals have been used to make them workable. It is better to use naturally fallen twigs.
Related Recipes
Baingan Bhurta
Baingan Bhurta in Yogurt
Tamarind flavored Baingan Bhurta
======================================================
i) गॅसवर: गॅसच्या शेगडीवर वांगं भाजण्यासाठी आधी वांग्याला किंचीत तेल चोळून घ्यावे आणि मध्यम किवा मोठ्या आचेवर भाजावे. मधेमधे वांगं फिरवावे म्हणजे सर्व ठिकाणी वांगं निट भाजले जाईल. (नोट- गॅसवर वांगं भाजताना वांग्यातील पाणी शेगडीवर पडून डाग पडतात. पण थोडे घासून स्वच्छ करता येते.)
ii) ओव्हनमध्ये: ओव्हन ४५० F वर प्रिहीट करावे. वांग्याला बाहेरून तेल लावून सुरीने किंवा काट्याने (Fork) काहीवेळा टोचावे. अल्युमिनीयम फॉइलमध्ये गुंडाळून ४५ ते ५० मिनीटे बेक करावे. (या पद्धतीने वांग्याचा आतील गर शिजतो पण थेट विस्तवावर भाजल्याने जो खमंग स्वाद येतो तो मात्र येत नाही.)
iii) बार्बेक्यु ग्रिलसुद्धा वांगं भाजायला वापरू शकतो.
iv) फायरप्लेस (टीप): ऐकायला मजेशीर वाटेल पण मी वांगं फायरप्लेसमध्ये भाजलं. वांग्याला तेल लावून काहीवेळा सुरीने किंवा काट्याने टोचून घ्यावे. अल्युमिनीयम फॉइलमध्ये व्यवस्थित घट्ट गुंडाळून घ्यावे. फायरप्लेसमध्ये वरच्या बाजूस धूर बाहेर जाण्यासाठी छोटी खिडकी असते ती प्रथम उघडावी. नंतर २ ते ३ जाडसर फांद्या फायरप्लेसमध्ये रचाव्यात. खाली १-२ नारळाच्या करवंट्या ठेवाव्यात. १-२ चमचे तेल फांद्यांवर शिंपडावे. जागा करून मधल्या जागी वांगं ठेवावे. आग पेटवावी. लागल्यास पेपर किंवा कार्डबोर्डचे तुकडे वापरून आग सुरू करावी. शेकोटी व्यवस्थित पेटल्यावर १० ते १५ मिनीटात वांग भाजलं जातं. वांगं भाजलं गेल्यावर अगदी सांभाळून पापड तळायच्या चिमट्याने बाहेर काढावे.
टीप:
१) वांगं भाजण्यासाठी बाजारात जो फायर स्टार्टर लॉग मिळतो तो वापरला नव्हता कारण तो बनवण्यासाठी कोणत्या गोष्टी किंवा रसायनं वापरतात ते माहीत नसतं. म्हणून झाडाच्या तुटलेल्या फांद्याच वापरल्या होत्या.
दह्यातील वांग्याचे भरीत
वांग्याचे भरीत
चिंचकोळाचे वांग्याचे भरीत
Tuesday, 29 November 2011
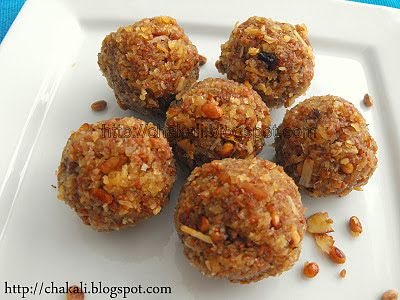
Aliv Ladu
Aliv Ladu in Marathi
Time: 15-20 minutes
Makes: 18 to 20 medium laddus
Ingredients:
4 cups fresh coconut, scraped
1.5 cups jaggery
1/2 cup Aliv seeds
15 Almonds, peeled and slivered
3 to 4 tbsp Chironji (optional)
3 to 4 tbsp Golden raisins
1/2 tsp nutmeg powder
Method:
1) Soak aliv seeds in coconut water for 2 and 1/2 hours.
2) Heat a pan. Add soaked aliv seeds, scraped coconut and jaggery. Cook over medium heat until thick.
3) Once mixture becomes little dry, add almonds, chirounji, golden raisins and nutmeg powder. Mix well and make laddus.
Tips:
1) Cardamom powder can be added instead of nutmeg powder
2) Incase, if you don't have coconut water, use normal water.
Related Recipes -
अळिव लाडू - Alivache Ladu
Aliv Ladu in English
वेळ: १५-२० मिनिटे
साधारण १८-२० मध्यम लाडू
साहित्य:
४ कप नारळाचा चव
दिड कप गूळ
१/२ कप अळिव
१५ बदाम, सोलून पातळ काप
३ ते ४ टेस्पून चारोळी
३ ते ४ टेस्पून बेदाणे
१/२ टिस्पून जायफळ पूड
कृती:
१) अळीव नारळाच्या पाण्यात किमान २ ते अडीच तास भिजत ठेवावे.
२) कढई गरम करून त्यात भिजवलेले अळिव, खवलेला नारळ, आणि गूळ घालून मिक्स करावे. मध्यम आचेवर मिश्रण घट्ट होईस्तोवर ढवळावे.
३) मिश्रण घट्टसर झाले कि त्यात बदाम, चारोळी, बेदाणे आणि जायफळ पूड घालून मिक्स करावे. मिश्रण गरमसर असतानाच लाडू वळावेत.
टीप:
१) जायफळऐवजी वेलची पूडही वापरू शकतो.
२) जर नारळाचे पाणी नसेल तर साध्या पाण्यात अळीव भिजवले तरी चालतील.
Related Recipes
Aliv Kheer
Thursday, 24 November 2011
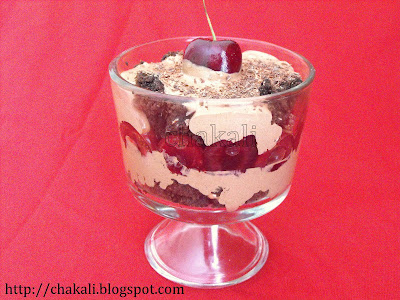
Chocolate Trifle
Chocolate Trifle in Marathi
Serves 4
Time: 15 minutes
Ingredients:
2 cups crumbled chocolate sponge cake or crumbled chocolate brownie
20 cherries, pitted and halved
2 to 3 tbsp sugar
1/4 cup water
2.5 cups whipped cream
1/4 cup powdered sugar
2 tbsp coco powder (unsweetened)
Milk chocolate, shaved (for garnishing)
Method:
Cherries cooked in sugar syrup
1) Take a small pan. Add water and sugar. Mix and put the pan on fire. Wait till the sugar dissolves and melts. Add cherries and cook over low heat until cherries start leaving juice and becomes little soft. After finishing, drain and reserve the juice, if any. Transfer cherries into a bowl.
Chocolate flavored whipped cream
2) Take a big bowl filled with chilled water. Take another medium sized bowl. Add whipped cream, sugar and coco powder in it. Hold the bowl in the cold water so that cream will stay chilled. Do not push the bowl hard in the water. Otherwise water will enter and mix in with whipped cream. Whisk well until sugar dissolves. Refrigerate till you are ready to serve.
Combining
Take a serving cup. Make a layer of cake at the bottom. Add whipped cream and spread it evenly. Now add cherries. Again, layer of cake, whipped cream and cherries.
Give a final layer of cake and whipped cream. Garnish with shaved chocolate. Assemble remaining Serve immediately.
Tip:
1) To make it more sweet and moist, add a spoon of sugar syrup we saved after cooking cherries.
चॉकोलेट ट्रायफल - Chocolate Trifle
Chocolate Trifle in English
वाढणी: ४
वेळ: १५ मिनिटे
साहित्य:
२ कप चॉकोलेट केक किंवा चॉकोलेट ब्राउनीचा चुरा
२० चेरीज, अर्धे दोन भाग करून त्यातील बिया काढून टाकाव्यात
२ ते ३ टेस्पून साखर
१/४ कप पाणी
अडीच कप व्हीप्प्ड क्रीम
१/४ कप पिठी साखर
२ टेस्पून कोको पावडर (अनस्वीटन्ड)
मिल्क चॉकोलेट, किसलेले (सजावटीसाठी)
कृती:
साखर पाकातल्या चेरीज
१) एक लहान पॅन घ्या. त्यात साखर आणि पाणी घाला. मिक्स करून गॅसवर ठेवा.साखर विरघळेस्तोवर मिक्स करावे. चेरीज घालून मध्यम आचेवर शिजवावे. चेरीज मऊ होवून त्यातील रस निघायला लागला कि गस बंद करावा. ज्यूस गाळून एका वाटीत काढून घ्यावा. चेरीज दुसऱ्या लहान वाडग्यात काढून ठेवाव्यात.
चॉकोलेट फ्लेवर्ड व्हीप्प्ड क्रीम
२) मोठा बोल घेउन त्यात गार पाणी भरावे. अजून एक मध्यम आकाराचा बोल घेउन त्यात व्हीप्प्ड क्रीम, साखर, आणि कोको पावडर घालावे. हे बोल गार पाण्याच्या बोलवर तळ टेकेल असे धरावे. यामुळे क्रीम थंड राहील आणि वितळणार नाही. बोल अधांतरी ठेवावे आणि त्यात पाणी जाउ देवू नये. साखर विरघळेस्तोवर व्हिस्क करावे. मिक्स झाल्यावर फ्रीजमध्ये ठेवावे.
१ सर्व्हीग कप घ्यावा. त्यात तळाला केकचा एक थर द्यावा. त्यावर थोडे व्हीप्प्ड क्रीम पसरावे. त्यावर थोडे चेरीजचे तुकडे घालावे. परत केकचा, व्हीप्प्ड क्रीमचा आणि चेरीजचा लेयर द्यावा.
फायनली, परत एक केकचा थर आणि व्हीप्प्ड क्रीमचा लेयर द्यावा. वरती चेरी आणि किसलेले चॉकोलेट घालावे. अशाच प्रकारे बाकीचे सर्व्हिंग कप्स भरावे आणि लगेच सर्व्ह करावे.
टीप:
१) लागल्यास केकच्या लेयरवर चमचाभर चेरी शिजवल्यावर राहिलेले शुगर सिरप घालावे.
Tuesday, 22 November 2011
Bhindi Raita
Bhindi Raita in Marathi
Time: 5-7 minutes
Makes: 2 servings
Ingredients:
Okra 10 no. medium
2 green chilies
Yogurt 1/4 to 1/2 cup
Salt to taste
1 tsp oil
pinch of asafoetida (hing)
1/4 tsp cumin seeds
2 tbsp cilantro, finely chopped
Method:
1) Cut off the ends of Okra. Cut the okra into medium pieces.
2) Pressure cook okra and green chilies together upto two whistles.
3) Once the steam has released, get the okra out and crush with fingers. Add salt.
4) Take a small tadka pan. Heat oil in it. Add cumin and hing. Pour this tadka over crushed okra. Mix with spoon.
5) Once mixture is cooled down. Add yogurt and cilantro. Mix and serve as side dish in your meal.
Tips:
1) Do not add yogurt while okra mixture is hot. Heat separates the yogurt into tiny particles.
भेंडीचे रायते - Bhindi Raita
Bhindi Raita in English
वेळ: ५ ते ७ मिनिटे
वाढणी: २ जणांसाठी
साहित्य:
१० ते १२ मध्यम भेंडी
२ हिरव्या मिरच्या
१/४ ते १/२ कप दही
चवीपुरते मीठ
१ टीस्पून तेल
चिमूटभर हिंग
१/२ टीस्पून जिरे
२ टेस्पून कोथिंबीर, बारीक चिरून
कृती:
१) भेंडीची दोन्ही देठं कापावीत. आणि भेंडीचे मध्यम तुकडे करावे.
२) भेंडी आणि हिरव्या मिरच्या एकत्र प्रेशरकुकरमध्ये २ शिट्या करून वाफवून घ्याव्यात.
३) वाफ जिरल्यावर भेंडी बाहेर काढून हाताने कुस्करून घ्यावी. मीठ घालावे.
४) लहान कढल्यात तेल गरम करून जिरे आणि हिंग घालून फोडणी तयार करावी. कुस्करलेल्या भेंडीवर घालावी. चमच्याने मिक्स करावे.
५) भेंडी गार झाल्यावर दही आणि कोथिंबीर घालून मिक्स करावे.
भेंडीचे रायते जेवणात तोंडीलावणी म्हणून घ्यावे.
टीपा:
१) मिश्रण गरम असताना दही घालू नये. उष्णतेमुळे दही फुटते.
Labels:
Bhindi,
Maharashtrian,
Raita,
Sides
Thursday, 17 November 2011
Makhani Gravy
Makhani gravy in Marathi
Time: 20 to 25 minutes
Ingredients:
5 big tomatoes, riped and juicy
1 tsp garam masala
1 tbsp ginger garlic paste
1 tsp red chili powder
1 tsp kashmiri red chili powder or pinch of red food color
1 tsp coriander powder
1/2 tsp kasoori methi
1/2 tsp cumin powder
2 tsp lemon juice (Tip 2)
1/4 to 1/2 cup heavy cream
salt to taste
2 tbsp butter
1/2 tsp Sugar (optional)
Method:
1) Put the tomatoes in a big microwave safe bowl. Pour enough water to cover the tomatoes. microwave for 5 to 6 minutes. Grind them. Strain well and get a fine puree.
2) Heat butter in a pan. Add ginger garlic paste red chili powder. Saute for 10-15 seconds. Add tomato puree, coriander-cumin powder, kasoor methi, salt and lemon juice. Simmer for 10 minutes, stirring occasionally.
3) Once raw flavor of tomatoes disappears, turn off the heat. Transfer this mixture to the blender. Blend well. Add heavy cream. However, do not add all the cream at once, there is a chance of curdling the cream. Therefore, add little at a time and blend. Add cream until you get desired color and consistency.
4) Now transfer the gravy to the pan again. Keep flame on low. simmer for 5 minutes.
This gravy can be used for making paneer makhani or butter chicken.
Tips:
1) A slight sweetness balances the flavor.
2) Incase the tomatoes are sour in taste, then reduce the amount of lemon juice. A pinch of Citric acid can be used instead of lemon juice.
3) Paste of 1/4 cup cashews can be added for thickness and rich flavors.
माखनी ग्रेव्ही - Makhani Gravy
Makhani Gravy in English
वेळ: २० ते २५ मिनिटे
साहित्य:
५ मोठे टोमॅटो, लालबुंद आणि रसदार
१ टिस्पून गरम मसाला
१ टेस्पून आलेलसूण पेस्ट
१ टिस्पून लाल तिखट
१ टिस्पून कश्मीरी रेड चिली पाउडर किंवा चिमूटभर लाल रंग
१ टिस्पून धणेपूड
१/२ टिस्पून कसूरी मेथी
१/२ टिस्पून जिरेपूड
२ टिस्पून लिंबू रस
१/४ ते १/२ कप हेवी क्रीम
चवीपुरते मिठ
२ टेस्पून बटर
१/२ टीस्पून साखर (ऐच्छिक)
कृती:
१) टोमॅटो मोठ्या खोलगट काचेच्या भांड्यात ठेवावे. टोमॅटो बुडेस्तोवर पाणी घालावे. ५ ते ७ मिनिटे मायक्रोवेवमध्ये शिजवून घ्यावे. पाणी काढून घ्यावे. आणि फक्त टोमॅटो काढून मिक्सरमध्ये प्युरी करून घ्यावी. हि प्युरी गाळून त्यातील बिया आणि साले काढून टाकावीत.
२) पॅनमध्ये बटर गरम करून त्यात आले-लसूण पेस्ट आणि लाल तिखट घालावे.१० ते १५ सेकंद परतावे. यात गाळलेली टोमॅटो प्युरी, धणे-जिरेपूड, कसूरी मेथी, मीठ आणि लिंबाचा रस घालावे. १० मिनिटे मंद आचेवर ढवळावे.
३) टोमॅटोचा कच्चा वास गेला कि गॅस बंद करावा. हे मिश्रण थोडे कोमट होवू द्यावे. ब्लेंडरमध्ये घालावे. ७-८ सेकंद ब्लेंड करावे. २-३ टेस्पून हेवी क्रीम घालून ब्लेंड करावे. अशाप्रकारे थोडेथोडे क्रीम घालून ब्लेंड करत राहा. ग्रेव्ही हवी तेवढी क्रिमी झाली कि क्रीम घालणे थांबवावे.
४) हि ग्रेव्ही परत पॅनमध्ये घालावी आणि एकदम मंद आचेवर साधारण ५ मिनिटे गरम करावी.
हि ग्रेव्ही पनीर माखनी किंवा बटर चिकन बनवण्यासाठी वापरू शकतो.
टीपा:
१) थोडीशी साखर घातल्याने चव छान लागते.
२) लिंबू रसाऐवजी चिमुटभर सायट्रिक आम्ल घालावे. टोमॅटो जर आंबट असतील तर लिंबाचा रस किंवा सायट्रिक आम्ल यांचे प्रमाण कमी करावे.
३) या रेसिपीमध्ये १/४ कप काजूची पेस्ट करून घातल्यास दाटपणा छान येतोच आणि चवही छान लागते.
Tuesday, 15 November 2011
Stuffed Capsicum
Stuffed Capsicum in Marathi
Time: 40 minutes
Makes: 2 to 3 servings
Ingredients:
4 small capsicums
1/4 cup green peas
1/4 cup corn kernels (boiled)
1/2 cup small paneer cubes
1/4 cup onion, finely chopped
1/4 cup carrot, small cubes
1/2 tsp garam masala
1/2 tsp coriander powder
1/2 tsp cumin powder
1/4 tsp red chili powder
1/4 cup coconut milk
Salt to taste
2 medium Potatoes, boiled and mashed
1 tbsp oil + 3 tbsp oil for shallow frying
Method:
1) Heat 1 tbsp oil into a pan. Add Onion and carrot. Saute for a minute. Cover and cook for 3-4 minutes. Add coconut milk and turn heat to medium.
2) Add corn and green peas. Sprinkle some salt. Cook till vegetables become tender.
3) Add garam masala, coriander powder, cumin powder and red chili powder. Mix well. If you still see coconut milk separately, increase the heat and saute till mixture becomes dry. transfer it to a separate bowl.
4) Slice the tops off the capsicums and remove all ribs and seeds. Stuff the capsicums with mixed veg mixture.
5) Add salt to mashed potato. Mash well and make it lump-free. Seal the stuffed capsicum with mashed potatoes.
6) Take a medium pan. Heat 3 tbsp oil. Place capsicums in the pan, sealed side down. Cover and cook over medium heat for atleast 25 minutes. Flip the sides carefully during these 20-25 minutes to assure even cooking. (capsicum's skin becomes soft and slightly wrinkly)
Pour ladleful of tomato-onion gravy or any spicy gravy you like. Serve hot with chapati or rice. Try Makhani Gravy on stuffed Capsicum
Tips:
1) In addition, you may use other vegetables of your choice.
Monday, 14 November 2011
स्टफ कॅप्सिकम - Stuffed Simla Mirchi
Stuffed Capsicum in English
वेळ: ४० मिनिटे
वाढणी: २ ते ३ जणांसाठी
साहित्य:
४ लहान भोपळी मिरच्या
१/४ कप मटार
१/४ कप उकडलेले मक्याचे दाणे
१/२ कप पनीरचे लहान चौकोनी तुकडे
१/४ कप कांदा, बारीक चिरून
१/४ कप गाजर, लहान चौकोनी तुकडे
१/२ टीस्पून गरम मसाला
१/२ टीस्पून धनेपूड
१/२ टीस्पून जिरेपूड
१४ टीस्पून लाल तिखट
१/४ कप नारळाचे दुध
चवीपुरते मीठ
२ मध्यम बटाटे, उकडून कुस्करलेले
१ टेस्पून + ३ टेस्पून तेल
कृती:
१) कढईत १ टेस्पून तेल गरम करावे. त्यात कांदा आणि गाजर घालून मिनिटभर परतावे. झाकण ठेवून २-४ मिनिटे शिजवावे. आच मध्यम करून नारळाचे दुध घालावे.
२) मका आणि मटार घालावे. थोडे मीठ घालून मिक्स करावे. भाज्या मऊ होईस्तोवर शिजवावे.
३) गरम मसाला, धने-जिरेपूड, आणि लाल तिखट घालून ढवळावे. जर मिश्रणाला थोडा रस राहिला असेल तर थोडी आच मोठी करून थोडे कोरडे करून घ्यावे.
४) भोपळी मिरचीचा शेंडीकाडचा भाग कापून घ्यावा. आतील बिया काढून टाकाव्यात. तयार मिश्रण मिरच्यांमध्ये भरावे.
५) कुस्करलेल्या बटाट्यांमध्ये थोडे मीठ घालावे. आणि परत कुस्करावे, जर गुठळ्या राहिल्या असतील तर त्यात बारीक कराव्यात. भरलेल्या मिरच्या बटाट्याने सील करून टाकाव्यात.
६) नॉनस्टिक पॅनमध्ये ३ टेस्पून तेल घालावे. त्यात मिरच्या सील केलेली बाजू खाली अशा रीतीने ठेवाव्यात. झाकण ठेवून मध्यम आचेवर साधारण २५ मिनिटे शिजवाव्यात. या २५ मिनिटात मध्येमध्ये मिरच्या हलवून पलटाव्यात. म्हणजे करपणार नाहीत आणि समान शिजतील. (मिरच्यांची साले एकदम मऊ बनतील आणि थोडी सुरकुततील)
कांदा टोमॅटोची ग्रेव्ही किंवा आवडीची तिखट ग्रेव्ही वर घालून भरली भोपळी मिरची पोळी किंवा भाताबरोबर सर्व्ह करावी. भरली भोपळी मिरचीवर माखनी ग्रेव्हीसुद्धा खूप छान लागते.. माखनी ग्रेव्हीची रेसिपी.
टीप:
१) वर दिलेल्या भाज्यांव्यतिरिक्त आवडीच्या कोणत्याही भाज्या घालता येतील.
Sunday, 13 November 2011
गुलाबजाम - Ricotta cheese gulabjamun
Gulabjam in English
वेळ: पूर्वतयारी- ४५ ते ५० मिनिटे | पाकृसाठी- ३० मिनिटे
४० ते ४५ मध्यम गुलाबजाम
साहित्य:
१ lb रिकोटा चीज (मी लाईट रिकोटा चीज वापरले होते)
३ टेस्पून मैदा
१ चिमटी बेकिंग सोडा
अडीच कप साखर
अडीच कप पाणी
२ ते ३ वेलची
१ चिमूट केशर
गुलाबजाम तळण्यासाठी तेल
कृती:
१) नॉनस्टिक पॅनमध्ये रिकोटा चीज घालावे आणि मध्यम आचेवर आटवावे. आटवताना सतत ढवळत राहावे म्हणजे पॅनला चिकटणार नाही. रिकोटा चीज घट्ट होउन गोळा बनेस्तोवर आटवावे. याला साधारण ३० ते ४० मिनिटे लागतील. आटले कि थंड होवू द्यावे.
२) २ चमचे मैदा आणि चिमूटभर बेकिंग सोडा आटवलेल्या आणि थंड झालेल्या रिकोटा चीज मध्ये घालावा. व्यवस्थित मऊसर मळून घ्यावे. लागल्यास एखाद टीस्पून पाणी घालावे. छान मऊसर मळून घ्यावे.
३) खोलगट नॉनस्टिक पॅनमध्ये साखर आणि पाणी घालावे. ५ मिनिटे उकळवावे. नंतर आच अगदी मंद करून ठेवावी. केशर आणि वेलची पूड घालावी.
४) मध्यम आचेवर तेल गरम करावे. मळलेल्या गोळ्याची लहान गोटीएवढ्या आकाराचे गोळे करून घ्यावे. या गोळ्यांना तडा गेलेल्या नसाव्यात. सरफेस एकदम प्लेन असावा.
५) तेलाचे तापमान तपासण्यासाठी एक लहान गोळा तेलात सोडावा. प्रथम गोळा तळाला बसला पाहिजे आणि ५ ते ८ सेकंदानी तेलावर तरंगला पाहिजे. जर तेलात टाकल्यावर गोळा एकदम पटकन वर आला आणि लालसर रंग चढला म्हणजे तेल जास्त तापले आहे [रंग पटकन चढला तर गुलाबजाम आतून कच्चे राहतात.]. अशावेळी आच थोडी कमी करावी आणि थोडावेळ थांबावे. नंतर गुलाबजाम तळावे.
६) तेलाचे तापमान अड़जस्ट झाल्यावर एकावेळी ८ ते १० गुलाबजामचे गोळे तळावेत. तळताना गुलाबजामचे गोळे झाऱ्याने सतत हलवत ठेवावे म्हणजे सर्वबाजूनी रंग सारखा येतो आणि सर्वत्र सारखे शिजतात.
७) गुलाबजामला लाल रंग येईस्तोवर तळावे. झाऱ्याने गुलाबजाम बाहेर काढावे आणि पेपर टॉवेलवर काढून ठेवावे. २-३ मिनीटांनी गरम साखरेच्या पाकात घालावे.
८) अशाप्रकारे सर्व गुलाबजाम तळून घ्यावे आणि तळून झाल्यावर २ मिनीटांनी पाकात घालावे.
गुलाबजाम किमान २ तास तरी पाकात मुरू द्यावे. रात्रभर मुरल्यास उत्तम.
टीपा:
१) कमीत कमी मैदा वापरावा. गरजेपेक्षा जास्त मैदा घातल्यास गुलाबजाम चिवट होतात आणि पाक आतापर्यंत मुरत नाही.
२) गुलाबजाम तळल्यावर २ मिनिटे पेपरवर काढून ठेवावे. तळल्या तळल्या लगेच पाकात घातले तर गुलाबजाम वर जे काही थोडेफार तेल असेल ते पाकात उतरते आणि पाकावर तेलाचा तवंग दिसतो. तसेच गुलाबजाम कडकडीत होतात.
३) रिकोटा चीज पासून खवा बनवणे थोडी वेळखाऊ प्रोसेस आहे. पण या पद्दतीने बनवलेले गुलाबजाम मऊसूत बनतात. चव तर खव्याच्या गुलाबजामच्या एकदम जवळची बनते.
४) जर गुलाबजाम फुटले तर अगदी थोडा मैदा घालावा आणि मळून परत गुलाबजाम ट्राय करावेत.
Thursday, 27 October 2011
Gulabjam from Ricotta cheese
gulabjam in Marathi
Time: Prep. time- 45 to 50 minutes | Cooking time- 30 minutes
Makes: 40 to 45 medium sized gulabjam
Ingredients:
Gulabjam Balls
1 lb ricotta cheese (use lite ricotta)
3 tbsp All purpose flour (maida)
1 pinch of Baking soda
Sugar Syrup
2.5 cups Sugar
2.5 cups water
2 to 3 Cardamoms
1 pinch Saffron
other
Oil for frying gulabjamun
Method:
1) Take a nonstick pan. Add ricotta cheese and cook over medium heat. Stir continuously from the bottom to avoid sticking. Cook till ricotta cheese dries and forms a ball. It will take 30 to 40 minutes approximately. Let it cool down completely.
2) Add 2 tbsp all purpose four, and pinch of baking soda. Knead well. Use a tsp of water only if required. Knead to make a soft dough.
3) In a saucepan, add sugar and water. Boil for 5 minutes. Turn heat to very low. Add saffron and cardamom.
4) Heat oil over medium flame. Divide the dough into marble size balls. Make smooth surfaced balls, so that they won't crack after putting into hot oil.
5) To check the temperature of oil. Put one ball into hot oil. First, ball should sit at the bottom and then rise slowly after 5 to 7 seconds. If the ball rises fast and color changes immediately, then oil is hotter than required. Turn the heat down a little bit and wait for few minutes.
6) Once you get perfect oil temperature, add 8 to 10 balls at a time and fry them. Keep gulabjam balls moving with steel slotted spoon for even cooking.
7) Fry until gulabjam balls get red color. Drain and put them on paper towel for couple of minutes. Now add them into sugar syrup.
8) Deep fry rest of the gulabjam and remember don't put immediately in sugar syrup. First let them rest for 2-3 minutes before adding to sugar syrup.
Soak gulabjam in sugar syrup for atleast couple of hours. Overnight soaking is better.
Tips:
1) Try to use minimum maida. If you add maida more than required, gulabjam will become chewy and they won't soak well in sugar syrup.
2) Cooking and thickening ricotta cheese is a time consuming process. But gulabjam made out of it comes out soft, moist and delicious. The taste is very close to gulabjam made of Khova.
3) If the gulabjam is breaking after adding in the oil, add a tsp or two maida in the dough and knead well. Make gulabjam as usual.
Tuesday, 25 October 2011
Kalakand
kalakand in Marathi
Time: 30 minutes
Makes: 15 medium pieces
Ingredients:
1 liter Milk
1/2 tsp Citric Acid or Juice of 1 lemon
150 gram Khova
3/4 cup Sugar (approx 150 to 175 gram)
1/2 tsp Cardamom Powder
Pistachio Slices for garnishing
Method:
1) Heat milk into a saucepan. Once milk is hot, add 2-3 pinches of citric acid and stir it from bottom. Milk will curdle. Water and milk solids will separate. (add little more citric acid if required.) Line a colander with a cheese cloth. Pour curdled milk in it. Save the paneer.
2) Wash paneer slightly under running water while its still in cheese cloth. This will help to remove sour taste and smell of lemon juice/ citric acid. Twist the edges and squeeze out all the water. No need to hang paneer.
3) Mix khova and sugar together in a nonstick pan. When sugar starts melting, mixture becomes runny. Keep stirring. After 5 minutes add paneer and cardamom powder.
4) Stir continuously. Mixture will thicken and form a lump. Take a square cake tin. Add this mixture to it and Spread evenly. Make 1 inch thick layer. Sprinkle pistachio slices. Cut into 1 inch squares once it cools down.
Tips:
1) Proportion of Khova and paneer can be altered according to your preference.
2) Make fresh paneer at home. After curdling milk, drain and squeeze out all the water. Do not hang paneer for longer. It looses its moisture if hung for longer.
3) I had used 1 tbsp readymade syrup of Saffron and cardamom. It gives nice flavor of both cardamom and saffron. Also, kalakand become pale yellow due to saffron.
4) I have made khova from ricotta cheese. 425 gram ricotta cheese makes 175 gram khova.
5) Amount of sugar can be adjusted to your taste.
6) Silver varakh can be used to garnish kalakand.
Thursday, 20 October 2011
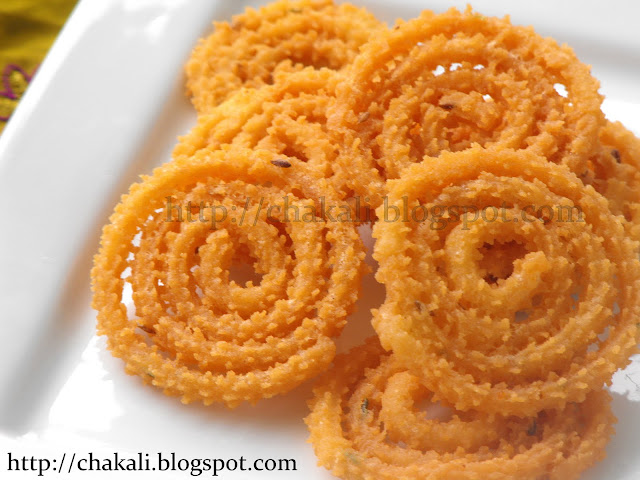
Rice Flour Chakali
Rice flour Chakali in Marathi
Time: Prep Time- 15 minutes | Cooking time- 20 minutes
Makes: 15 medium chakali
Ingredients:
1 cup Rice Flour
1 cup Water
1/4 cup butter
salt to taste (tip 1)
1/2 tsp cumin seeds
2 tsp green chili paste
Oil for frying
Method:
1) Take rice flour into a deep bowl
2) Take a small pan and heat water in it. Add salt, cumin seeds, chili paste and butter. Let the water boil. Add this boiling water to rice flour and mix with spoon. Cover for 15 minutes.
3) Once mixture becomes warm, knead it.
4) Grease chakali machine with oil. Stuff the mixture in it. Heat sufficient oil in kadai to deep fry chakali. Keep flame beween medium and high.
5) Take small plastic papers (tip 5). Press chakali machine. Slightly rotate the maker round and round until you get a spiral shaped chakali. stick the tip so that it won't open after dropping into hot oil
6) Gently lift the chakali and leave into hot oil. deep fry until golden color. Place deep fried chakali on paper towel.
Once chakalis are completely cooled down, store them into an airtight container.
Tips:
1) When you add salt, taste a drop of water. It should taste little salty than usual. After adding rice flour, the salt will get adjusted.
2) If you want long lasting and crunchy chakalis, fry them till they get nice deep golden color. If you get the chakalis out of oil when they are white, they will taste crunchy at first but they may become soft after a while. Also do not overfry. If color turn dark brown, chakali will taste bitter.
3) Do not fry chakalis over low heat. Chakalis become oily.
4) Rice flour does not have enough gluten. before frying, Rice flour chakali can break while handling. Hence, lift chakali very gently. Also, careful while leaving it into hot oil.
5) Use 5" x 5" plastic paper. Press 1 chakali on 1 paper. It will make easy handling of chakali. Aluminum foil or butter paper can be used instead of Plastic paper.
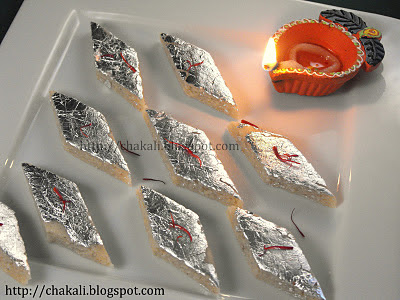
Kaju Katli
Kaju Katli in Marathi
Time: 15 to 20 minutes
Makes: 12 to 15 medium Pieces
Ingredients:
1 + 1/4 cup cashew powder
3/4 cup powdered sugar
1/2 cup milk powder
1/4 cup milk
1/4 tsp cardamom powder
Silver varakh
Method:
1) Take a glass bowl. Add 1 cup cashew powder, powdered sugar, milk powder, milk and cardamom powder. Mix well and make a lump-free mixture.
2) Microwave this mixture for 2 to 3 minutes. Give a stir after every 50 seconds. Once mixture becomes bubbly, remove it from microwave. Stir occasionally till mixture thickens.
3) Once mixture thickens add little cashew powder (only if needed) to make a pliable dough.
4) Grease a flat surface with little ghee. Roll the dough with rolling pin. Garnish with silver varakh. Cut it into diamond shape.
Tips:
1) Cashew powder should be very fine. If you get little coarse powder then sieve it through a fine mesh. Blend the coarse powder again to get fine consistency.
2) Saffron can be added to give yellowish color and flavor. Soak 2-3 pinch saffron into hot milk. Then use this milk to make the mixture in step 1
3) Milk powder can be substituted with 1/4 to 1/2 cup lightly roasted Khoya.
काजू कतली - Kaju Katli
Kaju Katli in English
वेळ: १५ ते २० मिनिटे
१२ ते १५ मध्यम वड्या
साहित्य:
सव्वा कप काजूची बारीक पूड
३/४ कप पिठी साखर
१/२ कप मिल्क पावडर
१/४ कप दूध
१ टीस्पून तूप
१/४ टीस्पून वेलचीपूड
चांदीचा वर्ख सजावटीसाठी
कृती:
१) सव्वा कपपैकी १ कप काजू पूड, तूप, पिठी साखर, मिल्क पावडर, दुध आणि वेलची पावडर एका काचेच्या बोलमध्ये एकत्र करावे. नीट मिक्स करावे. गुठळ्या राहू देऊ नयेत.
२) मिश्रण २ ते ३ मिनिटे मायक्रोवेव करावे. दर ५० सेकंदानी ढवळा. मिश्रण चांगले उकळले की बाहेर काढावे. आळेस्तोवर मध्येमध्ये ढवळावे.
३) मिश्रण जरा आळले कि त्यात लागल्यास थोडी काजू पावडर घालावी. नीट मिक्स करून कणिक जेवढी घट्ट असते तसा गोळा तयार करावा.
४) पोळपाटाला किंवा फ्लॅट सरफेसला तुपाचा हात लावून घ्यावा. त्यावर मिश्रणाचा गोळा लाटून जाडसर पोळी लाटावी. चांदीचा वर्ख लावून शंकरपाळ्याच्या आकारात वड्या कापाव्यात.
टीपा:
१) काजूची पूड एकदम बारीक असावी. वाटल्यास बारीक केकेली पूड बारीक चाळणीने चाळून जाडसर काजूची पूड परत बारीक करावी.
२) काजू कतली मिश्रणात थोडे केशर घातले तरी रंग आणि चव खूप छान येते. गरम दुधामध्ये २-३ चिमटी केशर भिजवून चिमटीने कुस्करून घ्यावे. आणि हे दुध मिश्रणात घालावे.
३) मिल्क पावडरऐवजी हलकासा भाजलेला खवा वापरला तरीही चालेल.
कलाकंद - Kalakand
Kalakand In English
वेळ: ३० मिनिटे
१५ मध्यम तुकडे
साहित्य:
१ लिटर दुध
१/२ टीस्पून सायट्रिक अॅसीड किंवा एका लिंबाचा रस
दीडशे ग्राम खवा
३/४ कप साखर (साधारण १५० ते १७५ ग्राम)
१/२ टीस्पून वेलची पुड
पिस्त्याचे पातळ काप
कृती:
१) दुध जाड बुडाच्या पातेल्यात गरम करत ठेवावे. दुध गरम झाले कि त्यात चिमटीचिमटीने सायट्रिक अॅसीड घालून तळापासून ढवळावे. दुध फाटले कि सुती कपड्यावर पनीर गाळून घ्यावे.
२) गाळलेले पनीर फडक्यातच असताना गार पाण्याने थोडे धुवून घ्यावे म्हणजे लिंबाची/ सायट्रिक अॅसीडची आंबट चव आणि वास निघून जाईल. गच्च पिळून पनीर लगेच काढून एका वाडग्यात ठेवून द्यावे.
३) खवा आणि साखर एकत्र करून नॉनस्टिक भांड्यात मध्यम आचेवर गरम करत ठेवावे. साखर वितळली कि मिश्रण पातळ होईल. सतत ढवळत राहावे. ५ मिनिटांनी पनीर आणि वेलची पुड घालावी.
४) पनीर घातल्यावरही ढवळत राहावे. मिश्रण आळून गोळा बनायला सुरुवात झाली कि लगेच टीनच्या ट्रेमध्ये मिश्रण जाडसर पण एकसमान पसरवावे. वरून पिस्त्याचे काप घालावे. गार झाल्यावर वड्या पाडाव्यात.
वड्या उरल्या तर फ्रीजमध्ये ठेवाव्यात.
टीपा:
१) आवडीनुसार खवा किंवा पनीरचे प्रमाण कमीजास्त करावे.
२) पनीर ताजेच बनवावे. तसेच दुध फाटल्यावर गाळून, घट्ट पिळून लगेच पनीर वापरावा. पाणी निथळण्यासाठी खूप वेळ टांगून ठेवू नये.
३) मी वेलची-केशर यांचे रेडीमेड सिरप मिळते ते चमचाभर वापरले होते. त्यामुळे रंगही पिवळसर येतो आणि केशर वेलचीचा स्वादही छान येतो.
४) मी खवा रिकोटा चीजपासून बनवला होता. साधारण ४२५ ग्राम रिकोटा चीजपासून पावणे दोनशे ग्राम खवा बनतो.
५) ३/४ कप साखरेमुळे बेताचे गोड होते. अजून गोड हवे असेल तर २ ते ३ टेस्पून साखर वाढवावी.
६) मिश्रण ट्रेमध्ये थापल्यानंतर वरून चांदीचा वर्खही लावू शकतो. त्यामुळे कलाकंद अधिक आकर्षक दिसेल.
Monday, 17 October 2011
Garlic Sev
Garlic sev in Marathi
Time: 30 to 40 minutes
Ingredients:
2.5 cups Besan (Approx 325 Grams)
1/2 cup Oil
1/4 cup garlic paste
1/2 cup water
2 tsp green chili paste (Tip)
1 tsp Carom Seeds
1/2 tsp white pepper powder
Salt to taste
Oil for deep frying
Method:
1) Mix besan, white pepper powder and salt to taste. Sieve these three ingredients.
2) Heat 1/2 cup oil till smoking point. Add it to besan mixture. Mix with spoon.
3) Heat a tawa and turn off the heat. Lightly toast carom seeds. crush and make coarse powder.
4) Take 1/2 cup hot water. Add green chili paste, crushed carom seeds, and garlic paste. Mix well. Crush garlic and carom seeds with hands. This helps to infuse more flavor to the water. Strain and save the water.
5) Use this water to prepare sev batter. Add little water at a time. Mix it in besan well. Sev batter should be thick and sticky.
6) Grease sev presser from the inside with some oil. Pour Batter in Sev presser.
7) Heat oil in kadai. Press the sev pressing machine clockwise in circular motion. and keep coming in to form smaller circles and finish off when you come to center. Try to keep a single layer for even frying. Do not overlap, otherwise some parts will remain uncooked.
8) Fry over medium high heat. Flip to other side once one side becomes little firm. Do not fry until color changes to brown. It will taste bitter. Place on a paper towel to remove excessive oil. Let it cool down. Crush gently with hands to make Shev.
Tips:
1) Green chili paste can be substituted with red chili powder. However, Sev color becomes reddish due to red chili powder.
2) Quantity of water may vary by few tbsp. Hence add little water at a time. Mix and add if more required.
3) We are not mixing green chili paste, crushed carom seeds, and garlic paste to the flour because they can create problem while pressing sev. Small particles of garlic and carom seeds can get stuck in sev presser and block the flow. Therefore, we have flavors of garlic and carom seeds in water.
लसूण शेव - Lasun Shev
Garlic Sev in English
वेळ: ३५ ते ४० मिनिटे
साहित्य:
अडीच कप बेसन (साधारण सव्वा तीनशे ग्राम)
१/२ कप तेल
१/४ कप लसूण पेस्ट
१/२ कप पाणी
२ टीस्पून हिरवी मिरची पेस्ट
१ टीस्पून ओवा
१/२ टीस्पून पांढरी मिरपूड
चवीपुरते मीठ
तळणासाठी तेल
कृती:
१) बेसन, पांढरी मिरपूड, आणि मीठ एकत्र करून चाळून घ्यावे.
२) १/२ कप तेल कडकडीत तापवावे. आणि बेसनाच्या मिश्रणात घालावे. चमच्याने मिक्स करावे.
३) तवा गरम करावा आणि गरम झाला कि बंद करावा. त्यात ओवा अगदी हलकेच भाजून घ्यावा. खलबत्त्यात भरडसर कुटून घ्यावा.
४) १/२ कप गरम पाणी घ्यावे. त्यात लसूण पेस्ट, मिरची पेस्ट, आणि ओवापुड घालून मिक्स करावे. लसूण हाताने चुरडावी म्हणजे लसणीचा स्वाद पाण्यात पुरेपूर उतरेल. हे पाणी बारीक जाळीच्या गाळण्यातून गाळून घ्यावे.
५) हे पाणी बेसनामध्ये हळू हळू घालावे आणि घट्टसर पण चिकट असे मिश्रण बनवावे.
६) शेव पाडायच्या यंत्राला आतून तेलाचा लावून घ्यावा. बेसनाचे भिजवलेले पीठ यामध्ये घालावे.
७) कढईमध्ये तेल गरम करावे. तेल गरम झाले कि आच मिडीयम हायवर ठेवावी. प्रेस करून शेव पाडावी. शेव पाडायची योग्य पद्धत म्हणजे शेव गोलाकार पाडावी. म्हणजे तेलात बाहेरून वर्तुळाकार फिरवत एक फेरा झाला कि तो लगेच आतमध्ये चक्र पूर्ण करावे. कढई जेवढी मोठी तेवढे फेरे करावेत. शक्यतो शेव एकावर एक अशी पाडू नये, कच्ची राहते आणि मऊ पडते.
८) एक बाजू तळली गेली कि हलकेच पलटून दुसरी बाजू तळावी. अशाप्रकारे सर्व भिजवलेल्या पिठाची शेव बनवावी.
९) शेव तळली कि टिश्यू पेपरवर काढून ठेवावी. म्हणजे अधिकचे तेल निघून जाईल. गार झाले कि हाताने चुरडून हवाबंद डब्यात भरून ठेवावी.
टीपा:
१) मिरची पेस्ट ऐवजी २ टीस्पून लाल तिखट वापरले तरीही चालते. पण तिखटाचा रंग खूप भडक असेल तर शेवेचा रंग लालसर होतो.
२) पाण्याचे प्रमाण काही टेस्पून कमी जास्त होवू शकते. त्यामुळे बेताबेताने पाणी घालावे. मिश्रण घट्ट आणि चिकट झाले पाहिजे.
३) लसूण, ओवा, किंवा मिरची बेसनात डायरेक्ट घालून शेव पाडू नये. ओवा, लसूण यांचे कण शेव पडायच्या जाळीत अडकून शेव नीट पडत नाही. म्हणून पाण्यात सर्व घालून पाण्याला त्याचा स्वाद द्यावा आणि हे पाणी पीठ भिजवायला वापरावे.
Sunday, 16 October 2011
तांदुळाच्या पिठाच्या चकल्या - Rice Flour Chakali
Rice Flour Chakali in English
नग: १५ मध्यम चकल्या
वेळ: पूर्वतयारी- १५ मिनिटे | तळणीसाठी - २० मिनिटे
साहित्य:
१ कप तांदळाचे पीठ
१ कप पाणी
१/४ कप बटर
चवीपुरते मीठ (टीप १)
१/२ टीस्पून जिरे
२ टीस्पून वाटलेली मिरची पेस्ट
तळणीसाठी तेल
कृती:
१) तांदळाचे पीठ एका खोलगट भांड्यात घ्यावे.
२) लहान पातेल्यात पाणी गरम करावे. त्यात मीठ, जिरे, मिरचीची पेस्ट आणि बटर घालावे. बटर वितळून पाण्याला उकळी येऊ द्यावी. पाणी उकळले कि लगेच तांदळाच्या पिठात घालून चमच्याने मिक्स करावे. १५ मिनिटे झाकून ठेवावे.
३) कोमट झाले कि मऊसर मळून घ्यावे.
४) चकली यंत्राला आतून तेलाचा हात लावावा आणि तयार उकड भरून घ्यावी. तळणीसाठी तेल गरम करावे. आच मिडीयम आणि हायच्या बरोबर मधोमध ठेवावी.
५) प्लास्टिकच्या लहान कागदावर चकल्या पाडाव्यात (टीप ५) . चकली पाडून झाल्यावर शेवटचे टोक चिकटवून टाकायला विसरू नये.
६) चकल्या बदामी रंगावर तळून घ्याव्यात (टीप २ आणि ३). तळलेल्या चकल्या पेपर टॉवेलवर काढून ठेवाव्यात म्हणजे अधिकचे तेल टिपून घेतले जाईल.
चकल्या पूर्ण गार झाल्या कि डब्यात भरून ठेवाव्यात.
टीपा:
१) मिठाचा अंदाज घ्यायचा तर स्टेप २ मध्ये जेव्हा मीठ घालू तेव्हा पाण्याची चव पहावी. पाणी गरजेपेक्षा थोडे खारट असावे. म्हणजे तांदळाच्या पिठात घातल्यावर मीठ अडजस्ट होते.
२) चकल्या जरा कमी तळल्या तर रंग पांढरा राहतो आणि कुरकुरीतसुद्धा होतात. पण पूर्ण गार झाल्यावर कधीकधी आतमध्ये किंचितशा मऊ राहतात. त्यामुळे जास्त दिवस टिकणार नाहीत म्हणून शक्यतो बदामी रंग येईस्तोवर पक्क्या तळाव्यात.
३) एकदम कमी आचेवर चकल्या तळू नयेत. चकल्या तेलकट होतात.
४) चकली यंत्रातून चकली पाडल्यावर ती उचलताना आणि तेलात सोडताना काळजी घ्यावी. तांदळाच्या पिठाला चिकटपणा कमी असतो. त्यामुळे उचलताना चकल्या मोडतात.
५) प्लास्टिकच्या कागदाचे साधारण ५ x ५ इंचाचे चौकोनी तुकडे करावेत. आणि एका कागदावर एकच चकली पाडावी म्हणजे चकली उचलताना सोपे जाईल. प्लास्टिक कागदाऐवजी अल्युमिनियम फॉईल किंवा बटर पेपर वापरला तरी चालेल.
Labels:
Fried,
Snacks,
South Indian
Friday, 14 October 2011
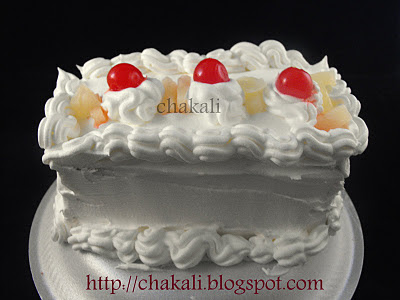
Pineapple Pastry
Pineapple Pastry in Marathi
Time: 15 minutes
Ingredients:
8 OZ tub of whipped cream (Tip 1 and 2)
2 to 3 tbsp powdered sugar
few drops of pineapple essence (4 to 5 drops)
1/4 cup pineapple chunks
8 to 10 glazed cherries
2 sheets of pineapple flavored sponge cake (8 x 4 x 1) (Tip 2)
10 x 10 inch square hard cardboard wrapped with aluminum foil
Method:
1) Add pineapple essence and sugar in whipped cream. Fold very gently. Do not whisk vigorously. Whipped cream looses its foamy texture if over mixed.
2) Place one cake sheet on card board. Slather whipped cream on that cake sheet evenly. Make 0.5 to 1 cm layer. Spread pineapple chunks.
3) Put second sheet of cake on top and spread whipped cream evenly. Also spread it on four vertical sides. Make all sides smooth.
4) If you have icing bag, then fill it with whipped cream and decorate the cake. Also, use pineapple chunks and glazed cherries for decoration.
Serve immediately. Or refrigerate.
Tips:
1) Whipped cream melts if kept at room temperature. So be quick when working with whipped cream. Keep all the ingredients ready and then bring the whipped cream out of the fridge.
2) Whipped cream can be made at home by whipping heavy cream. Pour chilled heavy whipping cream into chilled bowl. Beat until it forms soft peak. Soft peaks should fold over when the beaters or whisk are lifted. At this point, add 2 tbsp sugar and few drops of pineapple essence. Beat again until mixture thickens and becomes foamy. Continue beating until cream reaches desired consistency.
3) When you bake the cake, it will rise and might create a bump on the surface. To get nice and even cake sheet, run a serrated knife horizontally just below the bump to cut it. Then cut the square cake into two equal rectangles. This way you will get two sheets of sponge cake.
4) At the time of cutting cake, use sharp knife.
पाईनॅपल पेस्ट्री - Pineapple layer cake Pastry
Pineapple Pastry in English
वेळ: १५ मिनिटे
साहित्य:
८ oz व्हीप क्रीम (कूल व्हीप)(टीप १ आणि २)
२ ते ३ टेस्पून पिठी साखर
४ ते ५ थेंब पाईनॅपल इसेन्स
१/४ कप पाईनॅपलचे छोटे तुकडे
८ ते १० ग्लेझ चेरीज
२ पाईनॅपल स्पंज केकच्या आयताकृती शीट्स (८ x ४ x १) (टीप ३ )
१० x १० इंचाचा चौकोनी कार्डबोर्ड (पुठ्ठा), अलुमिनियम फॉईलमध्ये रॅप केलेला
कृती:
१) व्हीप क्रीममध्ये पाईनॅपल इसेन्स आणि साखर घालून हलकेच मिक्स करावे. जोरजोरात फेटू नये. व्हीप्प क्रीमचे फोमी टेक्स्चर निघून जाते. आणि मोजक्याच वेळा मिक्स करावे.
२) कार्डबोर्डवर एक केकची शीट ठेवावी. त्यावर व्हीप क्रीम पसरावे. आणि अननसाचे तुकडे घालावेत.
३) त्यावर दुसरी केकची शीट ठेवावी. त्यावरही व्हीप क्रीम पसरावे आणि उभ्या चारही बाजूंना व्हीप क्रीमचा समान थर लावावा.
४) आयसिंग बॅग असल्यास त्यात व्हीप क्रीम भरून केक डेकोरेट करावा. वरती अननसाचे तुकडे आणि चेरी यांनी केक सजवावा. कापून लगेच सर्व्ह करावा किंवा फ्रीजमध्ये ठेवावा.
टीपा:
१) रूम टेम्परेचरला व्हीप क्रीम वितळते, म्हणून व्हीप क्रीम हाताळताना जलद गतीने काम करावे. आधी सर्व साहित्य तयार ठेवून मगच व्हीप क्रीम फ्रीजच्या बाहेर काढावे.
२) मी रेडीमेड व्हीप क्रीम वापरले होते. जर व्हीप क्रीम घरी बनवायचे असेल तर हेवी क्रीम आणावे. हेवी क्रीम आणि काचेचे एक खोलगट भांडे एकदम थंड करावे. बाहेर काढून लगेच हॅंड मिक्सरने फेटावे. क्रीम सॉफ्ट पिकला पोहोचले कि त्यात २टेस्पून साखर आणि थोडा पाईनॅपल इसेन्स घालावा. क्रीम केकवर पसरण्याइतपत घट्ट आणि फोमी होईस्तोवर फेटावे.
३) केकचे मिश्रण केक टीनमध्ये ओतल्यावर आत हवेचे बुडबुडे राहिले असले तर बेक करताना ते बाहेर पडतात आणि केकवर टेकडीसारखा बंप तयार होतो. जेव्हा पेस्ट्री बनवाची असते तेव्हा प्लेन सरफेसचा केक लागतो. म्हणून हा उंचवटा सुरीने कापून केक प्लेन करावा. नंतर चौरस आकाराचा केक मधोमध कापून दोन समान आयात तयार करावेत. अशाप्रकारे दोन समान आयताकृती केक शीट मिळतील.
Labels:
Cake,
Dessert,
Kids Favorite,
P - T
Wednesday, 12 October 2011
Pineapple Flavored sponge cake
Pineapple flavored cake in Marathi
Time: Preparation- 20 minutes | Cooking time- 45 to 50 minutes
Makes: 15 to 16 pieces
Pineapple cake can be made without eggs. For eggless cake recipe link and couple of changes you need to make for pineapple eggless cake, please check Tip no. 5
Ingredients:
1 and 1/2 cup All purpose Flour
1 and 1/2 stick unsalted butter, softened (3/4 cup)
1 cup granulated sugar
3 medium eggs (Room temperature)
1/4 tsp Pineapple essence
1 tsp baking powder
1 tsp baking soda
2 tbsp yogurt
1/2 cup milk (room temperature)
Pinch of salt
Method:
1) Preheat oven at 350 F (175 C) for atleast 10 minutes. Grease an 8 x 8 inches pan with butter.
2) Sift all purpose flour, Baking Soda, Baking powder, and salt. You may find small lumps of baking powder. Break them with fingers.
3) In a glass bowl, add sugar and softened butter. Beat at medium speed with hand mixer or electronic stand mixer till mixture becomes light and creamy. It will take minimum 2-3 minutes.
4) Now add eggs and beat well. Mixture will become fluffy and smooth. Do not over-beat. Over-beating eggs and butter will curdle the mixture.
5) Add Yogurt and pineapple essence. Add flour and milk alternately in three batches. Mix slightly after adding each batch of flour.
6) Pour the batter in greased pan. Spread the batter evenly and make the surface plain.
7) Put the cake batter in the oven on middle rack. Bake for 40-45 minutes.
8) After 40 minutes, check the doneness of cake by piercing a skewer in the center. If it comes out clean, then the cake is done. If you find wet batter on skewer. Bake for another 5 to 8
minutes or till skewer comes out clean. (Use cleaned skewer every-time you check)
Tips:
1) Do not add fresh pineapple pieces in the batter. Cake becomes soggy because of juices in pineapple. You may add dried pineapple pieces.
2) Once you put the batter in heated oven, do not open the oven. It will reduce the temperature and cake won't get baked well.
3) If using extra large eggs, use only 2 eggs.
4) When comes in contact with acidic ingredient (here yogurt), baking soda starts to react and release carbon dioxide gas as soon as it is added to the batter and moistened.
5) Click here for Eggless sponge cake recipe. Use pineapple flavor essence instead of vanilla essence. In Eggless vanilla cake recipe, the given ingredients would make only 8 to 10 pieces. For 15 to 16 pieces double the amount of ingredients.
पाईनॅपल केक - Pineapple Flavored Cake (With Egg)
Pineapple Flavored Cake recipe in English
वेळ: पूर्वतयारी- २० मिनिटे | बेकिंगसाठी- ५० मिनिटे
१५ ते १६ पिसेस
हा केक अंडी न वापरताही करू शकतो. रेसिपी लिंक आणि काय काय बदल करावे ते टीप नंबर ५ मध्ये लिहिले आहे
साहित्य:
दीड कप मैदा
दीड स्टिक अनसॉल्टेड बटर, रूम टेम्परेचर (दीड स्टिक = ३/४ कप)
१ कप ग्रानुलेटेड साखर
३ मध्यम अंडी (रूम टेम्परेचर)
१/४ ते १/२ टीस्पून पाईनॅपल इसेन्स
१ टीस्पून बेकिंग पावडर
१ टीस्पून बेकिंग सोडा
२ टेस्पून दही
१/२ कप दूध (रूम टेम्परेचर)
चिमूटभर मीठ
कृती:
१) ओव्हन ३५० F (१७५ C) किमान १० मिनिटे प्रीहिट करावे. ८" x ८" चा पॅन आतून बटर लावून ग्रीस करावा.
२) मैदा, बेकिंग सोडा, बेकिंग पावडर, आणि मीठ चाळणीतून दोनदा चाळून घ्यावे. जर बेकिंग पावडरचे बारीक गोळे असतील तर हाताने फोडावेत.
३) मोठ्या ग्लास बोलमध्ये साखर आणि बटर घालावे. हॅंड मिक्सरने किंवा इलेक्ट्रॉनिक स्टॅंड मिक्सरने मध्यम स्पीडवर मिश्रण फेटावे. मिश्रण क्रिमी होईस्तोवर फेटावे. १ ते २ मिनिट लागतील.
४) आता अंडी फोडून घालावीत. आणि परत फेटावे. मिश्रण एकदम हलके आणि फ्लफी होईल. मिश्रण फ्लफी झाले कि फेटणे थांबवावे. {अंडी किंवा बटर प्रमाणाबाहेर फेटल्यास विलग होउन मिश्रण फाटल्यासारखे दिसते.}
५) दही आणि पाईनॅपल इसेन्स घालावा. मैदा आणि दुध ३ बॅचेसमध्ये आलटून पालटून घालावे. मैदा नीट मिक्स होईस्तोवरच मिश्रण फेटावे.
६) बटर लावलेल्या पॅनमध्ये मिश्रण ओतावे. मिश्रण सर्वत्र सारखे पसरले पाहिजे. त्यासाठी लाकडी किंवा प्लास्टिक कालथ्याने मिश्रण एकसारखे पसरवा. पृष्ठभाग प्लेन करा.
७) पॅन ओव्हनमध्ये मधल्या रॅकवर ठेवून ओव्हन बंद करा. ४० ते ४५ मिनिटे बेक करा.
८) ४० मिनिटानंतर केकच्या मध्यभागी स्क्यूअरने आतपर्यंत टोचून बाहेर काढा. जर स्क्यूअरवर केकचे बॅटर लागले असेल तर अजून ७-८ मिनिटे बेक करा आणि परत मध्यभागी "स्वच्छ" केलेली स्क्यूअर टोचून पहा. जर त्यावर केक बॅटरचा अजिबात अंश नसेल तर केक झाला असे समजावे.
साधारण ४५ मिनिटात केक बेक होतो.
टीपा:
१) केक बॅटरमध्ये फ्रेश अननसाचे तुकडे घालू नकात. अननसातील रसामुळे केक आतून ओला राहतो. वाटल्यास सुकवलेले अननसाचे तुकडे वापरू शकता.
२) एकदा का मिश्रण बेकिंगसाठी ओव्हनमध्ये गेले कि ओव्हन उघडू नये. आतील तापमान कमी झाल्याने केक बेक होण्यात बाधा निर्माण होते.
३) जर एकदम मोठी अंडी वापरत असाल तर ३ ऐवजी २ अंडी पुरे होतील.
४) दही (आंबट पदार्थ) घातल्याने बेकिंग सोडा कार्यरत होउन कार्बन डाय ऑक्साईड वायू तयार करतो. ज्यामुळे केक फ्लफी होतो. फक्त मिक्सिंगचे काम जमेल तेवढ्या जलद करावे म्हणजे बेकिंग सोड्याचा परिणाम जास्त चांगला होईल.
५) एगलेस केक रेसिपीसाठी इथे क्लिक करा
फक्त वानिला इसेंसऐवजी पाईनॅपल इसेन्स वापरा. "एगलेस केक" रेसिपीमध्ये दिलेले साहित्याचे प्रमाण हे वरील रेसिपीपेक्षा निम्मे आहे. त्यानुसार आठच केक पिसेस होतील म्हणून जर १६ पिसेस हवे असतील तर प्रमाण दुप्पट करा.
Subscribe to:
Posts (Atom)