gulabjam in Marathi
Time: Prep. time- 45 to 50 minutes | Cooking time- 30 minutes
Makes: 40 to 45 medium sized gulabjam
Ingredients:
Gulabjam Balls
1 lb ricotta cheese (use lite ricotta)
3 tbsp All purpose flour (maida)
1 pinch of Baking soda
Sugar Syrup
2.5 cups Sugar
2.5 cups water
2 to 3 Cardamoms
1 pinch Saffron
other
Oil for frying gulabjamun
Method:
1) Take a nonstick pan. Add ricotta cheese and cook over medium heat. Stir continuously from the bottom to avoid sticking. Cook till ricotta cheese dries and forms a ball. It will take 30 to 40 minutes approximately. Let it cool down completely.
2) Add 2 tbsp all purpose four, and pinch of baking soda. Knead well. Use a tsp of water only if required. Knead to make a soft dough.
3) In a saucepan, add sugar and water. Boil for 5 minutes. Turn heat to very low. Add saffron and cardamom.
4) Heat oil over medium flame. Divide the dough into marble size balls. Make smooth surfaced balls, so that they won't crack after putting into hot oil.
5) To check the temperature of oil. Put one ball into hot oil. First, ball should sit at the bottom and then rise slowly after 5 to 7 seconds. If the ball rises fast and color changes immediately, then oil is hotter than required. Turn the heat down a little bit and wait for few minutes.
6) Once you get perfect oil temperature, add 8 to 10 balls at a time and fry them. Keep gulabjam balls moving with steel slotted spoon for even cooking.
7) Fry until gulabjam balls get red color. Drain and put them on paper towel for couple of minutes. Now add them into sugar syrup.
8) Deep fry rest of the gulabjam and remember don't put immediately in sugar syrup. First let them rest for 2-3 minutes before adding to sugar syrup.
Soak gulabjam in sugar syrup for atleast couple of hours. Overnight soaking is better.
Tips:
1) Try to use minimum maida. If you add maida more than required, gulabjam will become chewy and they won't soak well in sugar syrup.
2) Cooking and thickening ricotta cheese is a time consuming process. But gulabjam made out of it comes out soft, moist and delicious. The taste is very close to gulabjam made of Khova.
3) If the gulabjam is breaking after adding in the oil, add a tsp or two maida in the dough and knead well. Make gulabjam as usual.
Thursday, 27 October 2011
Tuesday, 25 October 2011
Kalakand
kalakand in Marathi
Time: 30 minutes
Makes: 15 medium pieces
Ingredients:
1 liter Milk
1/2 tsp Citric Acid or Juice of 1 lemon
150 gram Khova
3/4 cup Sugar (approx 150 to 175 gram)
1/2 tsp Cardamom Powder
Pistachio Slices for garnishing
Method:
1) Heat milk into a saucepan. Once milk is hot, add 2-3 pinches of citric acid and stir it from bottom. Milk will curdle. Water and milk solids will separate. (add little more citric acid if required.) Line a colander with a cheese cloth. Pour curdled milk in it. Save the paneer.
2) Wash paneer slightly under running water while its still in cheese cloth. This will help to remove sour taste and smell of lemon juice/ citric acid. Twist the edges and squeeze out all the water. No need to hang paneer.
3) Mix khova and sugar together in a nonstick pan. When sugar starts melting, mixture becomes runny. Keep stirring. After 5 minutes add paneer and cardamom powder.
4) Stir continuously. Mixture will thicken and form a lump. Take a square cake tin. Add this mixture to it and Spread evenly. Make 1 inch thick layer. Sprinkle pistachio slices. Cut into 1 inch squares once it cools down.
Tips:
1) Proportion of Khova and paneer can be altered according to your preference.
2) Make fresh paneer at home. After curdling milk, drain and squeeze out all the water. Do not hang paneer for longer. It looses its moisture if hung for longer.
3) I had used 1 tbsp readymade syrup of Saffron and cardamom. It gives nice flavor of both cardamom and saffron. Also, kalakand become pale yellow due to saffron.
4) I have made khova from ricotta cheese. 425 gram ricotta cheese makes 175 gram khova.
5) Amount of sugar can be adjusted to your taste.
6) Silver varakh can be used to garnish kalakand.
Thursday, 20 October 2011
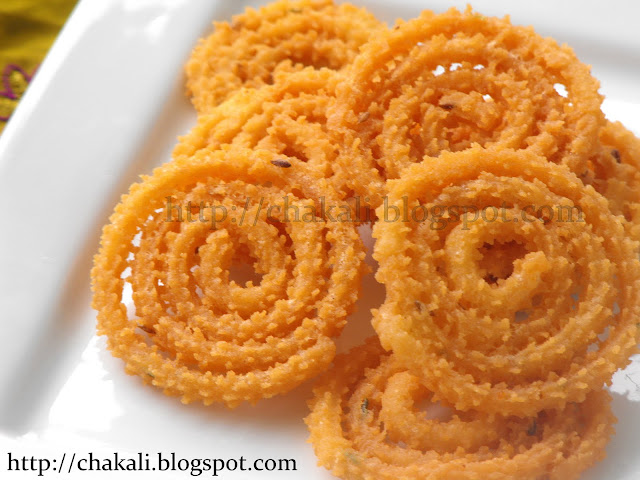
Rice Flour Chakali
Rice flour Chakali in Marathi
Time: Prep Time- 15 minutes | Cooking time- 20 minutes
Makes: 15 medium chakali
Ingredients:
1 cup Rice Flour
1 cup Water
1/4 cup butter
salt to taste (tip 1)
1/2 tsp cumin seeds
2 tsp green chili paste
Oil for frying
Method:
1) Take rice flour into a deep bowl
2) Take a small pan and heat water in it. Add salt, cumin seeds, chili paste and butter. Let the water boil. Add this boiling water to rice flour and mix with spoon. Cover for 15 minutes.
3) Once mixture becomes warm, knead it.
4) Grease chakali machine with oil. Stuff the mixture in it. Heat sufficient oil in kadai to deep fry chakali. Keep flame beween medium and high.
5) Take small plastic papers (tip 5). Press chakali machine. Slightly rotate the maker round and round until you get a spiral shaped chakali. stick the tip so that it won't open after dropping into hot oil
6) Gently lift the chakali and leave into hot oil. deep fry until golden color. Place deep fried chakali on paper towel.
Once chakalis are completely cooled down, store them into an airtight container.
Tips:
1) When you add salt, taste a drop of water. It should taste little salty than usual. After adding rice flour, the salt will get adjusted.
2) If you want long lasting and crunchy chakalis, fry them till they get nice deep golden color. If you get the chakalis out of oil when they are white, they will taste crunchy at first but they may become soft after a while. Also do not overfry. If color turn dark brown, chakali will taste bitter.
3) Do not fry chakalis over low heat. Chakalis become oily.
4) Rice flour does not have enough gluten. before frying, Rice flour chakali can break while handling. Hence, lift chakali very gently. Also, careful while leaving it into hot oil.
5) Use 5" x 5" plastic paper. Press 1 chakali on 1 paper. It will make easy handling of chakali. Aluminum foil or butter paper can be used instead of Plastic paper.
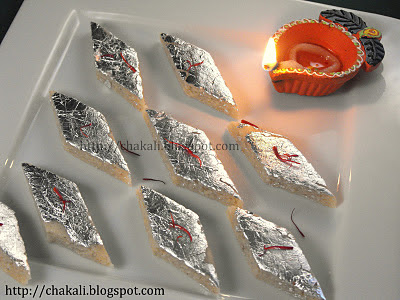
Kaju Katli
Kaju Katli in Marathi
Time: 15 to 20 minutes
Makes: 12 to 15 medium Pieces
Ingredients:
1 + 1/4 cup cashew powder
3/4 cup powdered sugar
1/2 cup milk powder
1/4 cup milk
1/4 tsp cardamom powder
Silver varakh
Method:
1) Take a glass bowl. Add 1 cup cashew powder, powdered sugar, milk powder, milk and cardamom powder. Mix well and make a lump-free mixture.
2) Microwave this mixture for 2 to 3 minutes. Give a stir after every 50 seconds. Once mixture becomes bubbly, remove it from microwave. Stir occasionally till mixture thickens.
3) Once mixture thickens add little cashew powder (only if needed) to make a pliable dough.
4) Grease a flat surface with little ghee. Roll the dough with rolling pin. Garnish with silver varakh. Cut it into diamond shape.
Tips:
1) Cashew powder should be very fine. If you get little coarse powder then sieve it through a fine mesh. Blend the coarse powder again to get fine consistency.
2) Saffron can be added to give yellowish color and flavor. Soak 2-3 pinch saffron into hot milk. Then use this milk to make the mixture in step 1
3) Milk powder can be substituted with 1/4 to 1/2 cup lightly roasted Khoya.
काजू कतली - Kaju Katli
Kaju Katli in English
वेळ: १५ ते २० मिनिटे
१२ ते १५ मध्यम वड्या
साहित्य:
सव्वा कप काजूची बारीक पूड
३/४ कप पिठी साखर
१/२ कप मिल्क पावडर
१/४ कप दूध
१ टीस्पून तूप
१/४ टीस्पून वेलचीपूड
चांदीचा वर्ख सजावटीसाठी
कृती:
१) सव्वा कपपैकी १ कप काजू पूड, तूप, पिठी साखर, मिल्क पावडर, दुध आणि वेलची पावडर एका काचेच्या बोलमध्ये एकत्र करावे. नीट मिक्स करावे. गुठळ्या राहू देऊ नयेत.
२) मिश्रण २ ते ३ मिनिटे मायक्रोवेव करावे. दर ५० सेकंदानी ढवळा. मिश्रण चांगले उकळले की बाहेर काढावे. आळेस्तोवर मध्येमध्ये ढवळावे.
३) मिश्रण जरा आळले कि त्यात लागल्यास थोडी काजू पावडर घालावी. नीट मिक्स करून कणिक जेवढी घट्ट असते तसा गोळा तयार करावा.
४) पोळपाटाला किंवा फ्लॅट सरफेसला तुपाचा हात लावून घ्यावा. त्यावर मिश्रणाचा गोळा लाटून जाडसर पोळी लाटावी. चांदीचा वर्ख लावून शंकरपाळ्याच्या आकारात वड्या कापाव्यात.
टीपा:
१) काजूची पूड एकदम बारीक असावी. वाटल्यास बारीक केकेली पूड बारीक चाळणीने चाळून जाडसर काजूची पूड परत बारीक करावी.
२) काजू कतली मिश्रणात थोडे केशर घातले तरी रंग आणि चव खूप छान येते. गरम दुधामध्ये २-३ चिमटी केशर भिजवून चिमटीने कुस्करून घ्यावे. आणि हे दुध मिश्रणात घालावे.
३) मिल्क पावडरऐवजी हलकासा भाजलेला खवा वापरला तरीही चालेल.
कलाकंद - Kalakand
Kalakand In English
वेळ: ३० मिनिटे
१५ मध्यम तुकडे
साहित्य:
१ लिटर दुध
१/२ टीस्पून सायट्रिक अॅसीड किंवा एका लिंबाचा रस
दीडशे ग्राम खवा
३/४ कप साखर (साधारण १५० ते १७५ ग्राम)
१/२ टीस्पून वेलची पुड
पिस्त्याचे पातळ काप
कृती:
१) दुध जाड बुडाच्या पातेल्यात गरम करत ठेवावे. दुध गरम झाले कि त्यात चिमटीचिमटीने सायट्रिक अॅसीड घालून तळापासून ढवळावे. दुध फाटले कि सुती कपड्यावर पनीर गाळून घ्यावे.
२) गाळलेले पनीर फडक्यातच असताना गार पाण्याने थोडे धुवून घ्यावे म्हणजे लिंबाची/ सायट्रिक अॅसीडची आंबट चव आणि वास निघून जाईल. गच्च पिळून पनीर लगेच काढून एका वाडग्यात ठेवून द्यावे.
३) खवा आणि साखर एकत्र करून नॉनस्टिक भांड्यात मध्यम आचेवर गरम करत ठेवावे. साखर वितळली कि मिश्रण पातळ होईल. सतत ढवळत राहावे. ५ मिनिटांनी पनीर आणि वेलची पुड घालावी.
४) पनीर घातल्यावरही ढवळत राहावे. मिश्रण आळून गोळा बनायला सुरुवात झाली कि लगेच टीनच्या ट्रेमध्ये मिश्रण जाडसर पण एकसमान पसरवावे. वरून पिस्त्याचे काप घालावे. गार झाल्यावर वड्या पाडाव्यात.
वड्या उरल्या तर फ्रीजमध्ये ठेवाव्यात.
टीपा:
१) आवडीनुसार खवा किंवा पनीरचे प्रमाण कमीजास्त करावे.
२) पनीर ताजेच बनवावे. तसेच दुध फाटल्यावर गाळून, घट्ट पिळून लगेच पनीर वापरावा. पाणी निथळण्यासाठी खूप वेळ टांगून ठेवू नये.
३) मी वेलची-केशर यांचे रेडीमेड सिरप मिळते ते चमचाभर वापरले होते. त्यामुळे रंगही पिवळसर येतो आणि केशर वेलचीचा स्वादही छान येतो.
४) मी खवा रिकोटा चीजपासून बनवला होता. साधारण ४२५ ग्राम रिकोटा चीजपासून पावणे दोनशे ग्राम खवा बनतो.
५) ३/४ कप साखरेमुळे बेताचे गोड होते. अजून गोड हवे असेल तर २ ते ३ टेस्पून साखर वाढवावी.
६) मिश्रण ट्रेमध्ये थापल्यानंतर वरून चांदीचा वर्खही लावू शकतो. त्यामुळे कलाकंद अधिक आकर्षक दिसेल.
Monday, 17 October 2011
Garlic Sev
Garlic sev in Marathi
Time: 30 to 40 minutes
Ingredients:
2.5 cups Besan (Approx 325 Grams)
1/2 cup Oil
1/4 cup garlic paste
1/2 cup water
2 tsp green chili paste (Tip)
1 tsp Carom Seeds
1/2 tsp white pepper powder
Salt to taste
Oil for deep frying
Method:
1) Mix besan, white pepper powder and salt to taste. Sieve these three ingredients.
2) Heat 1/2 cup oil till smoking point. Add it to besan mixture. Mix with spoon.
3) Heat a tawa and turn off the heat. Lightly toast carom seeds. crush and make coarse powder.
4) Take 1/2 cup hot water. Add green chili paste, crushed carom seeds, and garlic paste. Mix well. Crush garlic and carom seeds with hands. This helps to infuse more flavor to the water. Strain and save the water.
5) Use this water to prepare sev batter. Add little water at a time. Mix it in besan well. Sev batter should be thick and sticky.
6) Grease sev presser from the inside with some oil. Pour Batter in Sev presser.
7) Heat oil in kadai. Press the sev pressing machine clockwise in circular motion. and keep coming in to form smaller circles and finish off when you come to center. Try to keep a single layer for even frying. Do not overlap, otherwise some parts will remain uncooked.
8) Fry over medium high heat. Flip to other side once one side becomes little firm. Do not fry until color changes to brown. It will taste bitter. Place on a paper towel to remove excessive oil. Let it cool down. Crush gently with hands to make Shev.
Tips:
1) Green chili paste can be substituted with red chili powder. However, Sev color becomes reddish due to red chili powder.
2) Quantity of water may vary by few tbsp. Hence add little water at a time. Mix and add if more required.
3) We are not mixing green chili paste, crushed carom seeds, and garlic paste to the flour because they can create problem while pressing sev. Small particles of garlic and carom seeds can get stuck in sev presser and block the flow. Therefore, we have flavors of garlic and carom seeds in water.
लसूण शेव - Lasun Shev
Garlic Sev in English
वेळ: ३५ ते ४० मिनिटे
साहित्य:
अडीच कप बेसन (साधारण सव्वा तीनशे ग्राम)
१/२ कप तेल
१/४ कप लसूण पेस्ट
१/२ कप पाणी
२ टीस्पून हिरवी मिरची पेस्ट
१ टीस्पून ओवा
१/२ टीस्पून पांढरी मिरपूड
चवीपुरते मीठ
तळणासाठी तेल
कृती:
१) बेसन, पांढरी मिरपूड, आणि मीठ एकत्र करून चाळून घ्यावे.
२) १/२ कप तेल कडकडीत तापवावे. आणि बेसनाच्या मिश्रणात घालावे. चमच्याने मिक्स करावे.
३) तवा गरम करावा आणि गरम झाला कि बंद करावा. त्यात ओवा अगदी हलकेच भाजून घ्यावा. खलबत्त्यात भरडसर कुटून घ्यावा.
४) १/२ कप गरम पाणी घ्यावे. त्यात लसूण पेस्ट, मिरची पेस्ट, आणि ओवापुड घालून मिक्स करावे. लसूण हाताने चुरडावी म्हणजे लसणीचा स्वाद पाण्यात पुरेपूर उतरेल. हे पाणी बारीक जाळीच्या गाळण्यातून गाळून घ्यावे.
५) हे पाणी बेसनामध्ये हळू हळू घालावे आणि घट्टसर पण चिकट असे मिश्रण बनवावे.
६) शेव पाडायच्या यंत्राला आतून तेलाचा लावून घ्यावा. बेसनाचे भिजवलेले पीठ यामध्ये घालावे.
७) कढईमध्ये तेल गरम करावे. तेल गरम झाले कि आच मिडीयम हायवर ठेवावी. प्रेस करून शेव पाडावी. शेव पाडायची योग्य पद्धत म्हणजे शेव गोलाकार पाडावी. म्हणजे तेलात बाहेरून वर्तुळाकार फिरवत एक फेरा झाला कि तो लगेच आतमध्ये चक्र पूर्ण करावे. कढई जेवढी मोठी तेवढे फेरे करावेत. शक्यतो शेव एकावर एक अशी पाडू नये, कच्ची राहते आणि मऊ पडते.
८) एक बाजू तळली गेली कि हलकेच पलटून दुसरी बाजू तळावी. अशाप्रकारे सर्व भिजवलेल्या पिठाची शेव बनवावी.
९) शेव तळली कि टिश्यू पेपरवर काढून ठेवावी. म्हणजे अधिकचे तेल निघून जाईल. गार झाले कि हाताने चुरडून हवाबंद डब्यात भरून ठेवावी.
टीपा:
१) मिरची पेस्ट ऐवजी २ टीस्पून लाल तिखट वापरले तरीही चालते. पण तिखटाचा रंग खूप भडक असेल तर शेवेचा रंग लालसर होतो.
२) पाण्याचे प्रमाण काही टेस्पून कमी जास्त होवू शकते. त्यामुळे बेताबेताने पाणी घालावे. मिश्रण घट्ट आणि चिकट झाले पाहिजे.
३) लसूण, ओवा, किंवा मिरची बेसनात डायरेक्ट घालून शेव पाडू नये. ओवा, लसूण यांचे कण शेव पडायच्या जाळीत अडकून शेव नीट पडत नाही. म्हणून पाण्यात सर्व घालून पाण्याला त्याचा स्वाद द्यावा आणि हे पाणी पीठ भिजवायला वापरावे.
Sunday, 16 October 2011
तांदुळाच्या पिठाच्या चकल्या - Rice Flour Chakali
Rice Flour Chakali in English
नग: १५ मध्यम चकल्या
वेळ: पूर्वतयारी- १५ मिनिटे | तळणीसाठी - २० मिनिटे
साहित्य:
१ कप तांदळाचे पीठ
१ कप पाणी
१/४ कप बटर
चवीपुरते मीठ (टीप १)
१/२ टीस्पून जिरे
२ टीस्पून वाटलेली मिरची पेस्ट
तळणीसाठी तेल
कृती:
१) तांदळाचे पीठ एका खोलगट भांड्यात घ्यावे.
२) लहान पातेल्यात पाणी गरम करावे. त्यात मीठ, जिरे, मिरचीची पेस्ट आणि बटर घालावे. बटर वितळून पाण्याला उकळी येऊ द्यावी. पाणी उकळले कि लगेच तांदळाच्या पिठात घालून चमच्याने मिक्स करावे. १५ मिनिटे झाकून ठेवावे.
३) कोमट झाले कि मऊसर मळून घ्यावे.
४) चकली यंत्राला आतून तेलाचा हात लावावा आणि तयार उकड भरून घ्यावी. तळणीसाठी तेल गरम करावे. आच मिडीयम आणि हायच्या बरोबर मधोमध ठेवावी.
५) प्लास्टिकच्या लहान कागदावर चकल्या पाडाव्यात (टीप ५) . चकली पाडून झाल्यावर शेवटचे टोक चिकटवून टाकायला विसरू नये.
६) चकल्या बदामी रंगावर तळून घ्याव्यात (टीप २ आणि ३). तळलेल्या चकल्या पेपर टॉवेलवर काढून ठेवाव्यात म्हणजे अधिकचे तेल टिपून घेतले जाईल.
चकल्या पूर्ण गार झाल्या कि डब्यात भरून ठेवाव्यात.
टीपा:
१) मिठाचा अंदाज घ्यायचा तर स्टेप २ मध्ये जेव्हा मीठ घालू तेव्हा पाण्याची चव पहावी. पाणी गरजेपेक्षा थोडे खारट असावे. म्हणजे तांदळाच्या पिठात घातल्यावर मीठ अडजस्ट होते.
२) चकल्या जरा कमी तळल्या तर रंग पांढरा राहतो आणि कुरकुरीतसुद्धा होतात. पण पूर्ण गार झाल्यावर कधीकधी आतमध्ये किंचितशा मऊ राहतात. त्यामुळे जास्त दिवस टिकणार नाहीत म्हणून शक्यतो बदामी रंग येईस्तोवर पक्क्या तळाव्यात.
३) एकदम कमी आचेवर चकल्या तळू नयेत. चकल्या तेलकट होतात.
४) चकली यंत्रातून चकली पाडल्यावर ती उचलताना आणि तेलात सोडताना काळजी घ्यावी. तांदळाच्या पिठाला चिकटपणा कमी असतो. त्यामुळे उचलताना चकल्या मोडतात.
५) प्लास्टिकच्या कागदाचे साधारण ५ x ५ इंचाचे चौकोनी तुकडे करावेत. आणि एका कागदावर एकच चकली पाडावी म्हणजे चकली उचलताना सोपे जाईल. प्लास्टिक कागदाऐवजी अल्युमिनियम फॉईल किंवा बटर पेपर वापरला तरी चालेल.
Labels:
Fried,
Snacks,
South Indian
Friday, 14 October 2011
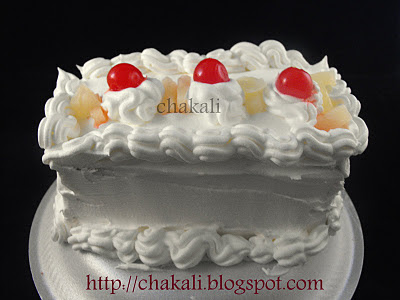
Pineapple Pastry
Pineapple Pastry in Marathi
Time: 15 minutes
Ingredients:
8 OZ tub of whipped cream (Tip 1 and 2)
2 to 3 tbsp powdered sugar
few drops of pineapple essence (4 to 5 drops)
1/4 cup pineapple chunks
8 to 10 glazed cherries
2 sheets of pineapple flavored sponge cake (8 x 4 x 1) (Tip 2)
10 x 10 inch square hard cardboard wrapped with aluminum foil
Method:
1) Add pineapple essence and sugar in whipped cream. Fold very gently. Do not whisk vigorously. Whipped cream looses its foamy texture if over mixed.
2) Place one cake sheet on card board. Slather whipped cream on that cake sheet evenly. Make 0.5 to 1 cm layer. Spread pineapple chunks.
3) Put second sheet of cake on top and spread whipped cream evenly. Also spread it on four vertical sides. Make all sides smooth.
4) If you have icing bag, then fill it with whipped cream and decorate the cake. Also, use pineapple chunks and glazed cherries for decoration.
Serve immediately. Or refrigerate.
Tips:
1) Whipped cream melts if kept at room temperature. So be quick when working with whipped cream. Keep all the ingredients ready and then bring the whipped cream out of the fridge.
2) Whipped cream can be made at home by whipping heavy cream. Pour chilled heavy whipping cream into chilled bowl. Beat until it forms soft peak. Soft peaks should fold over when the beaters or whisk are lifted. At this point, add 2 tbsp sugar and few drops of pineapple essence. Beat again until mixture thickens and becomes foamy. Continue beating until cream reaches desired consistency.
3) When you bake the cake, it will rise and might create a bump on the surface. To get nice and even cake sheet, run a serrated knife horizontally just below the bump to cut it. Then cut the square cake into two equal rectangles. This way you will get two sheets of sponge cake.
4) At the time of cutting cake, use sharp knife.
पाईनॅपल पेस्ट्री - Pineapple layer cake Pastry
Pineapple Pastry in English
वेळ: १५ मिनिटे
साहित्य:
८ oz व्हीप क्रीम (कूल व्हीप)(टीप १ आणि २)
२ ते ३ टेस्पून पिठी साखर
४ ते ५ थेंब पाईनॅपल इसेन्स
१/४ कप पाईनॅपलचे छोटे तुकडे
८ ते १० ग्लेझ चेरीज
२ पाईनॅपल स्पंज केकच्या आयताकृती शीट्स (८ x ४ x १) (टीप ३ )
१० x १० इंचाचा चौकोनी कार्डबोर्ड (पुठ्ठा), अलुमिनियम फॉईलमध्ये रॅप केलेला
कृती:
१) व्हीप क्रीममध्ये पाईनॅपल इसेन्स आणि साखर घालून हलकेच मिक्स करावे. जोरजोरात फेटू नये. व्हीप्प क्रीमचे फोमी टेक्स्चर निघून जाते. आणि मोजक्याच वेळा मिक्स करावे.
२) कार्डबोर्डवर एक केकची शीट ठेवावी. त्यावर व्हीप क्रीम पसरावे. आणि अननसाचे तुकडे घालावेत.
३) त्यावर दुसरी केकची शीट ठेवावी. त्यावरही व्हीप क्रीम पसरावे आणि उभ्या चारही बाजूंना व्हीप क्रीमचा समान थर लावावा.
४) आयसिंग बॅग असल्यास त्यात व्हीप क्रीम भरून केक डेकोरेट करावा. वरती अननसाचे तुकडे आणि चेरी यांनी केक सजवावा. कापून लगेच सर्व्ह करावा किंवा फ्रीजमध्ये ठेवावा.
टीपा:
१) रूम टेम्परेचरला व्हीप क्रीम वितळते, म्हणून व्हीप क्रीम हाताळताना जलद गतीने काम करावे. आधी सर्व साहित्य तयार ठेवून मगच व्हीप क्रीम फ्रीजच्या बाहेर काढावे.
२) मी रेडीमेड व्हीप क्रीम वापरले होते. जर व्हीप क्रीम घरी बनवायचे असेल तर हेवी क्रीम आणावे. हेवी क्रीम आणि काचेचे एक खोलगट भांडे एकदम थंड करावे. बाहेर काढून लगेच हॅंड मिक्सरने फेटावे. क्रीम सॉफ्ट पिकला पोहोचले कि त्यात २टेस्पून साखर आणि थोडा पाईनॅपल इसेन्स घालावा. क्रीम केकवर पसरण्याइतपत घट्ट आणि फोमी होईस्तोवर फेटावे.
३) केकचे मिश्रण केक टीनमध्ये ओतल्यावर आत हवेचे बुडबुडे राहिले असले तर बेक करताना ते बाहेर पडतात आणि केकवर टेकडीसारखा बंप तयार होतो. जेव्हा पेस्ट्री बनवाची असते तेव्हा प्लेन सरफेसचा केक लागतो. म्हणून हा उंचवटा सुरीने कापून केक प्लेन करावा. नंतर चौरस आकाराचा केक मधोमध कापून दोन समान आयात तयार करावेत. अशाप्रकारे दोन समान आयताकृती केक शीट मिळतील.
Labels:
Cake,
Dessert,
Kids Favorite,
P - T
Wednesday, 12 October 2011
Pineapple Flavored sponge cake
Pineapple flavored cake in Marathi
Time: Preparation- 20 minutes | Cooking time- 45 to 50 minutes
Makes: 15 to 16 pieces
Pineapple cake can be made without eggs. For eggless cake recipe link and couple of changes you need to make for pineapple eggless cake, please check Tip no. 5
Ingredients:
1 and 1/2 cup All purpose Flour
1 and 1/2 stick unsalted butter, softened (3/4 cup)
1 cup granulated sugar
3 medium eggs (Room temperature)
1/4 tsp Pineapple essence
1 tsp baking powder
1 tsp baking soda
2 tbsp yogurt
1/2 cup milk (room temperature)
Pinch of salt
Method:
1) Preheat oven at 350 F (175 C) for atleast 10 minutes. Grease an 8 x 8 inches pan with butter.
2) Sift all purpose flour, Baking Soda, Baking powder, and salt. You may find small lumps of baking powder. Break them with fingers.
3) In a glass bowl, add sugar and softened butter. Beat at medium speed with hand mixer or electronic stand mixer till mixture becomes light and creamy. It will take minimum 2-3 minutes.
4) Now add eggs and beat well. Mixture will become fluffy and smooth. Do not over-beat. Over-beating eggs and butter will curdle the mixture.
5) Add Yogurt and pineapple essence. Add flour and milk alternately in three batches. Mix slightly after adding each batch of flour.
6) Pour the batter in greased pan. Spread the batter evenly and make the surface plain.
7) Put the cake batter in the oven on middle rack. Bake for 40-45 minutes.
8) After 40 minutes, check the doneness of cake by piercing a skewer in the center. If it comes out clean, then the cake is done. If you find wet batter on skewer. Bake for another 5 to 8
minutes or till skewer comes out clean. (Use cleaned skewer every-time you check)
Tips:
1) Do not add fresh pineapple pieces in the batter. Cake becomes soggy because of juices in pineapple. You may add dried pineapple pieces.
2) Once you put the batter in heated oven, do not open the oven. It will reduce the temperature and cake won't get baked well.
3) If using extra large eggs, use only 2 eggs.
4) When comes in contact with acidic ingredient (here yogurt), baking soda starts to react and release carbon dioxide gas as soon as it is added to the batter and moistened.
5) Click here for Eggless sponge cake recipe. Use pineapple flavor essence instead of vanilla essence. In Eggless vanilla cake recipe, the given ingredients would make only 8 to 10 pieces. For 15 to 16 pieces double the amount of ingredients.
पाईनॅपल केक - Pineapple Flavored Cake (With Egg)
Pineapple Flavored Cake recipe in English
वेळ: पूर्वतयारी- २० मिनिटे | बेकिंगसाठी- ५० मिनिटे
१५ ते १६ पिसेस
हा केक अंडी न वापरताही करू शकतो. रेसिपी लिंक आणि काय काय बदल करावे ते टीप नंबर ५ मध्ये लिहिले आहे
साहित्य:
दीड कप मैदा
दीड स्टिक अनसॉल्टेड बटर, रूम टेम्परेचर (दीड स्टिक = ३/४ कप)
१ कप ग्रानुलेटेड साखर
३ मध्यम अंडी (रूम टेम्परेचर)
१/४ ते १/२ टीस्पून पाईनॅपल इसेन्स
१ टीस्पून बेकिंग पावडर
१ टीस्पून बेकिंग सोडा
२ टेस्पून दही
१/२ कप दूध (रूम टेम्परेचर)
चिमूटभर मीठ
कृती:
१) ओव्हन ३५० F (१७५ C) किमान १० मिनिटे प्रीहिट करावे. ८" x ८" चा पॅन आतून बटर लावून ग्रीस करावा.
२) मैदा, बेकिंग सोडा, बेकिंग पावडर, आणि मीठ चाळणीतून दोनदा चाळून घ्यावे. जर बेकिंग पावडरचे बारीक गोळे असतील तर हाताने फोडावेत.
३) मोठ्या ग्लास बोलमध्ये साखर आणि बटर घालावे. हॅंड मिक्सरने किंवा इलेक्ट्रॉनिक स्टॅंड मिक्सरने मध्यम स्पीडवर मिश्रण फेटावे. मिश्रण क्रिमी होईस्तोवर फेटावे. १ ते २ मिनिट लागतील.
४) आता अंडी फोडून घालावीत. आणि परत फेटावे. मिश्रण एकदम हलके आणि फ्लफी होईल. मिश्रण फ्लफी झाले कि फेटणे थांबवावे. {अंडी किंवा बटर प्रमाणाबाहेर फेटल्यास विलग होउन मिश्रण फाटल्यासारखे दिसते.}
५) दही आणि पाईनॅपल इसेन्स घालावा. मैदा आणि दुध ३ बॅचेसमध्ये आलटून पालटून घालावे. मैदा नीट मिक्स होईस्तोवरच मिश्रण फेटावे.
६) बटर लावलेल्या पॅनमध्ये मिश्रण ओतावे. मिश्रण सर्वत्र सारखे पसरले पाहिजे. त्यासाठी लाकडी किंवा प्लास्टिक कालथ्याने मिश्रण एकसारखे पसरवा. पृष्ठभाग प्लेन करा.
७) पॅन ओव्हनमध्ये मधल्या रॅकवर ठेवून ओव्हन बंद करा. ४० ते ४५ मिनिटे बेक करा.
८) ४० मिनिटानंतर केकच्या मध्यभागी स्क्यूअरने आतपर्यंत टोचून बाहेर काढा. जर स्क्यूअरवर केकचे बॅटर लागले असेल तर अजून ७-८ मिनिटे बेक करा आणि परत मध्यभागी "स्वच्छ" केलेली स्क्यूअर टोचून पहा. जर त्यावर केक बॅटरचा अजिबात अंश नसेल तर केक झाला असे समजावे.
साधारण ४५ मिनिटात केक बेक होतो.
टीपा:
१) केक बॅटरमध्ये फ्रेश अननसाचे तुकडे घालू नकात. अननसातील रसामुळे केक आतून ओला राहतो. वाटल्यास सुकवलेले अननसाचे तुकडे वापरू शकता.
२) एकदा का मिश्रण बेकिंगसाठी ओव्हनमध्ये गेले कि ओव्हन उघडू नये. आतील तापमान कमी झाल्याने केक बेक होण्यात बाधा निर्माण होते.
३) जर एकदम मोठी अंडी वापरत असाल तर ३ ऐवजी २ अंडी पुरे होतील.
४) दही (आंबट पदार्थ) घातल्याने बेकिंग सोडा कार्यरत होउन कार्बन डाय ऑक्साईड वायू तयार करतो. ज्यामुळे केक फ्लफी होतो. फक्त मिक्सिंगचे काम जमेल तेवढ्या जलद करावे म्हणजे बेकिंग सोड्याचा परिणाम जास्त चांगला होईल.
५) एगलेस केक रेसिपीसाठी इथे क्लिक करा
फक्त वानिला इसेंसऐवजी पाईनॅपल इसेन्स वापरा. "एगलेस केक" रेसिपीमध्ये दिलेले साहित्याचे प्रमाण हे वरील रेसिपीपेक्षा निम्मे आहे. त्यानुसार आठच केक पिसेस होतील म्हणून जर १६ पिसेस हवे असतील तर प्रमाण दुप्पट करा.
Thursday, 6 October 2011
Rice and urad dal Appe
Appe in Marathi
Time: 20 minutes
Yield: 15 appe
Ingredients:
2 cups Idli Batter
1 tsp ginger paste
1.5 tsp green chili paste, coarse
3-4 curry leaves, finely chopped (optional)
2 tbsp cilantro, finely chopped (optional)
Salt to taste
2 to 3 tbsp oil for roasting appe
Method:
1) Add ginger paste, cilantro, curry leaves, green chili paste and little salt in batter. Mix well.
2) Heat Appe pan. Add two drops of oil in each mould. Fill moulds with batter. Cover and cook over medium heat for 3 to 4 minutes.
3) Uncover and brush some oil on the surface. Flip the side, cover and cook for couple of minutes.
Serve hot with coconut chutney.
इडली पिठाचे अप्पे - Appe
Appe in English
वेळ: २० मिनिटे
१५ अप्पे
साहित्य:
२ ते अडीच कप इडलीचे आंबवलेले पीठ
१ टीस्पून आले पेस्ट
३-४ कढीपत्ता पाने बारीक चिरून (ऐच्छिक)
२ टेस्पून कोथिंबीर, बारीक चिरून (ऐच्छिक)
दीड टीस्पून हिरव्या मिरच्यांची पेस्ट, भरडसर
चवीपुरते मीठ
२ ते ३ टेस्पून तेल, अप्पे बनवताना
कृती:
१) मीठ, आले पेस्ट,कोथिंबीर, कढीपत्ता आणि हिरव्या मिरच्यांची पेस्ट घालून इडलीचे पीठ मिक्स करावे.
२) अप्पे पात्र गॅसवर गरम करण्यास ठेवावे. प्रत्येक कप्प्यात दोनदोन थेंब तेल घालावे. इडलीचे पीठ चमच्याने घालून कप्पे भरावेत. झाकण ठेवून मध्यम आचेवर ३ ते ४ मिनिटे वाफ काढावी.
३) झाकण काढून अप्प्यांचे पृष्ठभाग तेलाने ब्रश करावे. अप्प्यांची बाजू पलटवावी. थोडेसे प्रेस करावे. परत झाकण ठेवून २ ते ३ मिनिटे अप्पे वाफवून घ्यावेत.
गरम अप्पे चटणीबरोबर सर्व्ह करावेत.
Tuesday, 4 October 2011
Dates Laddu
Dates Laddus in Marathi
Time: 15 minutes
Yield: 10 to 12 small laddus
Ingredients:
25 Dates, Pitted (1 cup after grinding)
1/2 cup Almonds, coarsely ground
1/2 cup grated dry coconut, lightly roasted
1 tbsp ghee
1 tsp Poppy seeds
Method:
1) Heat ghee into a pan. Add poppy seeds and roast for few seconds. Then add ground almonds, lightly toasted dry coconut and ground dates. Saute over low flame for 3 to 4 minutes.
2) Mix well. Transfer this mixture into a plate. Grease palms with little ghee. Take a small portion, press tightly and make round shaped laddu. Make laddus while mixture is still warm.
Do not make big laddus. One laddu should be the same size of a lemon.
Tips:
1) Black dates can be used instead of regular dates.
2) I had only used almonds. However, 1/2 cup mixture of pistachio, cashews and almonds can be used. If you want to add more dry-fruits, increase the amount of dates accordingly.
3) More ghee can be added to your taste.
4) I had used ready-made sliced almonds. Try not to use them because it becomes very difficult to shape laddus (they fall apart).
5) Use moist dates to make soft laddus.
खजुराचे लाडू - Khajurache Ladoo
Dates Laddu in English
वेळ: १५ मिनिटे
१० ते १२ लहान लाडू
साहित्य:
२५ खजूर, बिया काढून (मिक्सरमध्ये भरडसर वाटून १ कप)
१/२ कप बदाम, भरडसर वाटून
१/२ कप किसलेले सुके खोबरे, गुलाबीसर भाजून
१ टेस्पून तूप
१ टीस्पून खसखस
कृती:
१) खजुराच्या बिया काढून खजूर मिक्सरमध्ये भरडसर वाटून घ्यावे. नॉनस्टिक पॅनमध्ये तूप गरम करावे त्यात खसखस घालून काही सेकंद परतावे. त्यात भरडसर वाटलेले बदाम, खोबरे आणि खजूर घालून मंद आचेवर गरम करावे.
२) नीट मिक्स झाले कि थाळीमध्ये काढून ठेवावे. हाताच्या तळव्यांना थोडे तूप लावून मिश्रण कोमटसर असतानाच लाडू बांधावेत.
शक्यतो एक ते दोन घासात संपेल इतपतच लाडूचा आकार असावा. खजूर उष्ण असतात एक लाडू आणि त्यावर ग्लासभर दुध प्यायल्यास शरीराला भरपूर उष्मांक मिळतात.
टीपा:
१) साध्या खजूराप्रमाणेच काळ्या खजूराचेही अशाप्रकारे लाडू करू शकतो.
२) मी फक्त बदामच वापरले होते. आवडीनुसार पिस्ता किंवा काजू असे सर्व मिळून अर्धा कप वापरू शकतो. जर जास्त ड्राय फ्रुट्स वापरायची असतील तर खजूराचे प्रमाणही वाढवावे. नाहीतर लाडू नीट बांधले जात नाहीत.
३) तुपाचे प्रमाण आवश्यकतेनुसार वाढवावे.
४) मी बदामाच्या रेडीमेड काप मिळतात ते वापरले होते. ते शक्यतो वापरू नयेत कारण लाडू बांधायला थोडे त्रासदायक पडते.
५) खजूराला ओलसरपणा असावा. कोरडे खडखडीत खजूर लाडवांसाठी चांगले लागत नाहीत.
Subscribe to:
Posts (Atom)