Pages

Thursday, 28 April 2011

Cake in Pressure Cooker

Pressure cooker Cake in Marathi

Time - Preparation: 25 minutes | Baking: 35 to 40 minutes.
Yield: 8 to 10 medium pieces
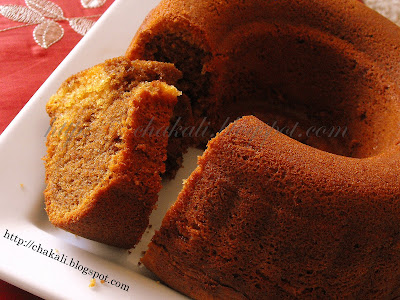
pressure cooker cake, Cake in pressure cooker, chocolate cake in cookerIngredients:
3/4 cup All purpose flour
250 to 300 gram Condensed milk (1/2 to 3/4 cup)
1/4 cup Butter (unsalted)
1/2 tsp Baking powder
1/2 tsp Baking soda
1/2 tsp vanilla essence
1/2 cup carbonated water (soda water)

how to bake cake in pressure cookerMethod:
1) Take a big pressure cooker. Remove the ring and weight from the lid. Close the pressure cooker with lid. Heat it over high flame for 8 to 10 minutes. Do not add water.
2) Grease a baking pan with some butter. Sieve all purpose flour, baking soda and baking powder together into a medium bowl
3) Take another deep and medium mixing bowl. Add softened butter and condensed milk. Beat using hand mixer or egg beater. Mix until well blended and smooth. Add vanilla essence and blend for a minute.
4) Now, add half of the all purpose flour to butter and condensed milk batter. Mix with the hand mixer. Then add half of the soda water and blend. Then again add flour, followed by soda water. Mix well until smooth consistency.
5) Pour the batter into greased cake tin. To remove excessive air bubbles, hit the pan very gently on the counter-top. Remove the cooker's lid. Turn the heat to medium. Put the cake tin inside with help of Pakkad (Indian Tong). Put the lid on and bake for 35 to 40 minutes. Do not open the cooker for first 25 minutes.
6) After 25 minutes open the lid. You will notice cake has risen nicely, but its not cooked inside. You may check by poking with toothpick in the middle of the cake. If you find wet batter on the toothpick, that means cake needs 10 to 12 minutes more to bake. Put the lid on.
7) After 10 to 12 minutes again check with toothpick. If it comes out clean, that means cake is ready.
Turn off the heat and use Pakkad to remove cake tin out of pressure cooker.
Remove the cake out from the cake tin and put it on a wired rack to cool down. After 15-20 minutes, cut the cake and its ready to enjoy.

Tips:
1) To get the perfect sweetness, taste the batter before pouring into cake tin. If you feel that batter needs to be little more sweet, add some condensed milk.
2) Do not forget to remove Pressure cooker ring and weight. Also DO NOT add water in the cooker.
3) Use thick Aluminum Metal cake tin. Thin metal might crack due to high heat.
4) To make the cake in two colors. Divide the batter into two portions. Keep one portion as it is. Add 2 to 3 tbsp dark coco powder and some condensed milk. Mix well. First add white portion of batter and then pour chocolaty portion over the white one. Now bake as per above method.
5) First of all, check whether cake tin fits inside the pressure cooker.
6) Do not fill the cake tin completely. Batter level should be upto a little over half. Otherwise, cake will overflow out of the tin.

प्रेशर कूकरमधील केक - Pressure Cooker Cake

Cake in Pressure cooker in English

८ ते १० मध्यम तुकडे
पूर्वतयारी - २५ ते ३० मिनीटे । बेकिंगसाठी - ३५ मिनीटे

pressure cooker cake, Cake in pressure cooker, chocolate cake in cookerसाहित्य:
३/४ कप मैदा
२५० ते ३०० ग्राम कंडेन्स मिल्क (१/२ ते ३/४ कप )
१/४ कप बटर (मिठविरहित)
१/२ टिस्पून बेकिंग पावडर
१/२ टिस्पून बेकिंग सोडा
१/२ टिस्पून वनिला इसेंस
१/२ कप प्यायचा सोडा (सोडा वॉटर)

how to bake cake in pressure cookerकृती:
१) प्रेशर कूकरमधील रींग आणि शिट्टी काढून ठेवावी. आणि प्रेशर कूकर झाकण लावून मोठ्या आचेवर गरम करण्यास ठेवावा. साधारण ८ ते १० मिनीटे गरम करावा. कूकरमध्ये पाणी घालू नये. कोरडाच गरम करावा.
२) नंतर मैदा, बेकिंग सोडा, आणि बेकिंग पावडर एकत्र करून चाळून घ्यावे. जर बेकिंग पावडरचे लहान गोळे असतील तर ते मोडून घ्यावे. केकटीनला आतून बटरचे कोटींग करावे.
३) एका खोलगट मध्यम बाऊलमध्ये मऊ झालेले बटर आणि कंडेन्स मिल्क एकत्र करावे. हॅंड मिक्सरने व्यवस्थित फेटून घ्यावे. बॅटर एकजिव झाले कि त्यात एकूण मैद्यापैकी १/२ भाग मैदा आणि १/२ भाग सोडा वॉटर घालून हॅंड मिक्सरने फेटून घ्यावे. पिठाच्या गुठळ्या राहू देवू नयेत.
४) नंतर उरलेला मैदा आणि सोडा वॉटर, तसेच वनिला इसेंस घालून परत फेटावे. अजून एक महत्त्वाची गोष्ट म्हणजे उगाचच मिश्रण फेटत राहू नये. गरजेपुरतेच बॅटर एकदम स्मूथ होईस्तोवर फेटावे. खुप जास्त फेटल्याने केक मध्यभागी सिंक होतो.
५) तयार बॅटर केक टीनमध्ये ओतावे. अतिरीक्त हवेचे बुडबूडे निघून जाण्यासाठी, केक टीन ओट्यावर हलकेच ठोकावा (३-४ वेळा). कूकरची आच मध्यम करावी. गरम कूकरचे झाकण उघडून त्यात पकडीच्या सहाय्याने केकटीन ठेवावा. झाकण लावावे आणि ३५ ते ४० मिनीटे केक बेक करावा. २५ मिनीटे होईस्तोवर कूकर अजिबात उघडू नये. बेकिग करताना मधेमधे झाकण उघडल्यास कूकरच्या आतील तापमान कमी होते व पदार्थ हवा तसा बेक होत नाही.
६) साधारण २५ मिनीटांनी कूकरचे झाकण उघडावे. आता केक फुललेला दिसेल पण आतून शिजला नसावा. तरीही मध्यभागी टूथपिकने टोचून पाहावे, जर ओलसर बॅटर लागले असेल तर अजून १०-१२ मिनीटे केक बेक होवू द्यावा.
७) १०-१२ मिनीटांनी टूथेपिकने मध्यभागी टोचून पाहावे. जर टूथपिकला ओलसर बॅटर लागले नसेल आणि टूथपिक क्लिन बाहेर आली तर केक बेक झाला असे समजावे. केकटीन पकडीच्या सहाय्याने बाहेर काढावा.
५ मिनीटांनी डब्याच्या बाहेर काढून जाळीवर काढून ठेवावा. गार झाला कि सुरीने कापून सर्व्ह करावा.

टीपा:
१) कंडेन्स मिल्क आवडीनुसार वाढवावे. वरील प्रमाणात बेताचा गोड होतो. काहीजणांना कमीगोड लागू शकतो, म्हणून बॅटर तयार झाले कि त्याची चव पाहावी, लागल्यास थोडे कंडेन्स मिल्क वाढवावे.
२) कूकरची रींग आणि शिट्टी काढायला विसरू नये. तसेच कूकरमध्ये पाणी घालू नये.
३) केकटीन जाड हिंडालियमचा असावा. पातळ मेटल घेऊ नये. उष्णतेमुळे भांड्याला तडा जाऊ शकते.
४) जर दोन कलरमध्ये केक बनवयाचा असेल तर केक बॅटरचे २ भाग करावे. एक भाग तसाच ठेवावा, दुसर्‍या भागात २ ते ३ टेस्पून डार्क कोको पावडर आणि थोडे कंडेन्स मिक्स घालावे. आधी पांढरा तसाच ठेवलेला भाग केकटीनमध्ये ओतावा. त्यावर कोको घातलेले बॅटर घालावे.आणि बेक करावे.
५) केकटीन कूकरमध्ये निट राहतो आहे कि नाही ते आधी तपासून पाहावे. नाहीतर कूकर लहान असल्यास काही करता येणार नाही.
६) केकचे बॅटर केकटीनमध्ये अर्ध्यापेक्षा किंचीत जास्त भरावे. भांडे पूर्ण भरू नये त्यामुळे केक फुलल्यावर भांड्याच्या बाहेर येतो.

Tuesday, 26 April 2011

Semolina Coconut Laddu

Rava coconut Laddu in Marathi

Yield: 22 to 24 medium laddus
Time: 30 minutes

rava laddu, rava recipes, laddu recipes, rava naralache ladu, coconut laddu, semolina ladoo, semolina laddu, semolina coconut ladduIngredients:
2 cup Rava (Fine)
1 cup scraped fresh coconut
1 and 1/2 cup sugar
1 cup water
3 to 4 tbsp pure ghee
1/2 tsp cardamom powder
25 Golden raisins

Method:
1) Dry roast rava over medium-high heat for 5 minutes. Stir continuously to prevent rava from burning. [Note - Do not roast too much until color changes as we are going to roast it again]
2) Transfer roasted rava to a big thali (plate). Add fresh coconut and mix. Let rava soak the moisture from coconut for 10 minutes.
3) Heat a pan. Add ghee and wait until it melts. Add rava-coconut mixture and roast for 8 to 10 minutes over medium-high heat. Stir continuously. After few minutes you will sense nice aroma of ghee and roasted rava. Roast until color changes very slightly.Transfer roasted rava to a big thali.
4) Now, prepare one string consistency sugar syrup. For that, mix sugar and water to a medium saucepan. Bring it to a boil. Stir occasionally. To check one string consistency, dip a spoon in syrup, touch carefully with your index finger. Press your index finger against your thumb.When finger and thumb pull apart, a thin string should form between them [the string will be for fraction of a second]. OR the easy way is, once syrup starts boiling, boil for 3 to 4 minutes and turn off the heat.
5) Immediately, pour the syrup on roasted rava. Mix nicely. Consistency of the mixture will be very loose. However it will thicken after sometime. Add cardamom powder. Mix this mixture occasionally.
Once mixture is thick enough to form a ball, make laddus. Stick one golden raisin on each laddu.

Tips:
1) The shelf life of laddus are no more than 7-8 days due to fresh coconut. If the weather is hot and humid it might be 3 to 4 days.
2) Usually, Rava gets in 3 qualities, Coarse, fine and superfine. For above recipe, use fine quality rava. Coarse rava will give grainy texture. Superfine rava almost looks like white flour, so it is not suitable for this recipe.
3) If the laddu mixture becomes dry, that means sugar syrup has got two or three string consistency. In that case, boil 1/2 cup water plus 3 tbsp sugar. Boil for 3 to 4 minutes and pour it on the mixture. Mix and make laddus after couple of hours.
4) Sliced dry fruits can be added according to your preference.
5) Use only white part of coconut and avoid black particles from shell.

रवा नारळाचे लाडू - Rava naralache ladu

Rava Coconut laddu in English

२२ ते २४ मध्यम लाडू
वेळ: ३० मिनीटे (मिश्रण आळायला लागणारा वेळ न धरता)

rava laddu, rava recipes, laddu recipes, rava naralache ladu, coconut laddu, semolina ladoo, semolina laddu, semolina coconut ladduसाहित्य:
२ कप बारीक रवा
१ कप खवलेला ताजा नारळ
दिड कप साखर
१ कप पाणी
३ ते ४ टेस्पून तूप
१/२ टिस्पून वेलची पूड
२५ बेदाणे

कृती:
१) रवा मध्यम आचेवर ४ मिनीटे कोरडाच भाजावा. तळापासून सारखे ढवळत राहावे जेणेकरून रवा जळणार नाही. [रंग बदलेस्तोवर भाजू नये, अगदी हलकेच भाजावे. नंतर परत रवा भाजायचा आहे.]
२) भाजलेला रवा परातीत काढावा. त्यात खवलेला नारळ घालावा आणि मिसळावे. नारळातील ओलसरपणा रव्यात उतरेस्तोवर (१० मिनीटे) तसेच ठेवावे.
३) कढई गरम करून त्यात तूप घालावे. तूप वितळले कि रवा-नारळाचे मिश्रण घालावे. ८ ते १० मिनीटे मिश्रण मिडीयम-हाय फ्लेमवर भाजावे. सतत तळापासून ढवळावे. काही वेळाने रवा आणि तूपाचा छान वास येईल. रव्याचा रंग हलका बदामी होईस्तोवर भाजावे. भाजलेले मिश्रण परातीत काढून ठेवावे.
४) साखर आणि पाणी एकत्र करून एकतारी पाक करावा. मिश्रण उकळायला लागले कि साधारण ३ ते ४ मिनीटांनी पाकाचा थेंब पहिले बोट आणि अंगठा यात पकडून उघडझाप करावी. जर एक तार दिसली कि पाक तयार आहे असे समजावे [हि तार अगदी सेकंदभरच दिसेल]. किंवा एकतारी पाक ओळखता येत नसेल. मिश्रण उकळायला लागले कि ३ ते ४ मिनीटात एकतारी पाक तयार होतो. पाक तयार झाला कि गॅस बंद करावा.
५) लगेच पाक रवा-नारळाच्या मिश्रणात ओतावा. मिक्स करावे. मिश्रण सुरूवातीला पातळ दिसेल पण काहीवेळाने घट्ट होईल. यात वेलचीपूड घालावी. मिश्रण आळेस्तोवर मधेमधे मिक्स करत राहावे.
मिश्रण आळले कि लाडू बनवावेत. प्रत्येक लाडवावर एकेक बेदाणा लावावा.

टीपा:
१) हे लाडू फार काळ टिकत नाहीत, जास्तीत जास्त ७-८ दिवस टिकतील. उष्ण आणि दमट हवामानात ३-४ दिवसच टिकतील. अशावेळी २-३ दिवसांनी लाडू फ्रिजमध्ये ठेवावे.
२) रवा साधारण ३ प्रकारचा मिळतो. जाड (coarse), बारीक (fine), एकदम बारीक (super fine). वरील रेसिपीसाठी बारीक रवा वापरावा. जाड रव्यामुळे लाडू चरचरीत लागतात. एकदम बारीक रवा पिठासारखाच दिसतो त्यामुळे रवा लाडूसाठी योग्य नसतो.
३) लाडूचे मिश्रण जर कोरडे झाले तर एकतारी पाक जरा जास्त आटल्याने दोन तारी किंवा तीन तारी झाला असावा. अशावेळी १/२ कप पाणी + ३ टेस्पून साखर असे मिश्रण उकळवावे. ३ ते ४ मिनीटे उकळवून पाक लाडू मिश्रणावर ओतावा. मिक्स करून मिश्रण आळले कि लाडू करावे.
४) आवडीनुसार सुका मेव्याचे तुकडे घालावे.
५) नारळाचा फक्त पांढरा भाग घ्यावा. करवंटीकडील काळपट भाग घेऊ नये.

Thursday, 21 April 2011

Dum Aloo

Dum aloo in Marathi

Time: around 1 hour
Serves: 3 to 4 persons

aloo recipes, dum aloo, kashmiri dum aloo, recipe of aloo dum, aloo dum recipe, Indian curry recipes, flavorful curryIngredients:
15 to 18 small potatoes (Tip)
1/2 cup finely chopped onion
1 cup finely chopped Tomato
1/2 inch piece of Ginger, finely chopped
4 to 6 big garlic cloves, finely chopped
2 tbsp cashew powder
4 tbsp plain yogurt, well beaten
1/2 tsp dry ginger powder, 1 tsp fennel seeds powder, 2 pinches clove powder
1 tsp coriander powder
1/2 tsp cumin powder
1 tsp garam masala
2 tsp kashmiri red chili powder (tip)
1 tsp red chili powder
salt to taste
3 tbsp oil
Oil for deep frying
Indian curry, butter masala curry, kashmiri dum aloo, dum aloo recipes, easy recipes, Indian restaurant, Restaurant style dum alooMethod:
1) Wash the potatoes. Boil 1 liter water. Add 1 tsp salt. Put the potatoes in, cover the pan and cook for around 7-8 minutes over high heat. Add some water if required. Don't cook potatoes fully. Cook enough, so that the skin is easily peelable. Once potatoes reach that point, drain the hot water and add cold water. Peel all the potatoes.
2) Heat oil in a kadai. Once oil is hot, turn the heat to medium. Deep fry potatoes till they turn golden brown. Do not fry over high heat. Potatoes will become brown quickly, but they will stay uncooked inside. Place the fried potatoes over a absorbent paper. Poke each fried potato 2-3 times with a fork.[This allows potatoes to soak the gravy.]
3) Heat 2 tbsp oil into a pan. Saute ginger-garlic for 10 seconds. Add onion and saute until translucent. Add red chili powder, cashew powder salt and tomato. Cook till tomato becomes mushy. Turn the heat off and let this mixture cool down. Grind it to a fine paste. Add little water if needed.
4) Heat 1 tbsp oil in that same kadai. Add turmeric powder and Kashmiri red chili powder. Add onion-tomato paste. Let the gravy boil. Then add dry ginger powder, fennel seeds powder, clove powder, coriander powder, cumin powder, and garam masala. Mix well.
5) Turn the heat to very low, 5 minutes before adding yogurt. Add yogurt and whisk quickly so that yogurt won't get spoil and become grainy. Therefore use egg beater to stir the gravy.
6) Once yogurt is well blended, add fried potatoes. Cover the pan and cook for 15 minutes. Stir occasionally.
Adjust the consistency to your own preference. Serve hot with white rice or chapati.

Tips:
1) In case, if baby potatoes are unavailable, cut the normal potatoes in big chunks and they are good to use.
2) Kashmiri red chili powder is used for bright red color. It's not much spicy, therefore normal red chili powder (cayenne) is also required.

काश्मिरी दम आलू - Kashmiri Dum Aloo

Kashmiri Dum Aloo in English

वेळ: साधारण १ तास
वाढणी: ३ ते ४ जणांसाठी

aloo recipes, dum aloo, kashmiri dum aloo, recipe of aloo dum, aloo dum recipe, Indian curry recipes, flavorful curryसाहित्य:
१५ ते १८ लहान बटाटे (टीप)
१/२ कप कांदा, बारीक चिरून
१ कप टोमॅटो, बारीक चिरून
१/२ इंच आल्याचा तुकडा, बारीक चिरून
४ ते ६ मोठ्या लसूण पाकळ्या, बारीक चिरून
२ टेस्पून काजूची पूड
४ टेस्पून दही, फेटून
१/२ टिस्पून सुंठ पावडर, १ टिस्पून बडीशेप पावडर, २ चिमटी लवंग पावडर
१ टिस्पून धणेपूड
१/२ टिस्पून जिरेपूड
१ टिस्पून गरम मसाला
२ टिस्पून काश्मिरी लाल तिखट (टीप)
१ टिस्पून साधं लाल तिखट
१/४ टिस्पून हळद
चवीपुरते मिठ
३ टेस्पून तेल
तळणासाठी तेल
Indian curry, butter masala curry, kashmiri dum aloo, dum aloo recipes, easy recipes, Indian restaurant, Restaurant style dum alooकृती:
१) बटाटे धुवून घ्यावेत. पातेल्यात मिठाचे पाणी उकळवावे. त्यात हे बटाटे सोडून १० मिनीटे झाकण ठेवून किंचीत शिजू द्यावे, जेणेकरून वरचे साल काढता येईल. १० मिनीटांनी पातेल्यातील गरम पाणी काढून गार पाणी सोडावे. आणि बटाट्याचे साल काढून घ्यावे.
२) कढईत तेल गरम करून त्यात बटाटे मिडीयम हाय आचेवर गोल्डन ब्राऊन तळून घ्यावे. खुप भरभर तळून काढू नये. नाहीतर बटाटे बाहेरून ब्राऊन होतात आणि आतून शिजत नाहीत. तळलेले बटाटे टिपकागदावर काढून घ्यावेत. काट्याने किंचीत टोचून घ्यावे, म्हणजे ग्रेव्हीमध्ये घातल्यावर आतपर्यंत ग्रेव्ही मुरेल.
३) कढईत २ चमचे तेल गरम करून त्यात आले लसूण परतावे. कांदा घालून लालसर होईस्तोवर परतावे. साधं लाल तिखट, काजूची पूड आणि टोमॅटो घालावा.मिठ घालून टोमॅटो अगदी नरम होईस्तोवर परतावे. हा मसाला थोडा गार होवू द्यावा. नंतर थोडे पाणी घालून मिक्सरमध्ये एकदम बारीक वाटून घ्यावे.
४) त्याच कढईत १ चमचा तेल घालून हळद आणि काश्मिरी लाल तिखट घालावे. त्यावर कांदा-टोमॅटोची प्युरी घालावी. प्युरी उकळायला लागली कि त्यात सुंठ पावडर, बडीशेप पावडर, लवंग पावडर, धणेपूड, जिरेपूड, गरम मसाला घालून मिक्स करावे.
५) दही घालण्यापूर्वी ५ मिनीटे आच एकदम कमी करावी. नंतर दही घालून भराभर मिक्स करावे म्हणजे दही फुटणार नाही. एग बिटरने मिक्स करावे म्हणजे दही व्यवस्थित मिक्स होईल.
६) दही निट मिक्स झाले कि तळलेले बटाटे घालावेत आणि झाकण ठेवून १५ मिनीटे ग्रेव्ही आटू द्यावी. मधेमधे झाकण काढून ढवळावे म्हणजे ग्रेव्ही तळाला चिकटणार नाही.
गरजेइतका दाटपणा येऊ द्यावा. ग्रेव्ही भातावर किंवा पोळीबरोबर उत्तम लागते.

टीपा:
१) जर लहान बटाटे नसतील बटाट्याचे मोठे तुकडे करून वरीलप्रमाणेच वापरता येतील.
२) काश्मिरी तिखट रंग येण्याकरता घातले आहे. या मिरची पावडरला तिखटपणा नसतो म्हणून नेहमीच्या वापरातील लाल तिखटही घालावे.

Tuesday, 19 April 2011

Ukarpendi

Ukadpendi in Marathi

Time: 15 minutes
Serves: 2 persons

ukadpendi, maharashtrian recipes,breakfast recipes, snacks, quick breakfastIngredients:
1/2 cup Wheat flour (coarse)
3 tbsp oil
1/4 cup onion, finely chopped
4 to 5 curry leaves
For tempering:- pinch of mustard seeds, 1/4 tsp hing, 1/8 tsp turmeric, 2 dried red chilies
1/2 cup plain sour yogurt, well beaten
1/4 cup water (tip 1)
Salt to taste

Method:
1) Heat 2 tbsp oil into a pan. Roast wheat flour over medium heat. Roast till color changes to light pink (around 5 minutes). Transfer roasted flour to a bowl.
2) In that same pan, add 1 tbsp oil. Add mustard seeds, hing, turmeric powder, red chilies and curry leaves. Saute for few seconds and add onion. Mix well, add salt and cook onion till translucent.
3) Add roasted flour. Mix nicely for couple of minutes. Mix yogurt and water. Stir well and add to the pan. Stir vigorously as the mixture will become doughy. So, act quickly to avoid lumps. Cover the pan and steam cook over low heat for few minutes.
Garnish with cilantro and serve hot.

Tips:
1) Amount of water depends on what consistency you want the ukad to be. Above water quantity is good for doughy consistency. For little loose and soft consistency add some more water.
2) Usually ukad is kneaded with little oil and then served in a ball shape. To knead the ukad, transfer hot ukad into a big plate. Drizzle couple tbsp of oil and knead while ukad is hot (Use pastel or base of mortar to avoid burning hands). Serve immediately.
3) Instead of Red chilies, green chilies or red chili powder can be used.
4) Onion is optional. But, it tastes good in this dish. Garlic can be used instead of onion. Also, green peas, carrot pieces, soaked matki may be added according to your preference.
5) Rice flour, besan or jowar flour can be used instead of wheat flour. Follow the same method. Or mixture of different flours may also work.

उकडपेंडी - Ukadpendi

Ukadpendi in English

वेळ: १५ मिनीटे
वाढणी: २ जणांसाठी

ukadpendi, maharashtrian recipes,breakfast recipes, snacks, quick breakfastसाहित्य:
१/२ कप रवाळ कणिक
३ टेस्पून तेल
१/४ कप कांदा, बारीक चिरून
४ ते ५ कढीपत्ता पाने
फोडणीसाठी: चिमटीभर मोहोरी, १/४ टिस्पून हिंग, १/८ टिस्पून हळद, २ सुक्या लाल मिरच्या
१/२ कप दही, घोटलेले
१/४ कप पाणी (टीप १)
चवीपुरते मिठ

कृती:
१) कढईत तेल गरम करावे. कणिक मध्यम आचेवर गुलाबीसर भाजून घ्यावी (साधारण ५ ते ७ मिनीटे). भाजलेली कणिक लहान वाडग्यात काढून ठेवावी.
२) त्याच कढईत १ टेस्पून तेल घालावे. मोहोरी, हिंग, हळद, लाल मिरच्या आणि कढीपत्ता घालून फोडणी करावी. कांदा घालून गुलाबीसर होईस्तोवर परतून घ्यावा. मिठ घालून मिक्स करावे.
३) भाजलेली कणिक घालून एक-दोन मिनीट मिक्स करावे. दही आणि पाणी मिक्स करावे आणि हे मिश्रण कढईत ओतावे. आणि पटापट मिक्स करावे. मिश्रणाचा गोळा तयार होईल. एकदम व्यवस्थित मिक्स करावे, गुठळी होवू देऊ नये. झाकण ठेवून मंद आचेवर काही मिनीटे वाफ काढावी.
कोथिंबीरीने सजवून सर्व्ह करावे.

टीपा:
१) उकड पातळ किंवा घट्ट हवी असेल त्याप्रमाणे पाण्याचे प्रमाण कमी किंवा जास्त करावे. वरील कृतीमध्ये घट्ट उकड होईल एवढे पाण्याचे प्रमाण दिले आहे. पण उकड पातळ हवी असेल तर पाणी जास्त घालावे.
२) उकड ही कच्चं तेल घालून, चांगली मळून मग खातात. त्यासाठी घट्ट उकड करावी. गरमच असताना परातीत घेऊन थोडे तेल घालून लगेच मळावी. गरम मळताना चटका बसतो म्हणून उकड मळण्यासाठी लाकडी चकती मिळते ती वापरावी. ती जर नसेल तर खलबत्त्यातील खलायचे भांडे घ्यावे. त्याच्या तळाला तेल लावून त्याने मळावी. गरम गरम उकड सर्व्ह करावी.
३) लाल मिरची ऐवजी काहीजण हिरवी मिरची किंवा लाल तिखटही वापरतात.
४) कांदा हा ऐच्छिक आहे. पण चव चांगली येते कांद्यामुळे. तसेच कांद्याऐवजी लसूण वापरता येते. अधिक पौष्टीक बनवायची असल्यास मटार, गाजराचे तुकडे, भिजवलेली मूग-मटकीही घालू शकतो.
५) ही उकड तांदूळाची, बेसनाची, ज्वारीच्या पिठाची करता येते. पद्धत हीच फक्त पिठ वेगवेगळे वापरावे. किंवा मिश्र पिठाची सुद्धा उकड बनवता येते.

Wednesday, 13 April 2011

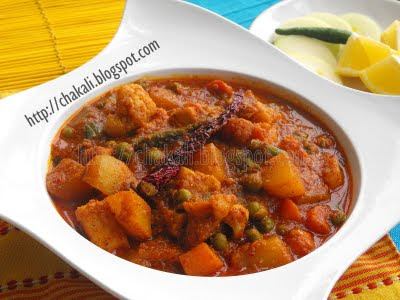
Vegetable Kolhapuri

Veg Kolhapuri in Marathi

Time: 40 minutes
Serves: 4 Persons

veg kolhapuri, Maharashtrian curry, Indian curryIngredients:
1/2 cup Carrot, medium cubes
3/4 cup potato, medium cubes (Peel and then cut)
1/2 cup Cauliflower, medium florets (I used frozen) (Tip)
1/2 cup Green peas, (I used frozen)
1/4 cup french beans, 1 inch pieces
1/2 cup onion, finely chopped
1 cup tomato, finely choppedhttp://www.blogger.com/img/blank.gif
1/2 inch ginger, finely chopped
4 to 6 big garlic cloves
1 to 1.5 tbsp Kashmiri red chili powder (Tip 3 and 5)
2 tsp red chili powder (cayenne)
1/4 tsp turmeric powder
6 tbsp oil
2 tbsp Kolhapuri Masala
2 tbsp fried cashewnuts
other spices:
1/4 tsp cardamom powder
2 pinches clove powder
1/2 tbsp fennel seeds powder (Saunf)
1/2 tsp cinnamon powder
1 pinch nutmeg powder
salt to taste

Method:
1) Heat 2 tbsp oil in a kadai. Saute ginger garlic. Add onion and fry till color changes to pink. Add red chili powder and tomato. Sprinkle some salt and cook till tomato becomes mushy. Remove kadai from heat and let this mixture cool down. Then grind to a fine puree by adding some water.
2) Use the same kadai and heat around 3 tbsp oil. Keep the flame on medium. Add turmeric and 1/2 tsp kashmiri red chili powder. Immediately add potato and french beans. Mix well and cook covered for 2-3 minutes. Stir couple of times in between to prevent burning. Now turn the heat from medium to high. Add onion-tomato puree. Stir well and add some water (about 1/2 cup)
3) Once gravy starts boiling, add kolhapuri masala, fennel seeds powder, clove powder, cinnamon powder, cardamom powder, and salt to taste. Also, add carrots, peas and cauliflower. Cover the kadai and simmer over medium heat for atleast 10 minutes or till veggies get cooked.
In a small tadka pan, heat 1 tbsp oil. Add 1 tbsp kashmiri red chili powder and immediately (Tip) pour it over the prepared vegetable curry.
Stir well and serve hot. Garnish with fried cashews.

Tips:
1) This curry should be enough spicy. However, adjust the amount of red chili powder to give required heat.
2) Kashmiri Red chili powder gives very nice bright red color to the curry. That's why, Kashmiri chili powder has been used for color and normal red chili powder (cayenne) has been used for spiciness.
3) Tadka given at the end is completely optional. This tadka gives reddish shimmery touch to the dish. Another important thing is after adding Kashmiri chili powder to hot oil, pour this tadka immediately. Otherwise chili powder will get burn.
4) Spices given under 'other spices' look very little in quantity but collectively they give light pleasant flavor to the curry. According to preference, adjust the amount of spices.
5) Kashmiri red chili powder gives nice bright red color and flavor to the curry. If its unavailable, use pinch of edible red color.

व्हेज कोल्हापूरी - Veg Kolhapuri

Veg Kolhapuri in English

वेळ: ४० मिनीटे
वाढणी: ४ जणांसाठी

veg kolhapuri, Maharashtrian curry, Indian curryसाहित्य:
१/२ कप गाजराचे चौकोनी तुकडे
३/४ कप बटाटयाचे मोठे तुकडे (बटाटा सोलून)
१/२ कप कॉलीफ्लॉवरचे मध्यम तुरे (फ्रोझन)
१/२ कप हिरवे मटार (फ्रोझन)
१/४ कप फरसबीचे तुकडे (१ इंच)
१/२ कप कांदा, बारीक चिरून
१ कप टोमॅटो, बारीक चिरून
१/२ इंच आल्याचा तुकडा, बारीक चिरून
४ ते ६ मोठ्या लसूण पाकळ्या, बारीक चिरून
१ ते दिड टेस्पून काश्मिरी लाल तिखट (टीप ३ व ५)
२ टिस्पून साधं लाल तिखट
१/४ टिस्पून हळद
६ टेस्पून तेल
२ टेस्पून कोल्हापूरी मसाला
इतर मसाले:
१/४ टिस्पून वेलची पावडर
२ चिमटी लवंग पावडर
१/२ टिस्पून बडीशेप पावडर
१/२ टिस्पून दालचिनी पावडर
१ चिमटी जायफळ पावडर
चवीपुरते मिठ

कृती:
१) कढईत २ टेस्पून तेल गरम करावे. त्यात आलं-लसूण परतून घ्यावे. कांदा घालून लालसर होईस्तोवर परतावे. साधं लाल तिखट आणि टोमॅटो घालावा.मिठ घालून टोमॅटो अगदी नरम होईस्तोवर परतावे. हा मसाला थोडा गार होवू द्यावा. नंतर थोडे पाणी घालून मिक्सरमध्ये एकदम बारीक वाटून घ्यावे.
२) त्याच कढईत ३ टेस्पून तेल, मध्यम आचेवर गरम करावे त्यात हळद आणि १/२ टिस्पून काश्मिरी लाल तिखट घालून लगेच फरसबी आणि बटाट्याचे तुकडे घालावे. मिक्स करून २ ते ३ वाफा काढाव्यात. बटाटे किंचीतच शिजू द्यावे. आच मोठी करून (बटाटे व तिखट करपणार नाही याची काळजी घ्यावी.) कांदा-टोमॅटोची प्युरी घालावी. आच मोठी ठेवल्याने तेल व्यवस्थित तापते आणि फोडणी चांगली बसते. मिश्रण निट ढवळून गरजेपुरते पाणी घालावे.
३) कढईतील मिश्रणाला उकळी येऊ द्यावी. त्यात कोल्हापूरी मसाला, बडीशेप पावडर, लवंग पावडर, दालचिनी पावडर, वेलचीपूड आणि चवीपुरते मिठ घालावे. गाजर, मटार आणि कॉलीफ्लॉवर घालावा. मध्यम आचेवर झाकण ठेवून शिजू द्यावे. १० मिनीटे शिजवावे.
भाजी तयार झाली कि १ ते दिड टिस्पून तेल फोडणीसाठीच्या कढल्यात गरम करावे. १ टेस्पून काश्मिरी लाल तिखट घालावे. आणि लगेचच हि फोडणी भाजीवर ओतावी. (टीप)
ढवळून भाजी सर्व्ह करावी.

टीप:
१) हि भाजी तिखटच असते, पण आपल्या आवडीनुसार तिखटाचे प्रमाण कमीजास्त करावे.
२) काश्मिरी लाल तिखटाला खुप छान लाल रंग असतो पण तिखटपणा नसतो. म्हणून नेहमीच्या वापरातील लाल तिखट हे तिखटपणासाठी आणि काश्मिरी लाल तिखट हे रंगासाठी वापरले आहे.
३) शेवटला जी काश्मिरी लाल तिखटाची फोडणी घालायची आहे ती पूर्णत: ऐच्छिक आहे, या फोडणीमुळे भाजीवर मस्तपैकी लालसर तवंग येतो. तसेच हि फोडणी घालताना तिखट गरम तेलात टाकल्याटाकल्या भाजीवर ओतावी, वेळ लावू नये नाहीतर तिखट करपते.
४) जे मसाले वापरले आहेत ते जरी कमी प्रमाणात आहेत तरी एकत्रितपणे खुप छान हलकासा स्वाद या भाजीला येतो. आवडीनुसार कुठलाही मसाल्याचे प्रमाण किंचीत वाढवले तरी चालते.
५) काश्मिरी लाल तिखटाने स्वाद आणि रंग चांगला येतो. जर अगदीच काश्मिरी लाल तिखट मिळाले नाही तर त्याऐवजी खायचा लाल रंग चिमूटभर वापरू शकतो.

Monday, 11 April 2011

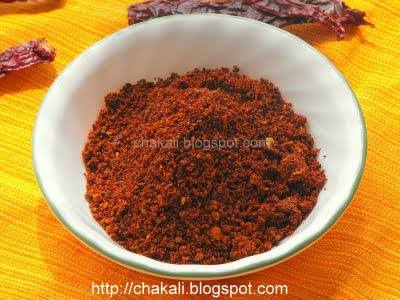
Kolhapuri Masala

Kolhapuri Masala in Marathi

Time: 15 to 20 minutes
Yield: approx 3/4 to 1 cup Masala

kolhapuri masala, indian garam masala, kolhapuriIngredients:
1 cup dry red chilies (Tip 1)
1/2 cup grated dry coconut
2 tbsp sesame seeds
1 tbsp coriander seeds
1 tbsp cumin seeds
1 tbsp black pepper
1 tsp mustard seeds
1 tsp fenugreek seeds
2 bay leaves
1 tsp cloves
1 tsp oil
1/4 tsp nutmeg powder
2 tbsp Kashmiri red chili powder

Method:
1) Take a kadai. Add all the spices except red chili powder and nutmeg powder. we will be adding these both ingredients at the end.
2) Drizzle 1 tsp oil and coat all the spices by mixing well. Roast these spices over medium high heat. Stir continuously to avoid burning.
3) After 5 to 8 minutes, edges of red chilies will blacken, mustard seeds will crackle, coriander-cumin seeds will become dark reddish. Also, you will sense nice aroma of roasted spices. This is the sign that spices are roasted nicely. Do not roast too much, otherwise spices will burn and get unpleasant bitter taste.
4) Transfer roasted spices to a big plate. Let them cool completely. Grind it to a fine powder. Add nutmeg and red chili powder. Mix well.
Take a clean glass container or any airtight container. Put all the masala in it and close with lid. Store in a dry place.

Tips:
1) Use hot red chilies. I used 1/2 cup kashmiri red chilies and half cup normal hot red chilies. Kashmiri chilies don't provide heat. They only give deep red color to this masala. whether use any proportion or use only hot chilies, its upto you.
2) Do not grind until spices are completely cold. If ground before spices are cold, the masala blend will become moist and cakey.

कोल्हापूरी मसाला - Kolhapuri Masala

Kolhapuri Masala in English

वेळ: १५ ते २० मिनीटे
साधारण पाऊण ते १ कप मसाला

kolhapuri masala, indian garam masala, kolhapuriसाहित्य:
१ कप सुक्या लाल मिरच्या
१/२ कप सुक्या खोबर्‍याचा किस
२ टेस्पून तीळ
१ टेस्पून धणे
१ टेस्पून जिरे
१ टेस्पून काळी मिरी
१ टिस्पून मोहोरी
१ टिस्पून मेथीदाणे
२ तमालपत्र
१ टिस्पून लवंग
१ टिस्पून तेल
१/४ टिस्पून जायफळपूड
२ टेस्पून काश्मिरी लाल तिखट

कृती:
१) कढईत वरील सर्व मसाले [’काश्मिरी लाल तिखट आणि जायफळ पूड’ वगळून] एकत्र करावे. लाल तिखट आणि जायफळ पूड आपण शेवटी मसाला तयार झाल्यावर त्यात घालायचे आहे.
२) मिक्स केलेल्या सर्व मसाल्यांना १ टिस्पून तेल हलकेच चोळून घ्यावे. मिडीयम हाय आचेवर हे सर्व मसाले भाजून घ्यावे. भाजताना कालथ्याने सतत ढवळावे.
३) मिरचीच्या कडा थोड्या काळ्या होतील, मोहोरी तडतडेल, धणे-जिरे-तिळ थोडे ब्राऊन होईल. असे झाल्यावर मसाले भाजले गेलेत असे समजावे. तसेच मसाले भाजले गेल्याचा छानसा वासही येईल. मसाले खुप काळपट भाजू नयेत किंवा करपवू नयेत.
४) भाजलेले मसाले लगेच दुसर्‍या ताटात पसरवून ठेवावेत. गार झाले कि मिक्समध्ये बारीक वाटावेत. तयार मसाल्यात जायफळ पूड आणि रंगासाठी २ टेस्पून काश्मिरी लाल तिखट घालावे.
तयार मसाला घट्ट झाकणाच्या काचेच्या किंवा प्लास्टिकच्या बरणीत भरून कोरड्या जागी ठेवावा.

टीपा:
१) लाल तिखट मिरच्या वापराव्यात. मी १/२ कप तिखट लाल मिरच्या आणि १/२ कप काश्मिरी मिरच्या वापरल्या होत्या. काश्मिरी लाल मिरच्यांना फारसा तिखटपणा नसतो. पण रंग फार सुरेख येतो. म्हणून १ कप मिरच्या कशा प्रमाणात घ्यायच्या किंवा पूर्ण लाल तिखट मिरच्या घ्यायच्या ते आवडीनुसार ठरवावे.
२) मसाले पूर्ण गार होत नाहीत तोवर मिक्सरमध्ये बारीक करू नयेत. जर केल्यास मसाल्याला दमटपणा येतो आणि मसाला मोकळा रहात नाही.

Thursday, 7 April 2011

Khoya matar paneer

khoya matar paneer in Marathi

Time: 35 to 40 minutes
Serves: 2 to 3 persons

khoya matar paneer, mutter paneer recipeIngredients:
3/4 cup green peas (Frozen)
3/4 cup Khoya, roasted
150 grams Paneer, small cubes (Tip 1)
3/4 cup tomato puree (Tip 2)
1/2 cup milk/ water
1 tsp Ghee
1 small piece of ginger, finely grated
1/2 tsp red chili powder
1/4 tsp cumin seeds (Optional)
1 tsp coriander powder
1/2 tsp cumin powder
7-8 cashews, (reserve few for garnishing)
1 tbsp golden raisins + few more raisins for garnishing
1 tsp sugar
salt to taste
Whole spices - 1 bay leaf, 2-3 cloves, 3-4 Pepper corns, 2 green cardamom, 1 small stick of Cinnamon or 1/2 tsp cinnamon powder (Tip 4)

Method:
1) Heat a skillet. Lightly roast the whole spices. Cloves will puff up and cardamom will pop open. Grind the spices to fine powder.
2) Heat ghee in a pan. Add cashew-nuts, cumin, ginger and tomato puree. Cover the pan and cook for couple of minutes.
3) Add khoya, 1 tsp ground spices and mix well. Try to break as many lumps as you can. However, tiny lumps and grainy texture are expected. Saute until well blended.
4) Add peas and water/milk. Mix well, cover and cook for 4-5 minutes.
5) Now add coriander-cumin powder, sugar, red chili powder, raisins and salt. Cook for couple of minutes.
6) Finally add paneer cubes. Mix well and cook for couple more minutes.
Serve hot.

Tips:
1) When using store bought paneer, cut into cubes. Immerse them into hot water for 2 minutes. Paneer will become soft and there won't be any need to deep fry.
2) If tomatoes are not enough sour, add very little amchoor powder.
3) Mix the gravy well after adding milk to avoid curdling.
4) If using cinnamon powder, do not roast it. Add directly along-with coriander-cumin powder.

खोया पनीर मटर - Khoya paneer Matar

Khoya matar Paneer in English

वेळ: ३५ ते ४० मिनीटे
वाढणी: २ ते ३ जणांसाठी

khoya matar paneer, mutter paneer recipe, Indian curry, Indian paneer mutar recipe, Restaurant style curry
साहित्य:
३/४ कप मटार (फ्रोझन)
३/४ कप खवा, भाजलेला
१५० ग्राम पनीर, लहान चौकोनी तुकडे (टीप १)
३/४ कप टोमॅटो प्युरी,
१/२ कप दुध/ पाणी
१ टिस्पून तूप
१ लहान आल्याचा तुकडा, बारीक किसून
१/२ टिस्पून लाल तिखट
१/२ टिस्पून जिरे (ऐच्छिक)
१ टिस्पून धणेपुड
१/२ टिस्पून जिरेपूड
७ ते ८ काजू बी, (थोडे सजावटीसाठी ठेवावे)
१ टेस्पून बेदाणे + अजून थोडे सजावटीसाठी
१ टिस्पून साखर
चवीपुरते मिठ
अख्खा गरम मसाला= १ तमाल पत्र, २ लवंगा, ३ ते ४ मिरीदाणे, २ हिरवी वेलची, १ लहान दालचिनीची काडी किंवा १/२ टिस्पून दालचिनी पावडर

कृती:
१) कढई गरम करून त्यात आख्खे गरम मसाले हलके भाजून घ्यावे. भाजले गेल्यावर लवंगा फुगतात आणि वेलची फुगून फुटते. हे सर्व मसाले कुटून घ्यावे किंवा मिक्सरमध्ये बारीक करावे.
२) कढईत तूप गरम करावे. त्यात काजू, जिरे, आलं आणि टोमॅटो प्युरी घालावी. कढईवर झाकण ठेवून २-३ मिनीटे शिजू द्यावे.
३) भाजलेला खवा आणि १ टीस्पून कुटलेला मसाला घालून मिक्स करावे. जमतील तेवढ्या गुठळ्या फोडाव्यात. तरी, बारीक बारीक गुठळ्या आणि रवाळ टेक्स्चर अपेक्षित आहे. चांगले मिळून येईस्तोवर परतावे (३-४ मिनीटे)
४) आता मटार आणि दुध/ पाणी घालावे. मिक्स करून झाकण ठेवावे व ४-५ मिनीटे शिजू द्यावे.
५) धणे-जिरेपूड, साखर, लाल तिखट, बेदाणे आणि मिठ घालून मिक्स करावे. २-३ मिनीटे उकळी काढावी.
६) शेवटी पनीर घालून १-२ मिनीटे उकळी काढावी.
गरमच सर्व्ह करावी.

टीपा:
१) जेव्हा विकतचे पनीर वापरत असाल तेव्हा पनीरचे लहान चौकोनी तुकडे करावेत. गरम पाण्यात २ मिनीटे बुडवून ठेवावेत. पनीर छान मऊसुत होईल आणि तळायला लागणार नाही.
२) जर टोमॅटोला आंबटपणा नसेल तर थोडीशी आमचूर पावडर घालावी.
३) दुध घातल्यावर ग्रेव्ही व्यवस्थित मिक्स करावी नाहीतर दुध फुटते आणि ग्रेव्ही चोथापाणी होते.
४) जर दालचिनी पावडर वापरणार असाल तर ती इतर मसाल्यांबरोबर भाजू नये, भाजल्यास करपते. म्हणून धणे-जिरेपूड बरोबर दालचिनी पावडर भाजीत घालावी.