Pages

Thursday, 30 December 2010

मसाला पापड - Masala Papad

Masala papad in English

वेळ: १० ते १५ मिनीटे
नग: ४
masala papad, punjabi masala papad, quick easy appetizer recipe, masala papad recipe
साहित्य:
४ उडदाचे पापड (५ ते ६" व्यास)
१/४ कप कांदा, बारीक चिरून
१/४ कप टोमॅटो, बारीक चिरून
२ टेस्पून कोथिंबीर, बारीक चिरून
१/२ टिस्पून लाल तिखट किंवा चवीनुसार
१/२ टिस्पून चाट मसाला
१ टिस्पून लिंबू रस (ऐच्छिक)
चवीनुसार मिठ
तेल, पापड तळण्यासाठी

कृती:
१) एका कढईवजा पॅनमध्ये पापड बुडण्याइतपत तेल गरम करावे. नेहमीप्रमाणे पापड तळून घ्यावे.
२) चिरलेल्या कांद्याला थोडा लिंबाचा रस चोळून घ्यावा.
३) पापडावर चाट मसाला आणि लाल तिखट भुरभूरावे. कांदा टोमॅटो पसरावा. मिठ पेरावे.
कोथिंबीरीने सजवून लगेच सर्व्ह करावे.

टीपा:
१) नेहमीच्या लहान कढईत पापड तळला तर कधीकधी फोल्ड होतो. अशावेळी पसरट पॅनमध्ये तळल्यास पापड फोल्ड होत नाही तसेच तळायला तेलही कमी लागते.
२) लिंबाच्या रसामुळे खुप छान चव येते. परंतु, जर लिंबाचा रस वापरणार असाल तर मसाला पापड लागलीच सर्व्ह करावा नाहीतर लगेच मऊ पडतो.
३) मी जिरं असलेला उडदाचा पापड वापरला होता. शक्यतो प्लेन उडीद पापड वापरावा. आवडीनुसार वेगळ्या फ्लेवरचा उडदाचा पापड वापरला तर थोडी वेगळी चव येते. मिरी फ्लेवरचा पापड वापरला तर लाल तिखट कमी घालावे किंवा घालूच नये.
४) पापड भाजला तरीही चालतो. पण, भाजका पापड कांदा-टोमॅटोतील पाणी शोषून लगेच मऊ पडतो.
५) सजावटीसाठी बारीक शेव वापरली तर पापड अजून आकर्षक दिसतो.

Masala Papad

Masala Papad in Marathi

Time: 10 to 15 minutes
Serves: 4 persons

masala papad, punjabi masala papad, quick easy appetizer recipe, masala papad recipeIngredients:
4 Urad Papad (5 to 6" dia)
1/4 cup onion, finely chopped
1/4 cup tomato, finely chopped
2 tbsp Cilnatro (coriander), finely chopped
1/2 tsp red chili powder or to taste
1/2 tsp Chaat Masala
1 tsp lemon juice (optional)
Salt to taste
Oil to deep fry

Method:
1) Heat a flat pan (Tip 1). Add oil and deep fry Papad as usual.
2) Rub lemon juice to the chopped onion. (Tip 2)
3) Sprinkle Red chili powder (Tip 3)and chaat masala over the papad. Also spread tomato and onion. Sprinkle very little salt.
Garnish with Cilantro and serve immediately.

Tips:
1) Usually we use kadai to deep fry papad. But, sometimes papad gets twisted while frying. Hence I used flat pan. It requires very little oil and papad does not fold or twist.
2) Lemon juice gives nice tangy flavor. However, masala papad should be served immediately after adding lemon juice. Otherwise, papad becomes mushy.
3) I had used Jeera flavored Papad. It is better to use plain urad papad. You may use other flavors urad papad, but the taste changes a bit. Sprinkle very little red chili powder, when using Miri flavored (black pepper) Papad.
4) Papad can be roasted instead of frying. However, roasted papad soaks the moisture and gets mushy immediately.
5) Fine sev can be sprinkled to make the masala papad more attractive.

Tuesday, 28 December 2010

गुळपोळी - gulpoli

Gulpoli in English

वेळ: साधारण २ तास
नग: जवळपास २५ मध्यम गुळपोळ्या

gulpoli, tilachi poli, tilgulachi poli, makar sankrant
साहित्य:
सारणासाठी
१/२ किलो गूळ
१ कप बेसन
२ सुक्या नारळाच्या वाट्या
३/४ कप तिळ
१/२ कप शेंगदाणे
१/२ कप खसखस
१/२ कप तेल
आवरणासाठी
दिड कप मैदा
३/४ कप कणिक
२ टेस्पून तेल
चिमूटभर मिठ
२ टेस्पून बेसन (ऐच्छिक)

कृती:
१) सुक्या नारळाच्या वाट्या किसून घ्याव्यात. सोनेरी रंग येईस्तोवर कोरडेच भाजावे. हाताने चुरून घ्यावे. हा चुरा आपल्याला १/२ ते ३/४ कप हवा आहे. कमी असल्यास अजून थोडं खोबरं भाजून चुरा करावा.
२) तिळ व खसखस स्वतंत्र, कोरडेच भाजून घ्यावे. बारीक पूड करून घ्यावी
३) शेंगदाणे भाजून त्याची साले काढून टाकावीत आणि एकदम बारीक कूट करून घ्यावा.
४) एका मध्यम पण जाड बुडाच्या पातेल्यात १/२ कप तेल गरम करावे. त्यात १ कप बेसन खमंग भाजून घ्यावे.
५) गूळ बारीक किसणीवर किसून घ्यावा. सर्व भाजलेले जिन्नस (तिळ, खसखस, शेंगदाणे, बेसन, सुकं खोबरं) गूळामध्ये घालून मळून घ्यावे आणि घट्ट गोळा करावा.
६) मैदा, कणिक, मिठ आणि बेसन (ऐच्छिक) एकत्र करावे. २ टेस्पून तेल कडकडीत गरम करून पिठात घालावे. पाणी घालून मध्यमसर घट्ट गोळा भिजवावा. लागल्यास थोडे साधं तेल घालावे. १५ मिनीटे झाकून ठेवणे.
७) सारणाचे २३ ते २५ सारख्या आकाराचे गोळे करून घ्यावे.
८) आवरणासाठी आपल्याला "१ सारण गोळ्याला २ पिठाचे गोळे" हवे आहेत त्यानुसार सारणाच्या गोळ्यापेक्षा जरा लहान असा पिठाचा गोळा करावा.
९) २ पिठाच्या लाटयांमध्ये १ सारणाचा गोळा भरून लाटीच्या कडा सिल करून बंद करावा. हाताने हलके प्रेस करून थोड्या कोरड्या पिठावर पोळी लाटावी. गुळाची पोळी एका बाजूनेच लाटावी, बाजू पलटू नये.
१०) मिडीयम हाय हिटवर तवा तापवून दोन्ही बाजू खरपूस भाजून घ्याव्यात. कागदावर काढून किंचीत गार होवू द्याव्यात. एकदम गरम खावू नये, सारणातील गूळ गरम असल्याने चटका बसू शकतो.
गुळपोळी गार किंवा कोमट दोन्हीप्रकारे छान लागते. गुळपोळीवर नेहमी थोडे तूप घालून खावे म्हणजे उष्ण पडत नाही.

टीप्स:
१) पिठांचे प्रमाण आवडीनुसार बदलू शकतो. जर तुम्हाला खुडखुडीत पोळी हवी असेल तर मैदा जास्त आणि कणिककमी वापरावी तसेच गरम तेलाचे मोहनही घालावे. जर थोडी नरम पोळी हवी असेल तर फक्त गव्हाचे पिठ वापरावे आणि थंड तेलाचेच मोहन घालावे.

Gulpoli

Gulpoli in Marathi

Time: around 2 hours
Yield: approx 25 gulpoli

Ingredients:
Stuffing
1/2 kg Jaggery
1 cup Besan flour (Chickpea flour/ Gram flour)
1/2 cup Oil
2 halves of dry coconut
3/4 cup sesame seeds
1/2 cup poppy seeds
1/2 cup peanuts
Cover
1 and 1/2 cup maida
3/4 cup wheat flour
2 tbsp oil
Pinch of salt
2 tbsp besan (Optional)

Method:
1) Grate the dry coconut. Dry roast till golden brown. Gently crush with hands. We need around 1/2 to 3/4 cup of crushed coconut. If it is less, then grate some more coconut. Roast and crush it.
2) Dry roast sesame seeds, poppy seeds separately, till golden brown. Grind to a fine powder.
3) Dry roast peanuts. Remove the peels and grind the peanuts to a fine powder.
4) Heat a pan. Add 1/2 cup oil. Add 1 cup besan flour and roast till, you sense nice aroma and color changes til golden.
5) Grate the jaggery to a fine powder. Add all the roasted items to the grated jaggery. Knead to a semi-stiff dough.
6) Mix maida, wheat flour, salt and besan. Heat 2 tbsp oil to the smoke point. Add it to the flour mixture. Make a medium consistency dough by adding water. Use little oil if required. Let the dough rest for 15 minutes.
7) Divide the stuffing into 23 to 25 equal balls.
8) For the cover, we will need two equal dough balls for 1 stuffing ball. Therefore, the 2 dough balls should be slightly smaller than stuffing ball.
9) Sandwich the stuffing ball between two dough balls. Seal the edges. Use dry flour and roll it to a thin roti. While rolling, do not flip the sides.
10) Roast over medium-high heated tawa. Roast both the sides. Put it on a paper towel. Stack them into Chapati Container after cools off.
Gulpoli can be served warm or cold. It tastes delicious either way. Do not forget to put a dollop of desi ghee.
Gulpoli stays fresh for 8 to 10 days at room temp. Hence, you can stack some extra gulpoli and enjoy them for few more days.

Tips:
1) The proportion of the flours can be changed according to your preference. If you want firm and little crispy gulpoli, then use only maida and add hot oil. If you want soft gulpoli, then use wheat flour and do not use hot oil, use room temp. oil.

Thursday, 23 December 2010

Paneer Biryani

Paneer Biryani in Marathi

Time: 60 to 90 minutes
Serves: 5 to 6 persons

biryani, vegetable biryani, paneer biryani, hyderabadi biryani recipe, Indian biryani recipe, dum biryani recipeIngredients:
2 cups Basmati Rice
3-4 Cardamom pods, 3-4 Bay leaves, 3-4 Cloves, 1 small Cinnamon stick
Salt to taste
Paneer Marination
250 gram Paneer
1/2 cup Yogurt
1 tsp Ginger-garlic paste
1/4 tsp Salt
Gravy
1 cup Onion, thinly sliced
5 medium Tomatoes
2 tsp Ginger-garilc paste
2 tsp Ghee
Whole Garam Masala - 2 cardamom pods, , 3-4 Bay leaves, 3-4 Cloves
1 tsp coriander powder, 1 tsp cumin powder, 1 tsp garam masala, 1/2 tsp red chili powder
1 cup milk powder (or 1/2 cup cream) (Tip 5)
salt to taste
Approx. 3/4 to 1 cup cut vegetables (I used peas, carrot, french beans)
Other Ingredients
4 tbsp Ghee + some more ghee [its optional :) ]
1 cup thin slices of Onion, 8 to 10 Cashew nuts, 8 tp 10 Raisins
1/4 cup Mint leaves finely chopped, 1/4 cup Cilantro finely chopped
2 tsp Milk + 4 strands of Saffron (Tip 6)

Method:
Paneer
Beat the yogurt. Add ginger-garlic paste and salt. Mix well. Marinate paneer pieces in this yogurt for 30 minutes
Rice
1) Wash rice and drain the water. Let it sit for 30 minutes. Then boil 6 cups of water in a deep pot. Add cardamom, cinnamon, bay leaves and salt. Wait till the water comes to a rolling boil.
Gravy
1) Blanch the tomatoes. Peel the tomatoes. Chop the tomatoes coarsely.
2) Heat 2 tsp Ghee into a pan. Add whole garam masala and saute for few seconds. Add ginger garlic paste and onion. Saute onion until golden brown. Now add chopped tomatoes and saute until tomato becomes mushy. Add red chili powder.
3) Let the mixture cools off. Puree into a blender (Don't add water)
4) Heat 2 tbsp Ghee. Fry cashews and raisins. Remove them with slotted spoon. Add the prepared puree in the ghee. Simmer over medium heat. Add cumin powder, coriander powder, garam masala powder and milk powder. Also add vegetables. Mix well and cook for few minutes until gravy become thick. Add salt to taste. The consistency of the gravy should not be too runny or too thick (Tip 1). Once the gravy is thick enough, add marinated paneer. Cook for few minutes.
Fried Onion
Deep fry 1 cup onion slices into ghee or oil until crispy. This fried onion is for decoration.
Biryani (Tips 2,3,4)
Once Rice and gravy is ready, divide rice into 4 equal portions and gravy into 3 equal portions. In a deep nonstick pan, spread 1 tbsp melted ghee at the bottom. Then layer 1 portion of rice. Spread 1 portion of gravy. Sprinkle mint leaves, cilantro, 3-4 cashews and raisins. Complete all the layers accordingly. Sprinkle remaining cashews, fried onion, raisins and milk + saffron on the top layer of the rice
Cover the pan with a tight lid. Cook the Biryani for 15 to 20 minutes over low heat.
Serve the biryani with Raita.

Tips:

1) Consistency of the gravy should not be runny. Thin gravy makes the biryani mushy.
2) The last part of steaming can be done in the oven. Preheat the oven at 250 F. Then make the layers in a baking pan. Cover tightly with a oven proof lid or aliminum foil. Bake for 15 to 20 minutes.
3) If you dont have nonstick pan, use a heavy bottom pan. Do not put this pan directly on the flame. Place a tawa on the flame and put the pan on the tawa. it will avoid burning.
4) Ghee can be added in each layer according to your preference.
5) Try to use milk powder. It quickly gives thickness to the gravy. If using cream, stir nicely until it blends well in the gravy.
6) Saffron can be replaced by edible saffron color.

पनीर बिर्याणी - Paneer Biryani

Paneer Biryani In English

वाढणी : ५ ते ६ जणांसाठी
वेळ: साधारण १ ते दिड तास

biryani, vegetable biryani, paneer biryani, hyderabadi biryani recipe, Indian biryani recipe, dum biryani recipe
साहित्य:
२ कप बासमती तांदूळ
३-४ वेलची, ३-४ तमालपत्र, ३-४ लवंगा, १ लहान दालचिनीची काडी
चवीपुरते मिठ
पनीर मॅरीनेशन
२५० ग्राम पनीर, १/२ कप दही, १ टिस्पून आलेलसूण पेस्ट, १/४ टिस्पून मिठ
ग्रेव्ही
१ कप कांदा, उभा पातळ चिरून
५ टोमॅटो, २ टिस्पून आलेलसूण पेस्ट, २ टिस्पून तूप
खडा गरम मसाला - २ वेलची, ३-४ लवंगा, ३-४ मिरीदाणे, २-३ तमालपत्र
१ टिस्पून धणेपूड, १ टिस्पून जिरेपूड, १ टिस्पून गरम मसाला, १/२ टिस्पून लाल तिखट
१ कप मिल्क पावडर (किंवा १/२ कप क्रिम) (टीप ५)
चवीपुरते मिठ
साधारण पाऊण ते एक कप भाज्यांचे तुकडे :- मटार + गाजर लहान तुकडे + फरसबी तुकडे
इतर साहित्य
४ टेस्पून तूप + अजून तूप ऐच्छिक, १ कप कांद्याचे पातळ उभे काप, ८ ते १० काजूबी, ८ ते १० बेदाणे, १/४ कप पुदीना बारीक चिरून, १/४ कप कोथिंबीर बारीक चिरून, २ टिस्पून दूध + ३ ते ४ केशराच्या काड्या (टीप ६)

कृती:
पनीर
दही फेटून घ्यावे. त्यात आलेलसूण पेस्ट आणि मिठ घालून मिक्स करावे. पनीरचे तुकडे या मिश्रणात १/२ तास घोळवून ठेवावे.
भात
१) तांदूळ स्वच्छ धुवून १/२ तास निथळत ठेवावेत. पातेल्यात ६ कप पाणी गरम करण्यास ठेवावे. त्यात वेलची, लवंगा, दालचिनी, तमालपत्र आणि मिठ घालून पाण्याला उकळी येऊ द्यावी. पाणी उकळले कि त्यात धुतलेले तांदूळ घालावे. भात साधारण ६० ते ७० % शिजला कि चाळणीमध्ये ओतावा आणि अधिकचे पाणी काढून टाकावे. तयार भात परातीत मोकळा करून गार होण्यास ठेवावा.
ग्रेव्ही
१) पाणी उकळवावे. त्यात टोमॅटो घालून २ मिनीटांनी गार पाण्यात सोडावे. सालं सुटली कि काढून टाकावी. आतील गराच्या मध्यम फोडी कराव्यात.
२) कढईत २ टिस्पून तूप गरम करून त्यात खडा गरम मसाला काही सेकंद परतावा. आलेलसूण पेस्ट परतावी. कांदा घालून तो गुलाबी रंग येईस्तोवर परतावा. नंतर चिरलेल्या टोमॅटोच्या फोडी घालून त्या नरम होईस्तोवर परतावे. लाल तिखट घालावे.
३) हे मिश्रण थोडे गार होवू द्यावे. मिक्सरमध्ये पाणी न घालता प्युरी करावी.
४) कढईत साधारण २ टेस्पून तूप गरम करावे. यामध्ये काजूबी आणि बेदाणे परतून बाजूला काढून ठेवावे. याच तुपात हि प्युरी परत कढईत घ्यावी. मध्यम आचेवर गरम करण्यास ठेवावी. त्यात धणेजिरेपूड, गरम मसाला घालावा. मिल्क पावडर घालावी. भाज्या घालाव्यात. निट ढवळून हे मिश्रण घट्टसर करावे. चवीपुरते मिठ घालावे. हि ग्रेव्ही एकदम पातळ किंवा एकदम घट्टही नसावी (टीप १). ग्रेव्ही दाटसर होत आली कि पनीरचे मॅरीनेट केलेले तुकडे घालून थोडा वेळ उकळी काढावी.
तळलेला कांदा
तुपात किंवा तेलात कांद्याचे पातळ काप (१ कप) खरपूस तळून काढावेत. हा तळलेला कांदा सजावटीसाठी वापरावा.
बिर्याणी (टीप २, ३, ४)
एकदा भात आणि ग्रेव्ही तयार झाली कि भाताचे ४ आणि ग्रेव्हीचे ३ असे समसमान भाग करून घ्यावे. एका खोलगट नॉनस्टिक पॅनमध्ये पहिले तूप सोडावे आणि पसरवून घ्यावे. प्रथम भाताचा एक भाग घेऊन समान पसरावा. त्यावर ग्रेव्हीचा १ भाग समान पसरवून घ्यावा. थोडा चिरलेला पुदीना आणि कोथिंबीर घालावी. ३-४ काजू, बेदाणे घालावे. अशाप्रकारे सर्व थर पूर्ण करावे. भाताचा शेवटचा थर दिला कि त्यावर तळलेला कांदा, उरलेले काजू बेदाणे आणि दूधात कालवलेले केशर असे पसरावे. वरती घट्ट झाकण ठेवावे, वाफ बाहेर जाता कामा नये. एकदम मंद आचेवर १५ ते २० मिनीटे वाफ काढावी. गरम गरम बिर्याणी रायत्याबरोबर सर्व्ह करावी.

टीप:
१) ग्रेव्ही पातळ नसावी. पातळ ग्रेव्हीमुळे बिर्याणी बनवताना भाताची शिते मोडतात आणि भात मोकळा न होता ओलसट आणि गच्च होतो. बिर्याणीचे थर करताना पसरता येईल इतपत दाट ठेवावी.
२) जर ओव्हनमध्ये बिर्याणीला वाफ काढायची असेल ओव्हन २५० डीग्री F वर प्रिहीट करावा. नंतर बेकिंग पॅनमध्ये वरीलप्रमाणेच थर करावे. वरती ओव्हनसेफ झाकण ठेवावे किंवा अल्युमिनीयम फॉईलने घट्ट सिल करावे आणि १५-२० मिनीटे वाफ काढावी.
३) जर नॉनस्टिक पॅन नसेल तर जाड बुडाच्या पातेल्यात तूप घालून वरीलप्रमाणेच थर करावे. आणि डायरेक्ट गॅसवर न ठेवता खाली एक तवा ठेवावा त्यावर भांडे ठेवावे म्हणजे भात करपणार नाही.
४) प्रत्येक थरामध्ये पातळ केलेले तूप गरजेनुसार घालावे. यामुळे बिर्याणीला खुपच छान चव येते.
५) शक्यतो मिल्क पावडर वापरावी म्हणजे ग्रेव्हीला दाटपणा लगेच येतो. तसेच क्रिम वापरणार असाल तर क्रिम घातल्यावर ते ग्रेव्हीमध्ये निट मिक्स होईस्तोवर ढवळा म्हणजे ते ग्रेव्हीत फुटणार नाही.
६) जर केशर नसेल तर चिमूटभर खायचा केशरी रंग २ टिस्पून दूधात घालून तो वापरावा.

Tuesday, 21 December 2010

Capsicum Potato Curry

Capsicum Potato Curry in Marathi

Time: 30 minutes
Serves: 3 to 4 persons

bhopli mirchi, dhobli mirchi recipe, capsicum sabzi, bell pepper bhaji, Indian vegetables, capsicum curry, bhopli mirchi chi bhajiIngredients:
2 cups Bell Pepper, big chunks (simla mirchi)
1 cup potato cubes, medium
For tempering: 1 tbsp oil, 2 pinches mustard seeds, 2 pinches hing, 1/4 tsp turmeric powder, 1/2 tsp red chili powder
1/2 tsp Goda Masala
2 tbsp coarsely crushed peanuts, roasted
1 tbsp fresh coconut
1 tbsp tamarind pulp
1 tbsp jaggery or to taste
Salt to taste

Method:
1) Heat oil in a wok. Add mustard seeds, hing, turmeric powder and red chili powder. Add potato cubes. Cover and cook for a minute or two over medium heat.
2) Add bell pepper, saute for a minute. Add 3/4 cup water, Goda Masala, tamarind pulp and salt. Cook until potato are nicely done. Add little water if needed. There should be little bit crunch to bell pepper.
3) Once potatoes are cooked, add jaggery, fresh coconut and peanuts powder. Mix nicely. Serve hot with Chapati.

सिमला मिरची रस भाजी - Simla Mirchi batata Ras Bhaji

Simla Mirchi Rassa in English

वेळ: ३० मिनीटे
वाढणी: ३ जणांसाठी

bhopli mirchi, dhobli mirchi recipe, capsicum sabzi, bell pepper bhaji, Indian vegetables, capsicum curry, bhopli mirchi chi bhaji


साहित्य:
२ कप भोपळी मिरचीचे मोठे तुकडे
१ कप बटाट्याचे मध्यम तुकडे
फोडणीसाठी: १ टेस्पून तेल, २ चिमटी मोहोरी, २ चिमटी हिंग, १/४ टिस्पून हळद, १/२ टिस्पून लाल तिखट
१/२ टिस्पून गोडा मसाला
२ टेस्पून शेंगदाणा कूट
१ टेस्पून ताजा नारळ
१ टेस्पून चिंचेचा कोळ
१ टेस्पून गूळ किंवा चवीनुसार
चवीपुरते मिठ

कृती:
१) कढईत तेल गरम करावे. त्यात मोहोरी, हिंग, हळद, लाल तिखट घालून फोडणी करावी. आधी बटाटे घालून मिक्स करावे. साधारण एक ते दोन मिनीट वाफ काढावी.
२) आता भोपळी मिरची घालून मिक्स करावे. अंदाजे ३/४ कप पाणी, गोडा मसाला, चिंचेचा कोळ आणि मिठ घालून मिक्स करावे. बटाटे शिजेस्तोवर शिजवावे. गरज वाटल्यास थोडे पाणी घालावे. भोपळी मिरची एकदम मऊ होईस्तोवर शिजवू नये. अगदी किंचीत कच्ची राहू द्यावी.
३) बटाटा शिजला कि भाजीत गूळ, नारळ आणि शेंगदाणा कूट घालावा. छान ढवळावे आणि गरम गरम पोळीबरोबर सर्व्ह करावे.

Thursday, 16 December 2010

Sweet Lime pickle

Sweet Lime Pickle in Marathi

lemon pickle, sweet lemon pickleIngredients
12 juicy lemons (Tip 1)
1 kg Sugar (approx 4 to 4.5 cups)
3/4 cup salt
3/4 cup red chili powder
2 tsp cumin powder

Method:
1) Wash lemons thoroughly. Pat dry with a kitchen towel. There should not be any trace of water. Then cut each lemon and remove seeds. Make around 8 to 10 pieces of each lemon.
2) Put lemon pieces into a clean bowl. Add salt, red chili powder and cumin powder. Mix well. Then transfer the mixture to a clean and dry glass jar. Close with an airtight lid for 8 days.
Method 1
After 8 days, prepare a one string consistency sugar syrup (1 kg sugar + 1 cup water). Let the sugar syrup cool down. add pickled lemon pieces to the syrup. Mix well and again transfer this mixture to glass jar. Spread half a cup sugar at the top and close the jar with lid. It will take around 4 to 5 months to marinate. During this period lemon pieces will get soaked nicely in sugar syrup and salt. Also, the bitter taste of lemon skin will go away.
Method 2
If you are not comfortable with making sugar syrup, you can use sugar directly.
After 8 days, mix sugar and the pickle into a separate bowl. Then transfer it to the glass jar and close with a tight lid. Everyday, open jar and stir the pickle from the bottom. Use clean and dry spoon. Do it till sugar dissolves completely. Let the pickle mature for 4 to 5 months.

Tips:
1) Use lemons with thin skin. In India, it is very easy to find juicy lemons.
If you are in US, use limes (green color), as lemons (yellow one) have thick skin. Limes have thin yet hard skin. Therefore Boil around 2-3 liter water and turn off the heat. Put the whole limes in boiled water and cover. After an hour or so, remove limes from water. Pat dry thoroughly, so that there wont be any water. Then make pickle as per the above method.

लिंबाचे गोड लोणचे - Sweet Lime Pickle

Lemon Pickle in English

lemon pickle, sweet lemon pickle
साहित्य:
१२ लिंबं (टीप १)
१ किलो साखर (४ मोठ्या वाट्या वरपर्यंत भरून)
१ वाटी मिठ
३/४ वाटी लाल तिखट
२ टिस्पून जिरेपूड

कृती:
१) लिंबं धुवून घ्यावीत. व्यवस्थित पुसून घ्यावी, पाणी राहू देवू नये. मध्यम आकाराच्या फोडी करून त्यातील बिया काढून टाकाव्यात. एका लिंबाच्या साधारण ८ ते १० फोडी कराव्यात.
२) फोडींना मिठ, तिखट, जिरेपूड लावून साधारण ८ दिवस स्वच्छ काचेच्या कोरड्या बरणीत भरून ठेवावे.
पद्धत १
साखरेचा १ तारी पाक करावा (१ किलो साखरेला दिड वाटी पाणी). पाक गार करावा. त्या पातेल्यात ८ दिवस मुरवलेल्या लिंबाच्या फोडी घालव्यात. ढवळून बरणीत भरावे.
सर्व लोणचे बरणीत भरले कि बरणीच्या तोंडाशी १ मुठभर साखर घालून झाकण बंद करावे. लोणचे चांगले मुरायला ४-५ महिने लागतात.

पद्धत २
जर पाक करायचा नसेल तर नुसती साखर, ८ दिवस मुरवलेल्या लिंबाच्या फोडीत मिक्स करावी. बरणीत भरून ठेवावे. रोजच्या रोज बरणी उघडून, स्वच्छ व कोरड्या चमच्याने लोणचे ढवळावे. असे साखर पूर्ण विरघळेस्तोवर करावे.

टीप:
१) लिंबं पातळ सालीची घ्यावी. जर अमेरीकेत असाल तर पातळ सालीची लिंबं मिळत नाहीत. अशावेळी पाणी एकदम चांगले उकळवावे. गॅस बंद करून त्यात आख्खी लिंबं घालावीत आणि वर झाकण ठेवावे. पाणी गार झाले कि लिंबं व्यवस्थित पुसून घ्यावी आणि एकदोन तास वार्‍यावर ठेवावी म्हणजे पाणी पूर्ण निघून जाईल. मग वरच्या कृतीनेच लोणचे करावे.

Tuesday, 14 December 2010

Soyabean Wheat flour Nankatai

Nankatai in Marathi

Yield: 20 to 22 small pieces
Time: 35 to 40 minutes

nanakatai, sugar cookies, shortbreadIngredients
8 tbsp Butter (1 stick OR 1/2 cup)
6 tbsp Powdered Sugar
1/2 cup Soyabean flour
1/2 cup wheat flour
1/4 tsp Baking powder
1/4 tsp Cardamom Powder
2 tbsp chopped Pistachio
Method:
1) Add butter and sugar a medium bowl. Butter should be very soft. Then beat until mixture becomes light. It will take about 3-4 minutes.
2) Preheat the Oven at 350 F.
3) Grease a Cookie pan / baking sheet with little butter.
4) Mix soy flour, wheat flour, cardamom powder and baking powder. sift the flour. Add it to the beaten butter and sugar mixture. Mix with the clean hand. It will turn into a nice dough. (You may need a spoonful flour)
5) Divide the dough into 23 to 25 small balls. Surface should be smooth. Place the dough balls on baking sheet. Nankatai balls should be about 2 inches apart. Gently press pistachio chopped over each nankatai dough balls. 12 to 14 balls will occupy one tray. So you will need 2 treys . Otherwise, bake in 2 batches.
6) Place the trey on the middle rack of the oven. Bake for 12 to 14 minutes. After baking, remove the trey from the oven and let the nankatai cool down for 10 minutes.
Nankatai is ready to eat now !

Tips:
1) Use unsalted butter. You can use homemade butter (Makkhan) instead of readymade butter.
2) Addition of almond, pistachio, cashew-nuts pieces inside the dough makes the nankatai more delectable.
3) The dough should not be too soft and greasy. If so, add little bit flour. If the dough is soft and buttery, Nankatai becomes flat after baking.

सोया व्हिट नानकटाई - Soya Wheat Nankatai

Nankatai in English

वेळ: ३० ते ४० मिनीटे
नग: २० ते २२ मध्यम नानकटाई

nanakatai, homemade nankatai, nankatai recipe, shortbread recipe, eggless biscuits, eggless cookies
साहित्य:
८ टेस्पून अनसॉल्टेड बटर (१/२ कप)
६ टेस्पून पिठी साखर
१/२ कप गव्हाचे पिठ
१/२ कप सोयाबिन पिठ
१/४ टिस्पून बेकिंग पावडर
१/४ टिस्पून वेलची पावडर
२ टेस्पून पिस्त्याचे काप

कृती:
१) नानकटाई बनवण्यापूर्वी बटर २ तास फ्रिजबाहेर काढून ठेवावे म्हणजे एकदम मऊसर होईल. एका मध्यम आकाराच्या खोलगट ताटलीत बटर आणि साखर घ्यावी. आणि मिश्रण हलके होईस्तोवर जोरजोरात फेसावे.
२) ३५० डीग्री F (१७५ डीग्री सेल्सियस) वर ओव्हन प्रिहीट करावे.
३) बेकिंग ट्रे ला तूपाचा किंवा बटरचा हात लावून तयार ठेवावा. वरील प्रमाणासाठी साधारण २ ट्रे लागतील. एकच ट्रे असल्यास दोन विभागात नानकटाई बनवावी.
४) सोयाबिन पिठ, गव्हाचे पिठ, वेलची पावडर आणि बेकिंग पावडर एकत्र चाळून घ्यावी. चाळणीत जर पिठाचे गोळे अडकले असतील तर ते फोडून घ्यावेत. चाळलेले पिठ, बटर-साखरेच्या मिश्रणात घालावे आणि हाताने मळावे. व्यवस्थित गोळा तयार करावा. (कदाचित एखादा चमचा पिठ वाढवावे लागेल)
५) तयार गोळ्याचे साधारण २० ते २२ समान भाग करावे (१ इंच). प्रत्येक गोळा एकमेकापासून २ इंचाच्या अंतरावर ठेवावा. एका ट्रेमध्ये साधारण १२ ते १४ गोळे बसतील. प्रत्येक गोळ्यावर पेढ्याला लावतो तसे पिस्त्याचे काप लावून चेपावे.
६) ओव्हनच्या मधल्या रॅकमध्ये ट्रे ठेवावा व साधारण १२ ते १४ मिनीटे बेक करावे. बेक केल्यावर ट्रे बाहेर काढावा आणि गार होवू द्यावा. १५ मिनीटांनी खुसखूशीत अशा नानकटाई खाण्यासाठी तयार होतील.

टीपा:
१) मिठ नसलेले बटर वापरावे. बटर नसल्यास मऊसूत घरगूती लोणी वापरले तरी चालेल.
२) नानकटाईच्या मिश्रणात बदाम, काजू, पिस्त्याचे पातळ काप मिक्स केले तरीही छान चव येते.
३) नानकटाईसाठी मळलेला गोळा एकदम तुपकट नसावा. जर बटर जास्त वाटत असेल तर चमचाभर पिठ घालावे. कारण खुप तूपकट गोळा बेक केला तर नानकटाई एकदम बसक्या होतात. कणकेला मळतो इतपत गोळा घट्ट असला पाहिजे.

Thursday, 9 December 2010

पनीर फिंगर पकोडा - Paneer Finger Pakoda

Paneer Pakoda in English

वेळ: १५ ते २० मिनीटे
नग: १० ते १२ पिसेस

paneer pakoda paneer pakora, how to make paneer, Indian recipes, Vegetarian recipe, healthy recipes, Diet recipesसाहित्य:
२०० ग्राम पनीर, बोटाच्या आकाराचे उभे काप
१ टेस्पून कॉर्न फ्लोअर
१ टेस्पून मैदा
चवीपुरते मिठ
१ टिस्पून लाल तिखट
::::मॅरीनेशनसाठी::::
२ टिस्पून चिली सॉस
२ टिस्पून सोयासॉस
तळण्यासाठी तेल

लहान मुलांसाठी बनवताना लाल तिखट अजिबात घालू नये तसेच मॅरीनेशनमध्ये चिली सॉस अगदी कमी घालावा किंवा तो न घालता टोमॅटो केचप घालावा.

कृती:
१) चिली सॉस आणि सोयासॉस एका मध्यम बाऊलमध्ये मिक्स करावे. पनीरचे तुकडे या मिश्रणात ५ मिनीटे मॅरीनेट करून ठेवावे.
२) दुसर्‍या एका भांड्यात कॉर्न फ्लोअर, मैदा, मीठ आणि लाल तिखट मिक्स करावे. पनीरचे मॅरीनेट केलेले तुकडे कॉर्न फ्लोअर-मैद्याच्या मिश्रणात घोळवून घ्यावे. आणि तेल गरम करून त्यात सोनेरी रंगावर तळून घ्यावे.
चिली सॉसबरोबर गरमागरम सर्व्ह करावेत.

Labels:
Paneer Pakoda, Paneer Appetizer

Paneer Finger Pakora

Paneer Pakoda in Marathi

Time: 15 to 20 minutes
Yield: 10 to 12 pieces

paneer pakoda paneer pakora, how to make paneer, Indian recipes, Vegetarian recipe, healthy recipes, Diet recipesIngredients:
200 Gram paneer, cut into finger sized slices
1 tbsp corn flour
1 tbsp Maida
Salt to taste
1 tsp Red chili powder
Marination
2 tsp green chili sauce
2 tsp soy sauce
Oil for deep frying

Method:
1) Mix chili sauce and soy sauce into a medium bowl. Marinate paneer slices with this mixture for 5 minutes
2) Mix corn flour, maida, salt and red chili powder into a bowl. Dust marinated paneer with this mixture and deep fry in hot oil until golden brown.
Serve with Chili sauce as an appetizer.

Wednesday, 8 December 2010

Request a Recipe - 4

नवीन 'Request a Recipe' पेजवर तुमचे स्वागत! जुन्या पोस्टवर २०० च्या वर कमेंट्स झाल्याने हे नवीन पान पोस्ट करत आहे. तेव्हा नवीन रेसिपी रीक्वेस्ट या पानावर करा.

हि रेसिपी येउ द्या! - Request Recipe
तुमची फर्माइश. ब्लॉग बघून तुम्हाला एखाद्या झकास पदार्थाची आठवण झाली आणि तो ब्लॉग वर नसला तर मला नक्की सुचवा. मी जसे साहित्य आणि वेळ मिळेल तसे प्रयत्न करून रेसिपी पोस्ट करेन. बर्‍याचवेळा काही नविन पदार्थ आपल्या खाण्यात येतो, पण त्याची रेसिपी मराठीत इंटरनेटवर नसते. तुमच्या प्रतिसादांमुळे आणि फर्माइशींमुळे छान छान रेसिपी मराठीत इंटरनेटवर यायला मदत होईल.

Tuesday, 7 December 2010

Plantain Cutlets

Plantain cutlets in Marathi

Time: Prep Time- 20 minutes (Excludes soaking time for sago) | Cooking Time: 20 minutes
Yield: 12 to 14 medium cutlets

cutlet, fasting recipes, Indian snacks, vegetarian snacks, sabudana khichdi, sabudana vadaIngredients:
2 green plantain/raw bananas
1 medium potato boiled and mashed
1/4 cup sago
2 tbsp flour used for fasting
3 Tbsp peanuts roasted and crushed
Crush together - 3 green chilies + ½ tsp cumin seeds +¼ cup coriander leaves chopped finely
1 tbsp lemon juice
Salt to taste
Ghee or Peanuts Oil for deep frying

Method:
1) Wash sago pearls with water. Drain all the water and keep it covered for 4 hours.
2) Once sago is nice and plump, peel and grate the plantain. Mix them both. Now add mashed potato, fasting flour, peanuts powder, chili mixture, lemon juice and salt to taste. Make a stiff dough. Divide the dough into equal sized dumplings and shape them according to your preference.
3) Heat oil or ghee for deep frying. Deep fry cutlets over medium heat till color turns to golden brown.
Serve hot with Sweet lemon pickle or green chutney.

कच्च्या केळ्याचे कटलेट - Plantain Cutlets

Plantain Cutlets in English

वेळ: पूर्वतयारी- २० मिनीटे (साबुदाणा भिजवणे सोडून)। पाकृसाठी वेळ: २० मिनीटे
नग: साधारण १२ ते १४ मध्यम कटलेट

cutlet, fasting recipes, Indian snacks, vegetarian snacks, sabudana khichdi, sabudana vada
साहित्य:
२ कच्ची केळी
१ मध्यम बटाटा, उकडलेला
१/४ कप साबुदाणा
२ टेस्पून उपासाची भाजणी
३ टेस्पून शेंगदाण्याचा कूट
३ हिरव्या मिरच्या + १/२ टिस्पून जिरे + १/४ कप कोथिंबीर यांची पेस्ट
१ टेस्पून लिंबाचा रस
चवीपुरते मिठ
तूप किंवा शेंगदाणा तेल, तळण्यासाठी

कृती:
१) साबुदाणा धुवून त्यातील पाणी काढून टाकावे. झाकण ठेवून ४ तास झाकून ठेवावा.
२) साबुदाणा निट भिजला कि केळे सोलून किसून घ्यावे. नंतर साबुदाणा, किसलेले केळे, उकडून कुस्करलेला बटाटा, उपासाची भाजणी, शेंगदाणा कूट, मिरचीपेस्ट, लिंबू रस, आणि मिठ एकत्र करावे. निट मळून गोळा तयार करावा. हा गोळा समान विभागून मध्यम आकाराचे कटलेट बनवावे. आवडीप्रमाणे आकार द्यावा.
३) तेल किंवा तूप गरम करावे. तयार कटलेट मध्यम आचेवर तळून घ्यावे.
गोड लिंबाच्या लोणच्याबरोबर किंवा हिरव्या चटणीबरोबर सर्व्ह करावे.

Friday, 3 December 2010

तोंडली डाळ मेथ्या - Tondli Ras bhaji

Tondli Dal Methya in English

वेळ: पूर्वतयारी-१० मिनीटे। पाकृसाठी-१५ मिनीटे
वाढणी: २ ते ३ जणांसाठी

tondli dalimbya, tondali bhaji, tondalyachi bhaji, Indian vegetable, Indian curry recipe
साहित्य:
१/२ पौंड तोंडली (जवळपास पाव किलो)
१/४ कप तूर डाळ
१/२ टिस्पून मेथी दाणे
३ ते ४ लसणीच्या मोठ्या पाकळ्या, बारीक चिरून
फोडणीसाठी: १ टिस्पून तेल, २ चिमटी मोहोरी, १/८ टिस्पून हळद, १/२ टिस्पून लाल तिखट
१/२ टिस्पून गोडा मसाला
१ टिस्पून गूळ
१/२ टिस्पून चिंचेचा घट्ट कोळ किंवा २ कोकमाचे तुकडे
चवीनुसार मिठ
सजावटीसाठी चिरलेली कोथिंबीर

कृती:
१) तोंडली उभी चिरून मिठाच्या पाण्यात घालावी.
२) तूरडाळ धुवून १० मिनीटे पाण्यात भिजवून ठेवावी.
३) लहान कूकरमध्ये तेल गरम करावे. त्यात लसूण आणि मेथी दाणे फोडणीस घालावे. लसूण थोडी ब्राऊन होवू द्यावी. नंतर मोहोरी, हळद आणि लाल तिखट घालून फोडणी करावी. तोंडल्यातील पाणी निथळून फोडणीस घालावी. एकदा परतून तूरडाळ घालावी व मिक्स करावे.
४) यामध्ये गूळ, गोडा मसाला, मिठ, आणि कोकम घालावे. थोडे पाणीसुद्धा घालावे (साधारण १/२ कप). मिक्स करून कूकरचे झाकण बंद करावे.
५) ३ शिट्ट्या करून गॅस बंद करावा. वाफ जिरू द्यावी. कूकर उघडून रश्श्याची चव पाहावी आणि तिखट-मिठ-मसाला लागेल तसे अडजस्ट करावे.
कोथिंबीरीने सजवून गरमच पोळीबरोबर सर्व्ह करावे.

टीप:
१) पदार्थ शिजायला काही कूकरला जास्त शिट्ट्या लागतात तर काहींना कमी. ३ शिट्ट्यांमध्ये तोंडली शिजतीलच. आपल्याला डाळ शिजलेली हवी पण ती आख्खी राहिली पाहिजे, तीचे वरण होता कामा नये. म्हणून आपापल्या कूकरप्रमाणे किती शिट्ट्या कराव्या ते ठरवावे.

Wednesday, 1 December 2010

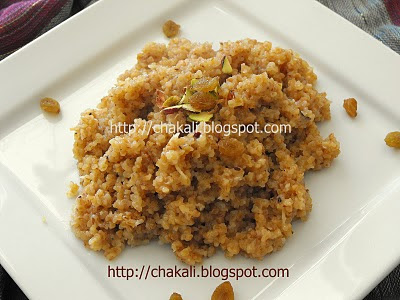
लापशी रवा शिरा - Cracked wheat sheera

Daliya Sheera in English

वेळ: ३० मिनीटे
वाढणी: ३ ते ४ जणांसाठी

हा शिरा बाळंतिणीसाठी करतात. दलिया हा गव्हाचा जाड रवा ज्यामध्ये गव्हाचा कोंडा विलग केलेला नसतो. त्यामुळे भरपूर फायबर यामध्ये असते. साखरेऐवजी गूळाचा वापर केला जातो.

lapashi rava, lapsi rava, cracked wheat, dalia shira, daliya sheera, healthy breakfast recipes, healthy recipes for breastfeeding moms, balantinicha ahar
साहित्य:
१ कप दलिया किंवा लापशी रवा (Cracked Wheat)
३/४ कप किसलेला गूळ
२ टेस्पून तूप
१/२ कप ताजा खोवलेला नारळ
३ कप पाणी
१/४ कप गरम दूध
१/४ टिस्पून वेलची पूड
चिमूटभर मिठ
३ टेस्पून काजू, बदाम, पिस्ता यांचे पातळ काप
१ टेस्पून बेदाणे
कृती:
१) २ टेस्पून तूप कढईत गरम करावे. त्यात लापशी रव खमंग भाजून घ्यावा. काजू, बदाम, पिस्त्याचे काप घालावे.
२) रवा भाजताना दुसर्‍या गॅसवर ३ कप पाणी गरम करावे. त्यात चिमूटभर मिठ घालावे.
३) रवा चांगला भाजला गेला कि त्यात गरम पाणी आणि दूध घालावे. निट मिक्स करावे. झाकण ठेवून मध्यम आचेवर २ वाफा काढाव्यात. ताजा नारळ घालून मिक्स करावे.
४) रवा शिजल्यावर किसलेला गूळ घालून ढवळावे. गूळ वितळला कि बेदाणे घालावे.
५) झाकण लावून मध्यम आचेवर वाफ काढावी. वेलचीपूड घालून मिक्स करावे.
गरम गरम सर्व्ह करावा.

टीप:
१) रवा व्यवस्थित भाजला गेला पाहिजे, नाहीतर शिरा निट बनत नाही.
२) पाणी घातल्यावर रवा चांगला शिजू द्यावा, गूळ घालायची घाई करू नये. नाहीतर रवा जरा कचवट राहण्याची शक्यता असते.
३) अजून गोड हवे असेल तर पाव कप गूळ अजून घालावा.
४) बाळंतिणीला शिरा वाढताना वरून थोडे तूप आणि ताजा नारळ घालून द्यावा. त्यामुळे चव छान लागते.